


A music streamer is the digital source in a modern hi-fi system.
It receives music from online services, a phone, a computer, a NAS drive, USB storage, or a multi-room platform, then sends the audio onward to a DAC, amplifier, active speakers, or headphones depending on the design.
Some streamers are simple digital transports with no analog outputs. Others include a DAC, preamplifier, HDMI ARC for TV sound, internal storage, or even built-in amplification. The correct setup depends less on brand and more on signal flow: network in, audio out, control app configured, and volume handled safely.
H3: Identify what type of streamer you are installing
Before connecting cables, decide what role the streamer will play.
In streaming systems, this is the step that prevents most compatibility problems.
A digital transport outputs only a digital signal and must feed an external DAC.
Examples in this category may offer coaxial, optical, AES/EBU, USB Audio, or I2S-style outputs.
A streamer-DAC adds digital-to-analog conversion and can connect directly to an integrated amplifier, preamplifier, power amplifier with suitable volume control, or active speakers. A streaming preamplifier adds input switching and volume control. A streaming amplifier combines network player, DAC, volume control, and speaker amplification in one unit, so passive speakers connect directly to it.
Also check whether the streamer supports the services and control methods you actually use.
Common streaming routes include TIDAL Connect, Qobuz Connect, Spotify Connect, AirPlay, DLNA/UPnP, Roon Ready operation, Bluetooth, internet radio, and manufacturer control apps.
These are not the same thing. A Connect feature usually lets you choose the streamer directly inside the music service’s own app. DLNA/UPnP is often used for local network libraries. Roon Ready means the device can appear as an endpoint inside a Roon system on the same network.
- List your downstream component: external DAC, integrated amplifier, preamp, active speakers, TV, or passive speakers.
- Check whether the streamer has the matching output: digital for an external DAC, analog RCA/XLR for an amplifier, HDMI ARC for TV audio, or speaker terminals if it is an all-in-one streaming amplifier.
- Confirm the control method you want to use: the streamer’s own app, a service app via Connect, AirPlay, DLNA/UPnP, Roon, or Bluetooth.
H3: Choose wired Ethernet or Wi-Fi for streaming reliability
A streamer is only as stable as its network connection.
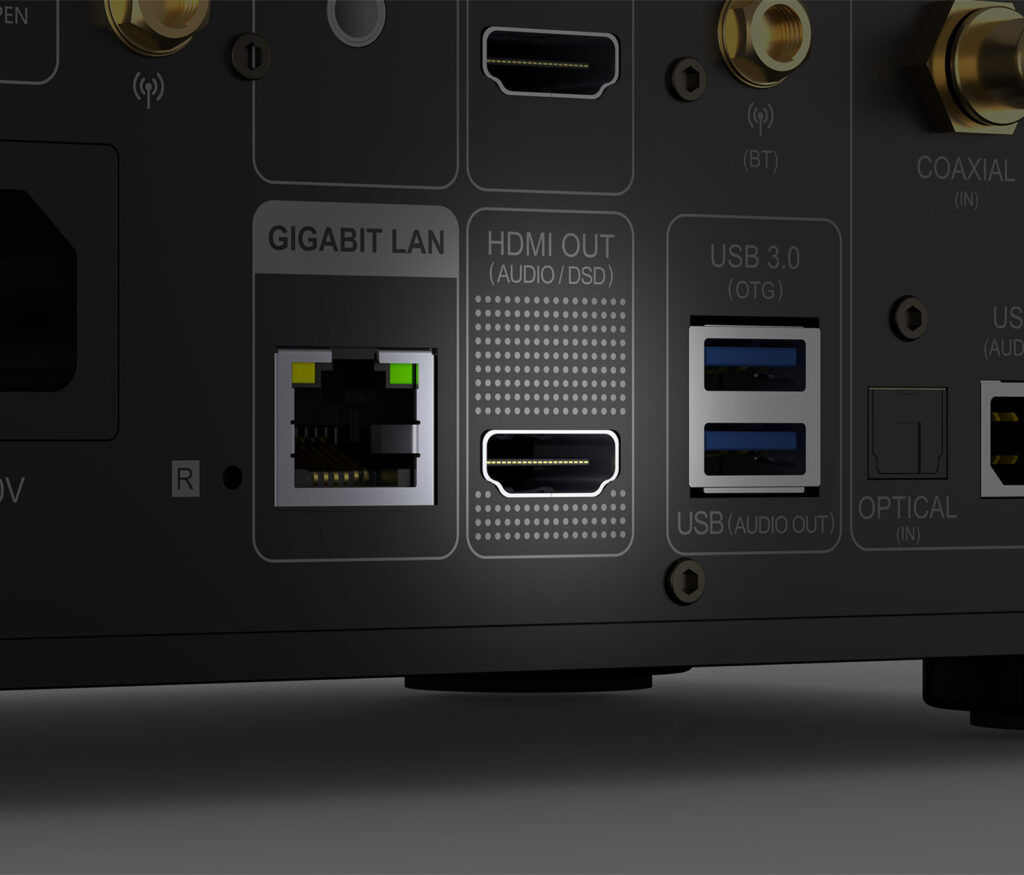
Wired Ethernet is usually the simplest route for a permanent hi-fi installation because it avoids many wireless variables and can support features such as Wake-on-LAN on compatible devices.
Some streamers also include Gigabit LAN, dual-band Wi-Fi, Wi-Fi 6, or Wi-Fi 6E, but the basic rule remains: use the most stable connection available in your room.
Wi-Fi can work well, especially for app control and normal streaming, but it is more affected by distance, walls, router placement, and network congestion.
Dual-band Wi-Fi lets a compatible streamer use either 2.4 GHz or 5 GHz networks.
In practical terms, 2.4 GHz often reaches farther, while 5 GHz can be cleaner and faster at shorter distances. If your streamer supports both, try the one that gives the most stable playback in your room.
Some higher-end network transports include fiber-capable SFP networking.
The practical point is not that every system needs fiber, but that network inputs vary.
If you use a fiber network path, make sure the streamer, switch, and transceivers are compatible.
- If the rack is near the router or a network switch, connect Ethernet first and complete setup before experimenting with Wi-Fi.
- If using Wi-Fi, place the streamer where its antenna is not blocked by metal shelves, a rear wall, or tightly packed components.
- Keep the phone or tablet running the control app on the same home network as the streamer, especially for Roon, DLNA/UPnP, AirPlay, and Connect discovery.
- If the streamer disappears from apps, reboot the router, streamer, and control device, then confirm they are on the same network and not isolated on a guest network.
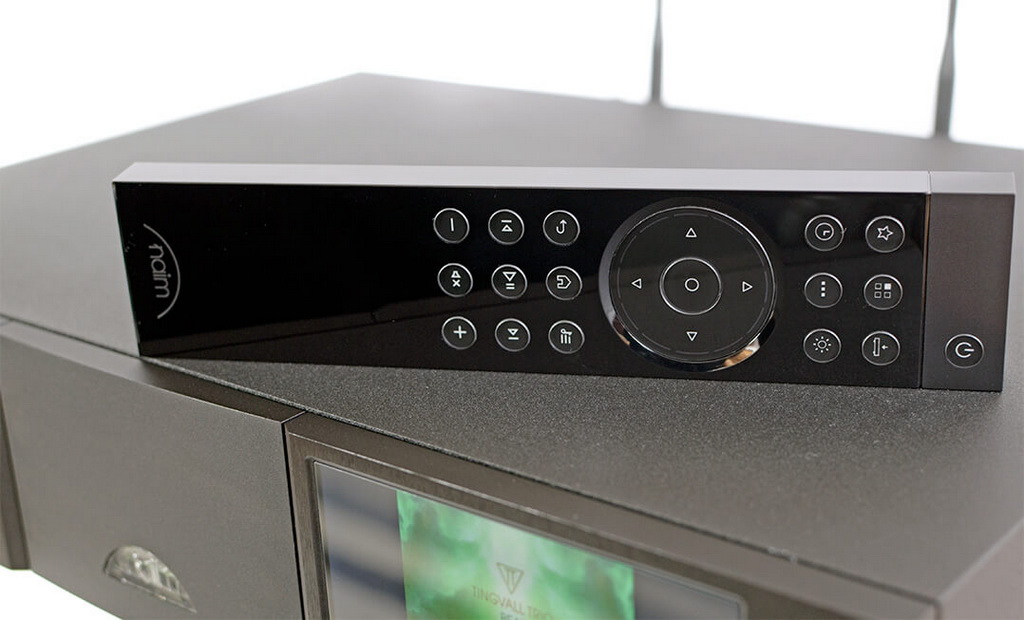
H3: Connect the streamer to a DAC, amplifier, or active speakers
The audio connection determines which component performs digital-to-analog conversion.
If you use the streamer’s digital output, the external DAC determines the analog conversion.
If you use the streamer’s analog outputs, the streamer’s internal DAC is doing that job.
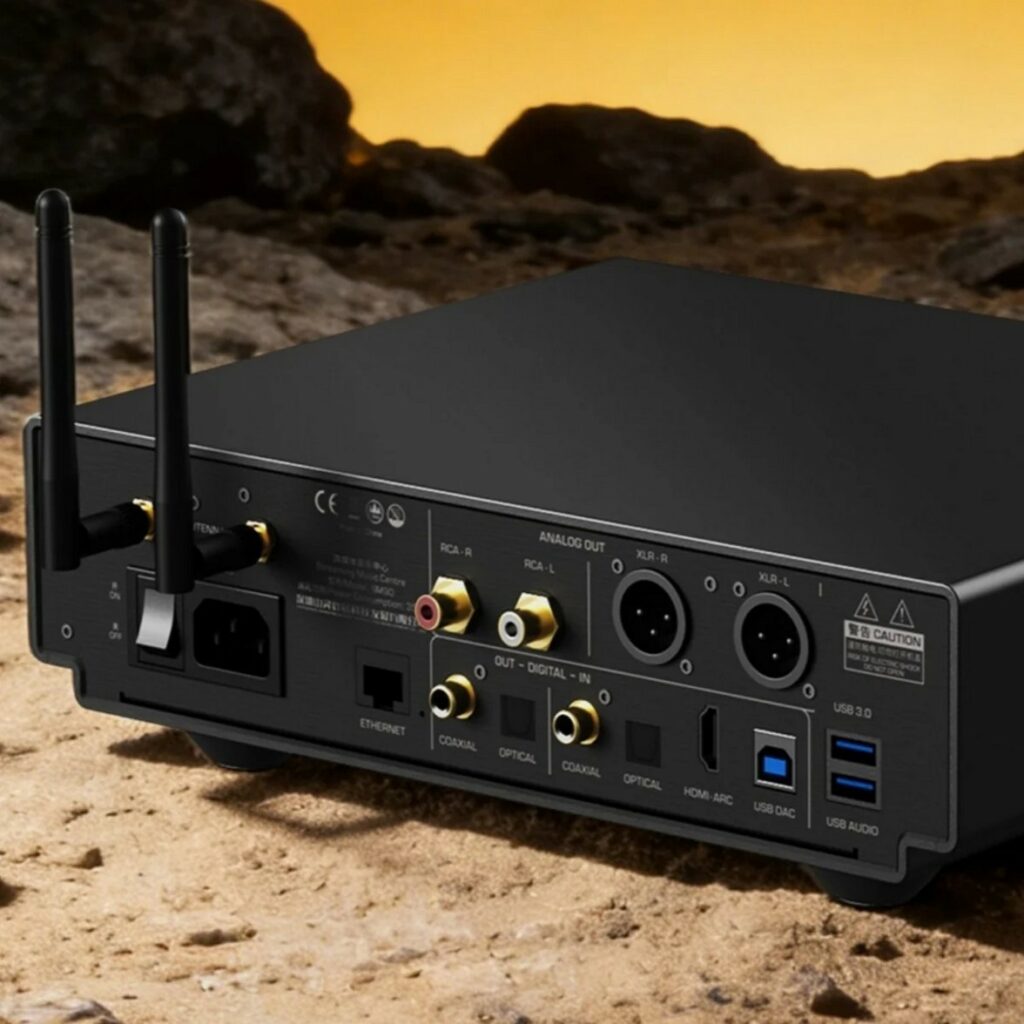
Digital outputs commonly include optical Toslink, coaxial RCA, AES/EBU, USB Audio, and sometimes I2S over an HDMI-style connector.
Optical is useful when electrical isolation is desirable, but it depends on the sample-rate support of both devices.
Coaxial and AES/EBU are traditional digital audio links. USB Audio is common for connecting to modern DACs. I2S connections can be manufacturer- or implementation-specific, so do not assume that two HDMI-shaped I2S ports will automatically be compatible.
Analog outputs are usually RCA unbalanced, XLR balanced, or both.
RCA works with most integrated amplifiers and preamplifiers.
XLR is useful if both streamer and amplifier support balanced input and output. Balanced connections can be helpful in systems where the components are farther apart or where the rest of the system is already wired balanced, but the equipment on both ends must support it.
HDMI ARC is a special case.
On streamers that include it, HDMI ARC can bring TV audio into the streamer or streaming hub, allowing the hi-fi system to handle television sound without a separate AV receiver.
ARC requires an HDMI ARC-compatible TV port and appropriate TV audio settings.
- For an external DAC, connect one digital output from the streamer to a matching DAC input, then connect the DAC’s analog outputs to the amplifier.
- For a streamer-DAC, connect RCA or XLR outputs from the streamer to a line-level input on the amplifier or preamplifier.
- For active speakers, connect the streamer’s variable analog outputs only if the streamer provides reliable volume control; start with low volume.
- For HDMI ARC, use the TV’s ARC-labeled HDMI port, enable ARC or CEC as required by the TV, and select the streamer’s HDMI ARC input.
H3: Set volume behavior safely before playing music
Volume setup is the most important safety step in a streaming system.
A streamer may operate as a fixed-level source, a variable-output preamplifier, or part of an integrated amplifier.
Using the wrong mode can send full output into a power amplifier or active speakers and produce dangerously loud sound.
If the streamer feeds an integrated amplifier or preamplifier with its own volume control, fixed output is often the cleanest and simplest arrangement, because only one component controls listening level.
If the streamer feeds a power amplifier or active speakers directly, the streamer must provide variable output, and you should confirm that volume control is active before playback.
Some streamers include advanced volume engines or analog gain stages, but the practical setup advice is the same: avoid two active volume controls unless you know why you need them, and never begin configuration at a high level.
- Turn the amplifier off or set it to minimum volume before changing streamer output mode.
- If using an amplifier’s volume control, set the streamer to fixed output if the device offers that option.
- If using the streamer as a preamp, enable variable output and start at a very low level before unmuting the amplifier or speakers.
- Disable app-based volume changes if you do not want phones, tablets, or service apps to alter system level unexpectedly.
H3: Configure streaming services, Roon, AirPlay, DLNA, and Bluetooth
After the physical connections are complete, install the manufacturer’s control app and sign in to the services you use.
Many modern streamers can access TIDAL, Qobuz, Spotify, internet radio, and local libraries through their own apps.
Some Android-based streaming hubs can run native music apps directly on the device, which can reduce dependence on a phone for playback.
Connect protocols are convenient because the music service app becomes the controller.
With TIDAL Connect, Qobuz Connect, or Spotify Connect, you select the streamer as the playback device from within the service app.
AirPlay lets Apple devices send audio to compatible streamers over the network. DLNA/UPnP is useful for browsing a server or NAS library. Roon Ready devices appear as audio endpoints in Roon when they are certified and on the same network.
Bluetooth is useful for guests and quick playback, but it is a different category from network streaming.
It sends audio from the phone or tablet to the streamer rather than letting the streamer pull music directly from the service over the network.
Use it for convenience, not as the only setup method if your goal is a fully integrated streaming system.
- Install the control app, add the streamer, and name it clearly, such as “Living Room Hi-Fi.”
- Update service logins and authorize any Connect features required by your streaming services.
- For Roon, confirm the Roon Core and streamer are on the same network, then enable the streamer in Roon’s audio settings if required.
- For NAS or DLNA playback, confirm that the server is running, shared folders are visible, and supported file formats are available.
- Pair Bluetooth only after network setup is working, so it does not become a workaround for a fixable network issue.
H3: Add local music from USB storage, SSD, CD ripping, or NAS
Streaming does not have to mean online services only.
Many streamers can play local files from USB drives, internal SSD storage, a NAS, or a computer running server software.
Some transports and network players include USB ports for external storage, and some include internal SSD slots. A few can connect an external CD drive for ripping discs to internal storage.
Local-library setup depends on indexing.
The streamer or app must scan the storage, read tags such as artist and album, and build a library.
If browsing looks chaotic, the issue is often metadata rather than the streamer itself. Use consistent folder names and file tags, especially for multi-disc albums and compilations.
File support varies.
Common formats in modern streamers include FLAC, WAV, AIFF, ALAC, AAC, MP3, DSD-related formats, and sometimes MQA support depending on the device.
Do not assume every input supports every maximum format. A streamer may support higher PCM or DSD rates through USB or I2S than through optical, coaxial, or HDMI ARC.
- Connect USB storage only after the streamer has completed its initial network setup.
- If using an internal SSD, power the unit down before installation unless the manufacturer states otherwise.
- For NAS playback, put the NAS and streamer on the same network and enable the appropriate media server or sharing protocol.
- Allow the streamer time to scan large libraries before judging whether files are missing.
- If a file will not play, check both the file format and the specific input or playback path being used.
H3: Place the streamer correctly in the hi-fi rack
A streamer is a network component, a computer, and sometimes an analog audio component in the same box.
Placement should support cooling, stable networking, and tidy signal routing.
Many streamers use metal enclosures and internal shielding, but they still need airflow and sensible cable management.
Do not stack a streamer tightly between hot amplifiers or power supplies.
Leave ventilation openings clear, especially on designs with perforated cases or internal storage.
Keep signal cables away from power cords where possible, and avoid bending optical cables sharply. If the unit has Wi-Fi antennas, do not trap them behind thick metal shelves or other large components.
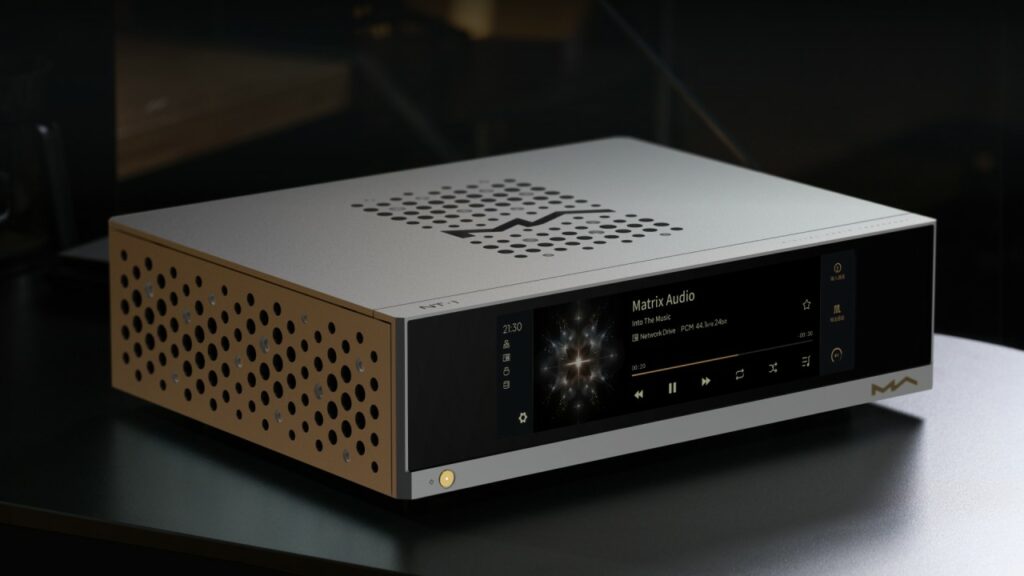
Touchscreen streamers should be placed where the screen is visible and reachable, but not where accidental touches will change inputs or volume.
If the display can be dimmed or switched off and you prefer a darker listening room, configure that in the settings rather than physically covering the screen.
- Place the streamer on a stable shelf with room for airflow.
- Separate power cables from analog interconnects where practical.
- Keep Wi-Fi antennas unobstructed if using wireless networking.
- Label digital and analog cables before moving the rack, especially if the streamer is used as a hub for several sources.
H3: Update firmware and maintain long-term streaming compatibility
Streaming products depend on software as much as hardware.
Service support, Connect features, app compatibility, Roon certification, and internet radio functions can change over time.
Firmware updates are therefore routine maintenance, not optional extras.
Some manufacturers deliver over-the-air updates that add features such as Roon Ready operation, Qobuz Connect, Spotify or Amazon Music integration, or expanded platform support.
In a practical system, the best habit is to update deliberately: read the update notes if available, install when you have time, and avoid interrupting power during the process.
Keep the control app updated on your phone or tablet as well.
A streamer may appear faulty when the real problem is an outdated app, expired service login, or a network permission issue on the mobile device.
- Connect the streamer to the internet and check for firmware updates during initial setup.
- Do not unplug the streamer or router during an update.
- After a major update, restart the streamer and reopen the control app.
- If a service disappears, check firmware, app version, subscription status, and whether the service requires reauthorization.
- Write down your preferred output mode and volume behavior before factory resetting any streamer.
H3: Troubleshoot common streaming problems systematically
Most streaming faults fall into four groups: network discovery, service login, audio output selection, or volume configuration.
Solve them in that order rather than swapping cables randomly.
If the app cannot find the streamer, confirm that the streamer and control device are on the same network.
Avoid guest Wi-Fi networks and router features that isolate wireless devices from wired devices.
If playback starts but stops, try Ethernet, move closer to the router, or reduce network congestion. If one service works and another does not, the issue may be account authorization or a service-specific setting rather than the streamer.
If there is no sound, check the selected output.
A streamer feeding an external DAC through coaxial will not necessarily output sound through its analog RCA jacks unless configured to do so.
A DAC must be set to the correct input. An amplifier must be on the correct line input. For HDMI ARC, both the TV and streamer may need ARC settings enabled.
If the sound is distorted or too loud, stop playback immediately and review fixed versus variable output.
If high-resolution files fail, try a different output type or a lower-rate file to determine whether the limitation is the streamer, DAC, input, or server software.
- Check power, input selection, mute status, and volume first.
- Confirm the network connection and whether the streamer has an IP address in its app or settings screen.
- Test one simple source, such as internet radio or a standard-resolution stream, before troubleshooting high-resolution local files.
- Swap only one variable at a time: cable, input, output, service, or network path.
- Use factory reset only after saving settings and exhausting simpler fixes.
Concise music streamer setup checklist
- Decide the streamer’s role: transport, streamer-DAC, streaming preamp, or streaming amplifier.
- Use Ethernet for first setup when possible; otherwise confirm strong Wi-Fi on the same network as the control device.
- Connect digital output to an external DAC, or analog RCA/XLR output to an amplifier, preamp, or active speakers.
- Set volume mode safely: fixed into an integrated amp or preamp, variable only when the streamer is controlling level.
- Install the manufacturer app, update firmware, and sign in to streaming services.
- Enable Connect, Roon, AirPlay, DLNA/UPnP, or Bluetooth only as needed for your listening habits.
- Add USB, SSD, or NAS libraries after basic streaming works.
- Verify supported formats and input limits before blaming a high-resolution file.
- Place the streamer with ventilation, clear antennas, and tidy cable routing.
- Document preferred settings before major updates or factory resets.
Common mistakes and how to avoid them
Connecting a digital-only streamer directly to an analog amplifier.
Use an external DAC between the streamer and amplifier, or choose a streamer with built-in DAC and analog outputs.
Leaving the streamer at fixed full output when feeding active speakers or a power amplifier.
Enable variable output before playback, start at minimum volume, and confirm that the streamer is acting as the preamp.
Assuming every HDMI-shaped connector carries normal HDMI audio.
Check the manual.
HDMI ARC is for TV audio return, while I2S over an HDMI-style connector is a digital audio interface that may require matching compatibility.
Using a guest Wi-Fi network for the control phone.
Put the phone, streamer, Roon Core, NAS, and other playback devices on the same main network so discovery protocols can work.
Ignoring firmware because the hardware already works.
Update firmware deliberately to maintain service compatibility, add supported features, and keep control apps working correctly.
Troubleshooting high-resolution files before confirming basic playback.
First test a simple stream or internet radio station, then test local files, then test the highest-resolution formats and special outputs.
Frequently asked questions
Do I need a separate DAC with a music streamer?
Only if the streamer is a digital transport or if you prefer using an external DAC.
A streamer with analog RCA or XLR outputs already includes a DAC.
A transport with only digital outputs must connect to a DAC before it can feed a conventional analog amplifier.
Is Ethernet better than Wi-Fi for a hi-fi streamer?
Ethernet is usually the most stable choice for a fixed hi-fi system and is a good starting point for setup.
Wi-Fi can work well when signal strength is strong and the network is not congested, but it is more sensitive to room layout and router placement.
What is the difference between TIDAL Connect, Qobuz Connect, AirPlay, DLNA, and Roon Ready?
Connect features let you choose the streamer from inside the music service app.
AirPlay sends audio from Apple devices over the network.
DLNA/UPnP is commonly used for local network libraries. Roon Ready means the device can operate as a certified endpoint inside a Roon system on the same network.
Can I connect a streamer directly to a power amplifier?
Yes, but only if the streamer has proper variable volume control or preamplifier functionality.
If it is set to fixed output, the system may play at full level.
Start with the amplifier off or volume down, enable variable output, and test carefully.
Why does my app see the streamer sometimes but not always?
The most common causes are mixed networks, guest Wi-Fi, router isolation settings, weak Wi-Fi, outdated firmware, or an outdated control app.
Keep the control device and streamer on the same main network, update software, and try Ethernet if discovery remains unreliable.
Can a streamer play music from a NAS or USB drive?
Many streamers can, but support varies.
Some accept USB drives, some include internal SSD options, and many can browse NAS libraries through network sharing or DLNA/UPnP.
After connecting storage, allow the streamer to scan the library and make sure the files are in supported formats.
Conclusion: build the streaming chain in the right order
A reliable hi-fi streaming setup starts with signal flow, not brand choice.
Decide whether the streamer is only a digital transport or whether it will also act as DAC, preamp, hub, or amplifier.
Use a stable network connection, choose the correct digital or analog output, and set volume behavior before you press play. Then configure services, Connect features, Roon, AirPlay, DLNA, Bluetooth, and local libraries one layer at a time. Keep firmware and control apps updated, place the streamer with proper ventilation and network access, and troubleshoot methodically from network discovery to output selection. Do that, and a music streamer becomes one of the simplest and most flexible sources in a modern hi-fi system.



Join the discussion
Share your thoughts, listening impressions or product experience.