Dolby Atmos lets an AV receiver build a three-dimensional sound field by adding height information to the usual surround speaker bed.
In practice, the quality of an Atmos system depends less on the logo on the front panel and more on how well the receiver, speakers, HDMI devices, and room calibration are set up.
This guide explains how to plan an Atmos layout, wire HDMI sources and eARC correctly, assign amplifier channels, run calibration, and troubleshoot the most common problems while staying focused on the AV receiver as the control center of the system.
Understand What the Atmos Channel Numbers Mean
AV receiver layouts are usually written as three numbers, such as 5.1.2, 5.2.2, 5.2.4, 7.1.4, or 7.2.4.
The first number is the main ear-level speaker bed: front left, center, front right, surrounds, and sometimes rear surrounds.
The second number is the subwoofer count or subwoofer outputs used by the receiver. The third number is the height or overhead layer used by Dolby Atmos.
For example, a 5.1.2 Atmos layout uses five main speakers, one subwoofer, and two height speakers.
A 5.2.4 layout uses five main speakers, two subwoofers, and four height speakers.
A 7.2.4 system adds rear surrounds to the seven-channel bed and keeps four height channels.
This distinction matters because many AV receivers have more processing channels than built-in amplifier channels.
A receiver may decode or process a larger Atmos layout but need an external power amplifier to drive every speaker.
For instance, some receivers operate as 5.1.2 or 5.2.2 Atmos systems using internal amplification, while expansion to layouts such as 7.1.4 or 7.2.4 can require extra amplifier channels connected to pre-outs.
- Count your receiver’s built-in amplifier channels.
- Check the maximum Atmos layout supported by its surround processor.
- Check whether the receiver has pre-outs if you want to add external amplification.
- Choose the largest layout your room, wiring, and amplifier channels can support without guessing.
Choose a Speaker Layout Your AV Receiver Can Actually Drive
Start with the AV receiver’s supported speaker configurations, not with the number of speakers you would ideally like to install.
A 7-channel receiver with Atmos support commonly suits a 5.1.2-style system: five ear-level speakers, one subwoofer, and two height speakers.
Some 7-channel models can alternatively be used as 7.1 without Atmos height speakers, so the receiver’s amp assignment menu determines whether the last two amplifier channels power rear surrounds or height channels.
A receiver such as the Denon AVR-S760H is an example of a 7.2-channel AV receiver that supports Dolby Atmos up to a 5.1.2 configuration.
The Sony STR-DN1080 is another example of an AV receiver intended for 5.1.2 or 7.1 operation.
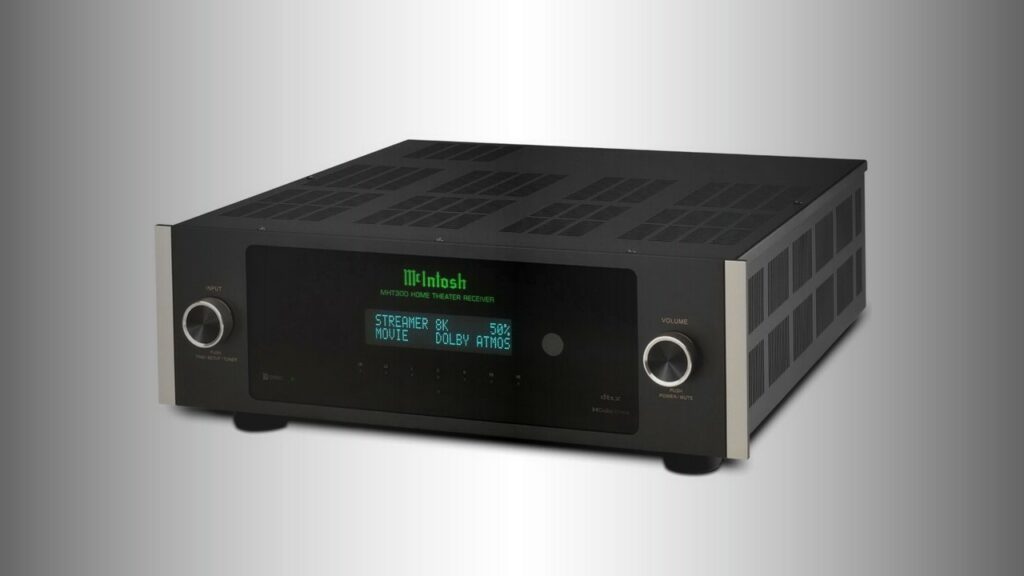
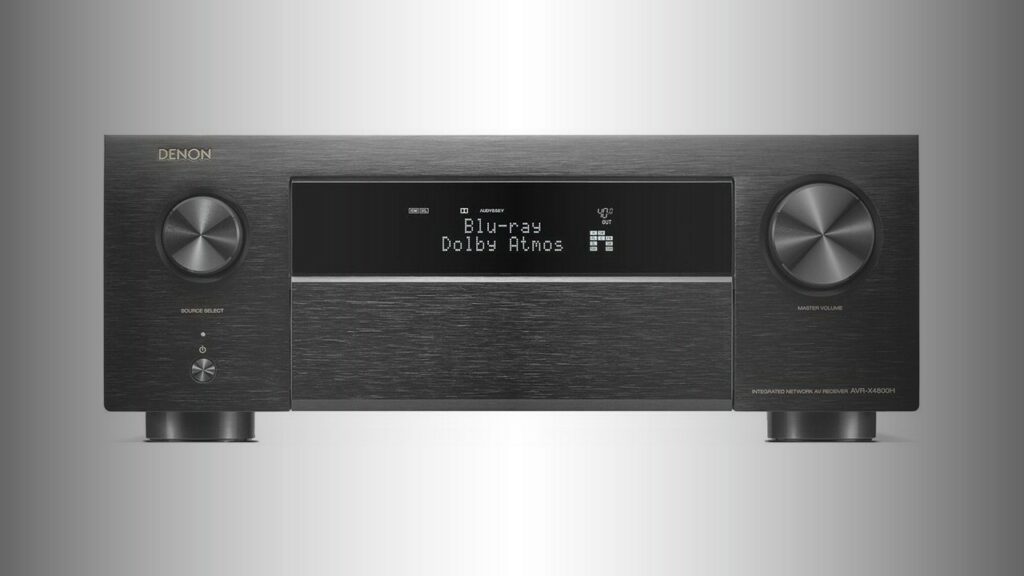
The McIntosh MHT300 operates as a 5.2.2-channel system when using Dolby Atmos or DTS:X through its internal amplifier section, while its pre-amplifier outputs allow expansion with additional amplification. The Arcam AVR11 supports a 5.1.2 Atmos setup with its onboard amplification and can be expanded to 7.1.4 by adding a 4-channel power amplifier or two stereo amplifiers. Higher-channel receivers such as the Denon AVC-X4800H provide more flexibility for 5.2.4 or 7.2.4-style systems, with processor outputs available for expansion when needed.
If you cannot install physical height or ceiling speakers, some receivers offer height virtualization.
Dolby Atmos Height Virtualization Technology and DTS Virtual:X are examples found on some AV receivers.
These modes simulate height effects from systems without dedicated Atmos speakers. Virtualization is useful when installation is difficult, but it is not the same setup task as wiring real height speakers.
- For a simple Atmos upgrade, plan 5.1.2 or 5.2.2 first.
- For a more enveloping system, plan 5.2.4 or 7.2.4 only if your receiver and amplifier channels support it.
- If your receiver has pre-outs, decide which channels will be powered externally before wiring.
- If you cannot install height speakers, enable the receiver’s height virtualization mode instead of assigning speakers that do not exist.

Place the Speakers Before You Connect Them
Speaker placement should follow the layout selected in the AV receiver’s setup menu.
The front left and right speakers create the main stereo image, the center anchors dialogue, surrounds provide side or rear ambience, and height speakers create the vertical Atmos layer.
Subwoofers reproduce low-frequency effects and bass redirected by the receiver’s bass management.
Keep the speaker labels consistent from the start.
If the receiver says “Surround Left,” that cable should go to the left surround speaker, not a rear surround or height speaker.
This sounds obvious, but Atmos layouts use more speaker positions than conventional surround systems, and a single swapped cable can confuse both the listener and the room correction system.
Height speakers may be in-ceiling, on-ceiling, or Atmos-enabled speakers depending on your system design and what the receiver allows you to select.
The important AV receiver step is to choose the matching speaker type in the setup menu.
Do not tell the receiver you have ceiling speakers if you are using a virtualization mode, and do not leave height channels disabled after installing real height speakers.
- Place the main speakers and subwoofer before running auto-calibration.
- Label each speaker cable at both ends.
- Match each physical speaker to the corresponding receiver terminal.
- Select the correct height speaker type or virtualization option in the receiver menu.
Wire Speakers Safely to the AV Receiver
Always power off the AV receiver before connecting or moving speaker wires.
Bare wire strands that touch between positive and negative terminals can cause a short circuit.
Use the receiver’s color-coded or labeled screw terminals carefully, and tighten them enough to hold the cable securely without crushing or fraying the conductor.
Check speaker impedance compatibility in the receiver documentation.
For example, some AV receivers specify supported speaker loads such as 4–16 ohms.
If you use low-impedance speakers, make sure the receiver is designed to handle them and that ventilation is adequate. Atmos playback can drive many channels at once, so heat management matters more than it does in casual stereo listening.
If your receiver requires an external amplifier for a larger Atmos layout, connect the relevant pre-out channels from the AV receiver to the amplifier inputs.
Then connect the speakers to the external amplifier, not to unused receiver terminals.
Keep trigger, IR, or control wiring separate and tidy if your system uses it.
- Turn off and unplug the AV receiver before speaker wiring.
- Connect positive to positive and negative to negative for every speaker.
- Inspect for stray wire strands before powering on.
- Use pre-outs and an external amplifier when the chosen Atmos layout exceeds the receiver’s onboard amplifier channels.
- Leave space around the receiver for ventilation.

Connect HDMI Sources, TV, Projector, and eARC Correctly
For most Atmos systems, the cleanest wiring path is source device to AV receiver, then AV receiver HDMI output to the TV or projector.
This lets the receiver decode Dolby Atmos, DTS:X, Dolby TrueHD, DTS-HD Master Audio, and other formats while passing video through to the display.
Connect disc players, streamers, and game consoles to HDMI inputs on the receiver, then connect the receiver’s HDMI output to the display.
If you use smart TV apps, connect the TV’s eARC-capable HDMI port to the receiver’s eARC HDMI output. eARC, or enhanced Audio Return Channel, sends audio from the TV back to the receiver over HDMI.
This is important because some receivers support receiving 3D audio such as Dolby Atmos from the TV via eARC.
Do not assume every HDMI input on an AV receiver has the same video capability.
Some receivers have only selected HDMI inputs that support the highest video bandwidth.
For example, one 7.2-channel receiver may have six HDMI inputs but only three that support 8K/60. Other models provide multiple HDMI 2.1 inputs and outputs with 8K/60 and 4K/120 compatibility, along with HDR formats such as HDR10+, Dolby Vision, and HLG. Also note that HDMI 2.1 labeling does not guarantee every gaming feature; one AV receiver may support 8K and 4K/120 but not fully support features such as QMS, VRR, or ALLM.
Use the receiver’s input assignment menu after wiring.
Rename inputs if helpful, and ensure the HDMI input carrying a high-resolution source is one of the ports that supports the required video standard.
If your TV shows video but the receiver does not show Atmos, the issue may be the source audio setting, the TV’s audio output setting, or an eARC/ARC setting rather than the cable itself.
- Connect HDMI sources directly to the AV receiver when possible.
- Connect the receiver’s main HDMI output to the TV or projector.
- Use the eARC HDMI connection when relying on TV apps for Atmos audio.
- Put 8K or 4K/120 sources on HDMI inputs that explicitly support those formats.
- Enable HDMI control, ARC, or eARC only as required by your TV and receiver combination.
Configure Amp Assignment and Speaker Settings
After the physical wiring is complete, the AV receiver still needs to know what you connected.
Enter the speaker setup or amp assignment menu and choose the exact layout: for example, 5.1.2, 5.2.2, 5.2.4, or 7.2.4.
This step tells the receiver which amplifier channels drive which speakers and which Dolby Atmos renderer layout to use.
If the receiver offers an on-screen setup assistant, use it.
Setup assistants can walk through speaker count, terminal connection, subwoofer use, HDMI setup, and calibration.
Some receivers also allow finer adjustments through a mobile app or editor software after the automatic calibration process.
Set subwoofer use and bass management deliberately.
Some AV receivers provide multiple bass manager settings or audio presets, allowing different behavior for multichannel movie playback and stereo music playback.
If your receiver supports separate presets, one practical approach is to keep a cinema-oriented preset for Atmos movies and another for stereo or daytime listening, then compare them at normal listening levels.
- Open the receiver’s speaker or amp assignment menu.
- Select the installed Atmos layout exactly.
- Enable subwoofer outputs that are actually connected.
- Disable channels that are not physically installed.
- Save the configuration before running room calibration.
Run Room Calibration the Right Way
Room calibration is where the AV receiver measures speaker levels, distances or delays, frequency response, and subwoofer integration.
Different brands use different systems, including Audyssey MultEQ, Audyssey MultEQ XT32, Dirac Live, and Sony’s Advanced DCAC.
The purpose is the same: adjust the receiver so the speakers work together in your room rather than only in theory.
Use the supplied calibration microphone or the microphone specified by the receiver.
Place it at the main listening position first, ideally where your head would be while seated.
Keep the room quiet during measurements: no conversation, vacuuming, HVAC blasts, or pets moving around the microphone. If your calibration system asks for several positions, measure around the actual seating area, not random points across the room.
Dirac Live implementations may require measurements to be processed on a computer and uploaded to the AV receiver.
One example system allows measurements at nine different points using a microphone before the results are uploaded.
Audyssey-based receivers may run the process directly from the receiver and can also support editor apps for finer correction, depending on model.
After calibration, review the results.
Confirm that every speaker was detected in the correct position.
Check that no height speaker was identified as a surround or vice versa. Review distances, levels, and crossover settings for obvious errors. Avoid immediately overriding everything by ear; instead, correct only clear setup mistakes, then listen to familiar content.
- Connect the calibration microphone to the receiver’s mic input.
- Place the microphone at the main listening position.
- Run all requested measurement positions if your system supports them.
- Upload or save the calibration filters as instructed by the receiver.
- Check speaker detection, levels, distances, subwoofer status, and crossovers before final listening.
Update Firmware Before Final Tuning
Firmware can affect AV receiver features, format support, streaming services, and calibration tools.
Some AV receivers have received updates adding features such as Dolby Atmos Music support, Roon Ready status, or expanded Dirac Live capability.
In certain cases, room correction updates can improve how the receiver handles longer delays in large rooms.
Use the network update feature if your internet connection is stable.
If it is not, some manufacturers allow downloading firmware from their website and installing it by USB flash drive.
Do not interrupt power during a firmware update. After updating, re-check HDMI settings, speaker assignment, and calibration availability because menus and options can change.
- Check the receiver’s current firmware version.
- Read the update notes from the manufacturer.
- Use network update only with a stable connection.
- Use USB update if the manufacturer supports it and your network is unreliable.
- Revisit speaker and HDMI settings after the update.
Verify Atmos Playback
Once wiring and calibration are complete, play known Atmos content from a source that supports it.
The AV receiver’s front panel or on-screen information should show whether it is receiving Dolby Atmos, Dolby TrueHD with Atmos metadata, or a Dolby Atmos stream.
If it only shows stereo, Dolby Digital, or PCM when you expect Atmos, something in the signal chain is not set correctly.
Also distinguish native Atmos from an upmixer.
Dolby Surround and DTS Neural:X can expand non-Atmos content to use more speakers, including height channels in some setups.
That can be useful, but it is not the same as receiving a native Dolby Atmos soundtrack. Use the receiver’s info display to confirm the incoming format, not only the listening mode.
- Play Atmos content from a compatible app, disc, or media device.
- Open the receiver’s signal information screen.
- Confirm that the input signal shows Atmos, not only an upmixed listening mode.
- Test each speaker with the receiver’s internal test tone if a channel seems silent.
- Save a working input and sound mode preset if your receiver allows it.
Troubleshoot No Atmos, No Sound, or HDMI Problems
If there is no Atmos, start with the source.
The content must include an Atmos soundtrack, and the source device must be set to output surround bitstream or a compatible audio format.
If using TV apps, make sure the TV is connected to the receiver through the eARC-capable HDMI ports and that the TV audio output is set for external receiver playback.
If there is sound but no height activity, check amp assignment.
A receiver set to 7.1 may be using the last two amplifier channels for rear surrounds instead of height speakers.
Reassign the amplifier channels to 5.1.2 or the appropriate Atmos layout and run calibration again.
If video fails with a high-resolution source, move the source to an HDMI input that supports the needed format.
Some receivers support 8K or 4K/120 on selected inputs only.
Also check HDCP compatibility, HDR pass-through settings, and whether the display supports the same format.
If audio drops out through ARC or eARC, power-cycle the TV and receiver, re-check HDMI control and eARC settings, and confirm the cable is connected to the correct labeled ports.
If a firmware update is available from the manufacturer, apply it before assuming the receiver is defective.
- Confirm the source content really has Atmos.
- Set the source audio output to a surround-compatible mode.
- Use eARC for TV app Atmos where supported.
- Check the receiver’s amp assignment and speaker layout.
- Move high-bandwidth video sources to the correct HDMI inputs.
- Update firmware and recalibrate if settings have changed.
Concise Dolby Atmos AV Receiver Setup Checklist
- Choose a layout your receiver can process and power, such as 5.1.2, 5.2.2, 5.2.4, or 7.2.4.
- Confirm whether external amplification is required for larger layouts.
- Place and label every speaker before connecting cables.
- Power off the receiver before wiring speaker terminals.
- Connect HDMI sources to the receiver, then the receiver HDMI output to the display.
- Use the TV and receiver eARC ports for Atmos from smart TV apps.
- Assign amplifiers and speaker layout in the receiver menu.
- Run Audyssey, Dirac Live, DCAC, or the receiver’s supplied calibration system.
- Review detected speakers, levels, distances, subwoofer settings, and crossovers.
- Update firmware and verify the receiver display shows native Atmos during playback.
Common Mistakes and How to Avoid Them
Buying or installing more speakers than the receiver can power.
Check both amplifier channels and processing channels.
Use external amplifiers through pre-outs if the receiver supports a larger layout than it can power internally.
Selecting 7.1 in the amp assignment menu when height speakers are connected.
Choose the correct Atmos layout, such as 5.1.2, so the receiver sends the final amplifier channels to height speakers rather than rear surrounds.
Expecting Atmos from every HDMI input.
Use HDMI inputs that support the video format required by the source, and check the receiver’s signal information screen to confirm the audio format.
Using ARC/eARC without enabling the correct TV and receiver settings.
Connect the HDMI cable to the labeled eARC ports and enable the necessary TV audio output, HDMI control, ARC, or eARC options.
Skipping room calibration after moving speakers or changing the layout.
Run the calibration system again whenever you add height speakers, change subwoofer placement, update amp assignment, or significantly rearrange the room.
Confusing an upmixer with native Dolby Atmos.
Use the AV receiver’s info screen to check the incoming signal.
Dolby Surround can use more speakers, but it does not prove the source is native Atmos.
Frequently asked questions
Can a 7-channel AV receiver run Dolby Atmos?
Yes, if it supports Dolby Atmos.
A common use for a 7-channel Atmos receiver is a 5.1.2 layout: five main speakers, one subwoofer, and two height speakers.
Some models can also be configured as 7.1 without height speakers, so amp assignment is important.
Do I need eARC for Dolby Atmos?
You need eARC when you want to send high-quality TV app audio, including supported 3D audio, from the TV back to the AV receiver.
If your streaming box or disc player is connected directly to the receiver, the receiver can decode the audio before sending video to the TV.
What is the difference between 5.1.2 and 5.2.4?
A 5.1.2 system has five ear-level speakers, one subwoofer, and two height speakers.
A 5.2.4 system has five ear-level speakers, two subwoofers, and four height speakers.
The second layout needs more channels and therefore a receiver with more amplifier or processing capability.
Should I run room calibration before or after a firmware update?
If you know a relevant firmware update is available, update first and calibrate afterward.
Firmware can affect features, room correction behavior, and available settings.
After any update, re-check speaker assignment and HDMI settings.
Why do my height speakers stay silent?
Possible causes include non-Atmos content, the receiver being set to a non-Atmos layout, the source outputting stereo, or the receiver using rear surround assignment instead of height assignment.
Check the input signal display, amp assignment, and speaker test tones.
Can I use Dolby Atmos without ceiling speakers?
Yes, if your receiver supports Atmos height virtualization or a compatible simulated height mode.
Some receivers offer Dolby Atmos Height Virtualization Technology or DTS Virtual:X for systems without dedicated height or in-ceiling speakers.
Conclusion
A successful Dolby Atmos AV receiver setup starts with matching the layout to the receiver’s real capabilities.
Choose a supported configuration, wire speakers carefully, use HDMI and eARC deliberately, assign amplifier channels correctly, and run the receiver’s room calibration system with patience.
Larger layouts such as 7.1.4 or 7.2.4 may require external amplification even when the receiver can process them. Finally, verify playback with the receiver’s signal information screen so you know when you are hearing native Atmos rather than an upmixed surround mode. Get these fundamentals right and the AV receiver can do its central job: coordinate speakers, sources, display, bass management, and room correction into a coherent Atmos system.