


An AV receiver is the control hub of a home theater.
It switches HDMI sources, decodes surround formats, powers speakers, sends bass to the subwoofer, and often applies room correction to make the system work better in a real living room.
A good setup is not only about buying a capable receiver; it is about wiring it safely, matching it to the speaker layout, configuring HDMI correctly, placing the subwoofer intelligently, and running calibration with care. This guide walks through the practical process from first connections to final checks, with the focus kept firmly on AV receiver installation and optimization.
H3: Plan the AV receiver layout before connecting anything
Before you plug in cables, decide what the AV receiver must control.
List every HDMI source, such as a disc player, streaming box, game console, or TV input device, then count the speakers and subwoofers you intend to use.
AV receivers vary from basic 5-channel layouts to larger 9-, 11-, or processor-style systems with many more channels. The important point is to configure the receiver for the speaker system you actually own, not for the maximum number printed on the front panel.
A 5.1 system means five main speaker channels plus one subwoofer: front left, center, front right, surround left, surround right, and the subwoofer.
A 5.2 system adds a second subwoofer output or second subwoofer.
Height-channel systems for Dolby Atmos or DTS:X use additional speakers to create overhead or elevated effects, but the exact layout depends on the receiver’s supported amplifier assignment. Some AV receivers also allow alternate layouts, such as using five amplifier channels for a compact Atmos arrangement rather than a conventional surround-only layout.
Also plan ventilation and access.
AV receivers contain power amplification, HDMI circuitry, processing, and power supplies in one chassis, so they need space around them and should not be buried in a closed cabinet without airflow.
Leave enough room behind the receiver for HDMI plugs, speaker cables, network cable if used, and Wi-Fi/Bluetooth antennas where applicable. If the receiver has detachable wireless antennas, install them even if you mainly use wired networking; on some models Bluetooth range can be unreliable without the antennas attached.
- Place the AV receiver on a stable shelf with ventilation space around it.
- Confirm the number of speaker channels and subwoofers you will connect.
- Check that your display and sources match the receiver’s HDMI capabilities, such as 4K, 8K, HDR, HDCP, VRR, QFT, or ALLM where needed.
- Keep the rear panel accessible until setup and troubleshooting are complete.

H3: Connect speakers to the AV receiver safely and consistently
Speaker wiring is simple in principle but easy to get wrong.
Each passive speaker connects to the corresponding binding posts on the AV receiver: front left to front left, center to center, surround right to surround right, and so on.
Red is normally positive and black is normally negative. Keeping polarity consistent matters because reversed polarity can weaken imaging and bass integration, especially between the front speakers and center channel.
Use proper speaker cable and avoid stray copper strands touching the neighboring terminal.
A short circuit at the speaker outputs can trigger receiver protection or, in the worst case, damage equipment.
Always turn the AV receiver off before inserting or removing speaker wire. If you use banana plugs, some receivers ship with dust caps in the binding posts; remove only the appropriate caps before inserting the plugs.
If the receiver offers A/B speaker terminals or a second speaker zone, do not assume that all terminals are meant for a home theater layout at the same time.
Some stereo-oriented receivers can switch between two pairs of speakers or use A+B for compatible speaker wiring arrangements, while multichannel AV receivers often reassign spare amplifier channels for height speakers, surround backs, Zone 2, or bi-amping.
Check the amplifier assignment menu and match it to your actual wiring.
Speaker matching is also part of setup.
The receiver should be used with speakers that fit its supported impedance range and practical power capability.
Do not connect several speakers in parallel to one channel unless the receiver and speaker manuals explicitly allow it. If the receiver becomes unusually hot, shuts down, or enters protection, stop playback and inspect wiring before increasing volume again.
- Switch the receiver off before working on speaker terminals.
- Connect each speaker to the matching labeled output on the receiver.
- Maintain red-to-red and black-to-black polarity from receiver to speaker.
- Trim exposed wire neatly and prevent stray strands from touching another terminal.
- Use the receiver’s speaker setup menu to tell it which channels are connected.

H3: Wire HDMI sources, TV ARC, and video features correctly
HDMI setup is central to an AV receiver because the receiver often acts as the HDMI switcher for the whole home theater.
Connect source devices to the receiver’s HDMI inputs, then connect the receiver’s HDMI monitor output to the TV or projector.
If your TV and receiver support ARC, the HDMI connector labeled ARC on the receiver can return TV audio to the receiver, allowing the TV’s apps or tuner audio to play through the home theater speakers. Some receivers label this output clearly as Monitor ARC.
Compatibility matters.
Modern receivers may support 4K or 8K video switching, HDCP copy protection versions, HDR formats such as HDR10, HDR10+, HLG, Dynamic HDR, and Dolby Vision, and gaming features such as VRR, QFT, and ALLM.
These features only work when the source, receiver, cable, and display all support the same function. If a console or media player is not passing the expected video format, the receiver is not the only possible cause; the HDMI input setting on the TV, the cable, and the source output menu may also need attention.
HDMI audio settings are just as important.
Set source devices to output bitstream or automatic surround audio if you want the AV receiver to decode formats such as Dolby TrueHD, DTS-HD Master Audio, Dolby Atmos, or DTS:X where supported.
If the source is set to basic stereo PCM, the receiver may only receive two-channel sound even though the movie contains a surround soundtrack.
Many receivers include lip-sync or audio delay adjustment.
Use it if voices arrive slightly before or after mouth movement on screen.
Some models also support automatic low latency behavior with compatible game consoles and displays, but do not rely on automatic features until you verify them with real content.
- Connect HDMI sources to the receiver, then the receiver’s HDMI monitor output to the TV or projector.
- Use the ARC-labeled HDMI ports on both receiver and TV if you want TV app audio through the receiver.
- Enable the required HDMI format or enhanced input mode in the TV and source menus if needed.
- Set sources to output surround audio rather than forced stereo.
- Adjust audio delay in the receiver if picture and sound are not synchronized.
H3: Set speaker size, crossover, levels, and distances in the AV receiver
After wiring, the AV receiver needs to know what is connected.
In the speaker setup menu, select the correct layout and identify whether each channel is present.
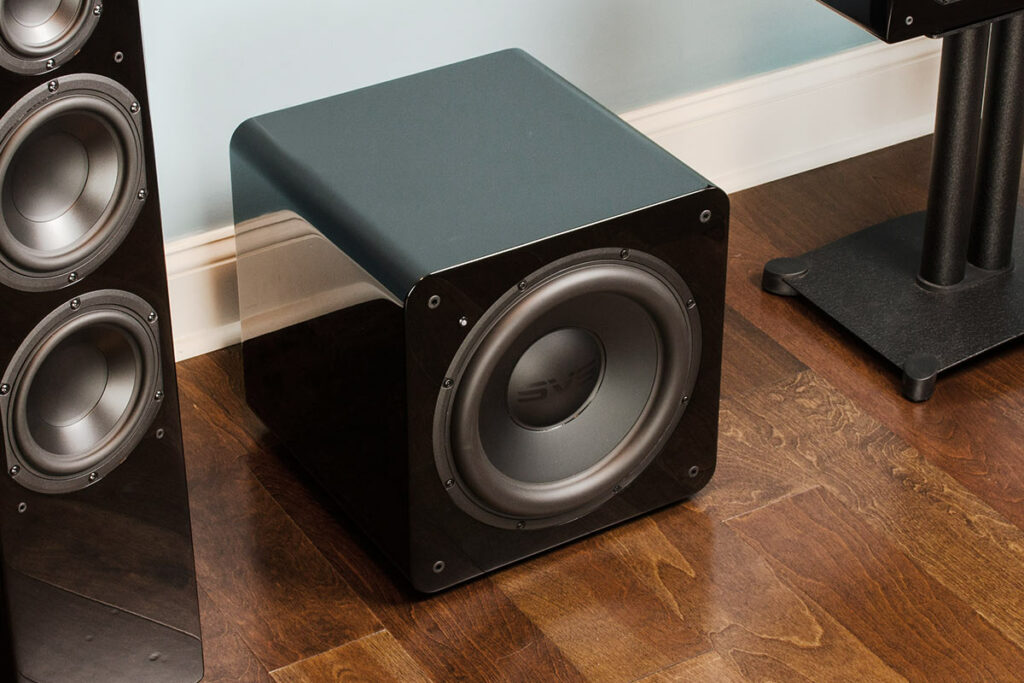
The receiver may ask whether speakers are large or small. In AV receiver terminology, “small” does not mean poor quality; it usually means bass below a selected crossover frequency will be redirected to the subwoofer. This is often useful because subwoofers are built to handle low frequencies that many main speakers cannot reproduce with the same authority.
The crossover is the frequency where the receiver begins handing bass from the main speakers to the subwoofer.
The source material notes that subwoofers are specialized for low frequencies, broadly in the 20 to 200 Hz region.
The exact crossover setting should be chosen according to your speakers, room, and receiver options. If room calibration sets a crossover, treat it as a starting point rather than a permanent rule; if dialogue becomes thin or bass becomes localized, revisit the setting.
Speaker distance settings tell the AV receiver how long sound takes to reach the listening position.
Level settings balance the loudness of each speaker so one channel does not dominate.
Room calibration systems usually measure these automatically, but manual confirmation is still useful. If the center channel is too low, dialogue suffers. If surrounds are too high, effects become distracting. If the subwoofer is too loud, bass becomes boomy and masks detail.
Do not chase maximum volume during setup.
Start with moderate playback levels, confirm every speaker works, and then increase volume gradually.
AV receivers may offer ECO or power-saving modes that reduce energy use, but those modes can also limit amplifier output or affect standby network behavior on some models. If the system seems less dynamic than expected or cannot be powered on over the network, check whether an energy-saving setting is involved.
- Open the receiver’s speaker configuration menu and select the correct layout.
- Set unused channels to off or none.
- Use bass management so low frequencies are routed appropriately to the subwoofer.
- Check distance and level values after calibration.
- Review ECO or standby settings if power, output, or network behavior seems unusual.
H3: Place the subwoofer for smoother bass before calibration
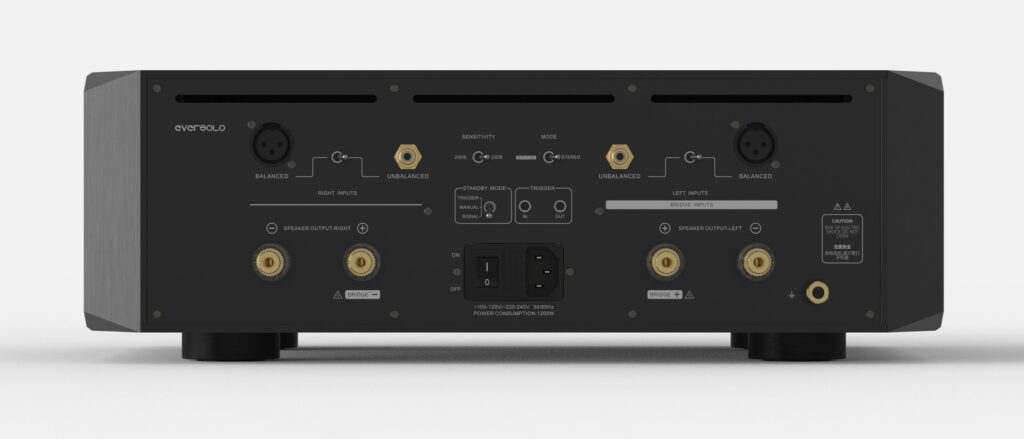
The subwoofer is not just another speaker connection on the AV receiver; it is the channel most affected by the room.
Bass frequencies spread in all directions and strongly interact with walls, windows, furniture, and parallel surfaces.
Reflections can create standing-wave peaks, where bass becomes boomy and indistinct, or dead zones, where bass almost disappears. This is why subwoofer placement must be considered before you run the receiver’s room correction.
A common starting point is the front area of the room, near the same wall as the TV and main speakers.
This keeps cable runs manageable and usually integrates well with the front soundstage.
The rule of thirds can also be useful: position the subwoofer about one-third of the distance between opposing walls rather than exactly halfway or randomly in a corner. This can help avoid some standing-wave problems.
Corner placement is another practical option.
Putting a subwoofer in a corner can increase bass output and reduce the chance of some dead zones, which may help in rooms where bass sounds weak.
However, corner loading can also make bass too strong or less defined in some spaces. If the bass becomes thick, uneven, or detached from the rest of the soundtrack, move the subwoofer away from the corner and recalibrate.
Avoid hiding the subwoofer inside a shelving unit, cabinet, or tight rack unless there is no alternative.
Low frequencies need room to develop, and furniture cavities can rattle or restrict performance.
In-wall subwoofers can work in custom installations, but they require proper enclosures and specialist installation. For most AV receiver users, a freestanding powered subwoofer connected to the receiver’s subwoofer output is the more flexible and serviceable choice.
Cable safety matters here too.
Long subwoofer cables or speaker cables across the floor can be trip hazards and can be damaged by feet, furniture, or pets.
Route cables along walls where possible, secure them neatly, and avoid pinching them under heavy furniture. Wireless subwoofer options can reduce cable clutter, but they still need power and should still be placed based on bass performance, not convenience alone.
- Start with the subwoofer near the front of the room or about one-third across the room dimension.
- Try a corner only if bass is too weak, then listen for boominess.
- Keep the subwoofer out of enclosed furniture if possible.
- Secure cables so they are not stepped on, pulled, chewed, or pinched.
- Move the subwoofer before calibration, not after, unless you plan to recalibrate.
H3: Run room calibration the right way
Room calibration is one of the most useful AV receiver features, but it is not magic.
Systems such as Audyssey, Dirac Live, MCACC, EMO-Q, and RoomPerfect measure the room and apply corrections so the receiver can better integrate speakers and subwoofers.
Some systems focus strongly on frequency response, while others also address timing or phase behavior. In practical terms, calibration helps the receiver compensate for the way your room changes the sound.
Use the calibration microphone supplied with the receiver or specified by the manufacturer.
Place it at the main listening position at ear height, not on a cushion, not in your hand, and not near a reflective surface if you can avoid it.
The room should be quiet: turn off loud fans, pause appliances if practical, and keep people and pets away from the microphone during sweeps. Do not change volume manually during the process unless instructed by the receiver.
Some correction systems benefit from multiple microphone positions.
The principle is simple: the receiver learns more about the acoustic behavior of the room when it measures more than one point around the listening area.
Lyngdorf’s RoomPerfect, for example, is described as using multiple microphone placements to gather a fuller picture of the room. Dirac Live, Audyssey, MCACC, and other systems also rely on measurement discipline, so follow the on-screen instructions rather than rushing through the process.
After calibration, inspect the results.
Confirm that the receiver detected the correct number of speakers, reasonable distances, and a subwoofer.
If a speaker is missing, very loud, very quiet, or assigned to the wrong position, there is likely a wiring or configuration problem. If the subwoofer level is extreme, adjust placement or subwoofer gain and run calibration again. Calibration should refine a sensible setup, not rescue a bad connection.
Finally, listen with familiar movie scenes and music.
If the sound is clear, dialogue is centered, effects move naturally, and bass supports rather than overwhelms the system, the receiver is doing its job.
If the calibrated sound is too restrained or too bright, many AV receivers allow target-curve, EQ, or correction-range adjustments. Make small changes and keep notes so you can return to a known good setup.
- Connect the correct calibration microphone to the AV receiver.
- Place the microphone at the main seat at ear height.
- Measure all requested positions and keep the room quiet.
- Review detected speakers, levels, distances, and crossover values.
- Re-run calibration after moving speakers, changing subwoofer placement, or rewiring channels.
H3: Maintain the AV receiver setup and troubleshoot common issues
Once the system is working, maintenance is mostly about keeping connections stable and settings documented.
Label speaker cables and HDMI inputs so future changes do not become guesswork.
Save or photograph key settings such as speaker layout, crossover values, HDMI input assignments, and room correction profile. If a firmware update is offered by the manufacturer, read the notes and perform it only when you have time to verify the system afterward.
If there is no sound from one speaker, first use the receiver’s test tone or channel level menu.
If the test tone is missing from the same speaker, inspect the speaker cable and terminal polarity, then confirm the channel is enabled in the speaker layout.
If the test tone works but a movie does not use that speaker, the issue may be the soundtrack, source audio output, or selected listening mode.
If HDMI video fails, simplify the chain.
Connect one source to one receiver input and the receiver to one display.
Check the HDMI cable, selected input, HDCP compatibility, and video format settings. For 8K, 4K/120, HDR, VRR, QFT, or ALLM, every device in the chain must support the feature. If a gaming feature does not engage, verify the console, receiver input, and display input settings rather than assuming the receiver is faulty.
If bass is uneven, do not only raise the subwoofer level.
Move the subwoofer, check that it is not inside furniture, try a different front-wall or corner position, and recalibrate.
Boomy bass is often a placement and room interaction problem, while missing bass at the listening seat can be a dead zone caused by cancellation. The AV receiver’s room correction can help, but placement gives it a better starting point.
If wireless streaming or Bluetooth is unreliable, make sure any supplied antennas are attached and positioned correctly.
A wired network connection can be more stable for receivers installed near a router or network switch, while Wi-Fi may be more convenient in other rooms.
If network standby or app power-on stops working, check power-saving modes because some receivers reduce standby network behavior to save energy.
- Label cables and HDMI inputs after the system is confirmed working.
- Use receiver test tones to separate speaker wiring faults from source-format issues.
- Troubleshoot HDMI with the simplest possible signal path first.
- Treat bass problems as placement and calibration issues before increasing level.
- Check antennas, network settings, and ECO modes when wireless or standby functions misbehave.
Concise AV receiver setup checklist
- Place the AV receiver on a ventilated, stable shelf with rear-panel access.
- Confirm your speaker layout before wiring: 5.1, 5.2, height channels, or a larger configuration.
- Turn the receiver off before connecting speaker cables.
- Wire each speaker to the matching receiver terminal and keep polarity consistent.
- Connect HDMI sources to the receiver and the receiver’s monitor/ARC output to the TV.
- Enable the required HDMI video features across the source, receiver, cable, and display.
- Set sources to output surround audio instead of forced stereo.
- Place the subwoofer in the room before calibration; avoid enclosed furniture.
- Run the receiver’s room calibration with the microphone at ear height and the room quiet.
- Review detected speakers, distances, levels, crossover settings, and subwoofer level after calibration.
- Save or note important settings for future troubleshooting.
Common AV receiver setup mistakes and how to avoid them
Connecting speakers with reversed polarity or stray wire strands.
Match red to red and black to black on every channel, trim exposed wire neatly, and power the receiver off before changing connections.
Assuming HDMI features work because only one device supports them.
For 4K, 8K, HDR, VRR, QFT, ALLM, ARC, or HDCP compatibility, confirm support across the source, receiver, HDMI cable, and display.
Putting the subwoofer wherever it is easiest to hide.
Treat placement as part of the AV receiver setup.
Try the front area, the rule-of-thirds approach, or a corner if bass is weak, then recalibrate.
Running room calibration once and never checking the results.
After calibration, verify speaker detection, distances, levels, crossover values, and subwoofer output.
Re-run calibration after any physical change.
Using the wrong listening mode or source audio setting.
Set sources to bitstream or automatic surround output when appropriate, and choose a receiver listening mode that matches the content and speaker layout.
Ignoring power-saving settings when features stop working.
If output seems limited or network power-on is unavailable, check ECO and standby settings in the AV receiver menu.
Frequently asked questions
Do I need an AV receiver for every 5.1 home theater system?
A conventional passive 5.1 speaker system normally needs an AV receiver or a separate processor and power amplification.
Some active subwoofer systems include built-in 5.1 amplifier technology and can drive satellite speakers without a separate receiver, but a standard AV receiver remains the usual hub for HDMI switching, surround decoding, amplification, bass management, and room calibration.
Should my speakers be set to large or small in the AV receiver menu?
In AV receiver setup, “small” usually means bass below the crossover is redirected to the subwoofer.
It is not a judgment of speaker quality.
Many systems work better when bass is managed by the subwoofer, but you should review the calibration result and adjust according to your speakers, room, and receiver options.
Where should I put the subwoofer before running calibration?
Start near the front of the room or about one-third of the way between opposing walls.
A corner can increase bass output if the system sounds weak, but it may also make bass boomy.
Avoid placing the subwoofer inside enclosed furniture, and recalibrate whenever you move it.
Why does my AV receiver show stereo when I expected Dolby Atmos or DTS:X?
The source may be outputting stereo PCM, the content may not include that format, the selected app may not support it, or the receiver may be in a listening mode that does not use the format.
Check the source audio output setting, the soundtrack selection, HDMI connection, and the receiver’s supported decoding formats.
Is room calibration enough to fix bad bass?
Room calibration can improve integration, but it cannot fully overcome poor subwoofer placement or severe room cancellation.
If bass is boomy or missing at the seat, move the subwoofer, check cable routing and gain, then run calibration again.
Why is there a delay between picture and sound?
Video processing and HDMI switching can create a mismatch between sound and picture.
Use the AV receiver’s audio delay or lip-sync adjustment, and check whether the TV, source, and receiver have automatic sync options enabled.
Conclusion: build the system first, then let the receiver optimize it
A successful home theater setup starts with the AV receiver but depends on the whole chain.
Plan the speaker layout, wire every channel safely, connect HDMI sources with the required video and audio compatibility, place the subwoofer where the room allows smoother bass, and then run room calibration carefully.
After calibration, always review the receiver’s detected speakers, distances, levels, crossover settings, and HDMI behavior. The best results come when physical setup and receiver configuration support each other: good placement gives calibration a better job to do, correct HDMI settings preserve video and surround formats, and tidy wiring makes troubleshooting faster. Take the process step by step and the AV receiver becomes what it should be: a reliable control center for clear dialogue, stable surround effects, and controlled home theater bass.

Join the discussion
Share your thoughts, listening impressions or product experience.