

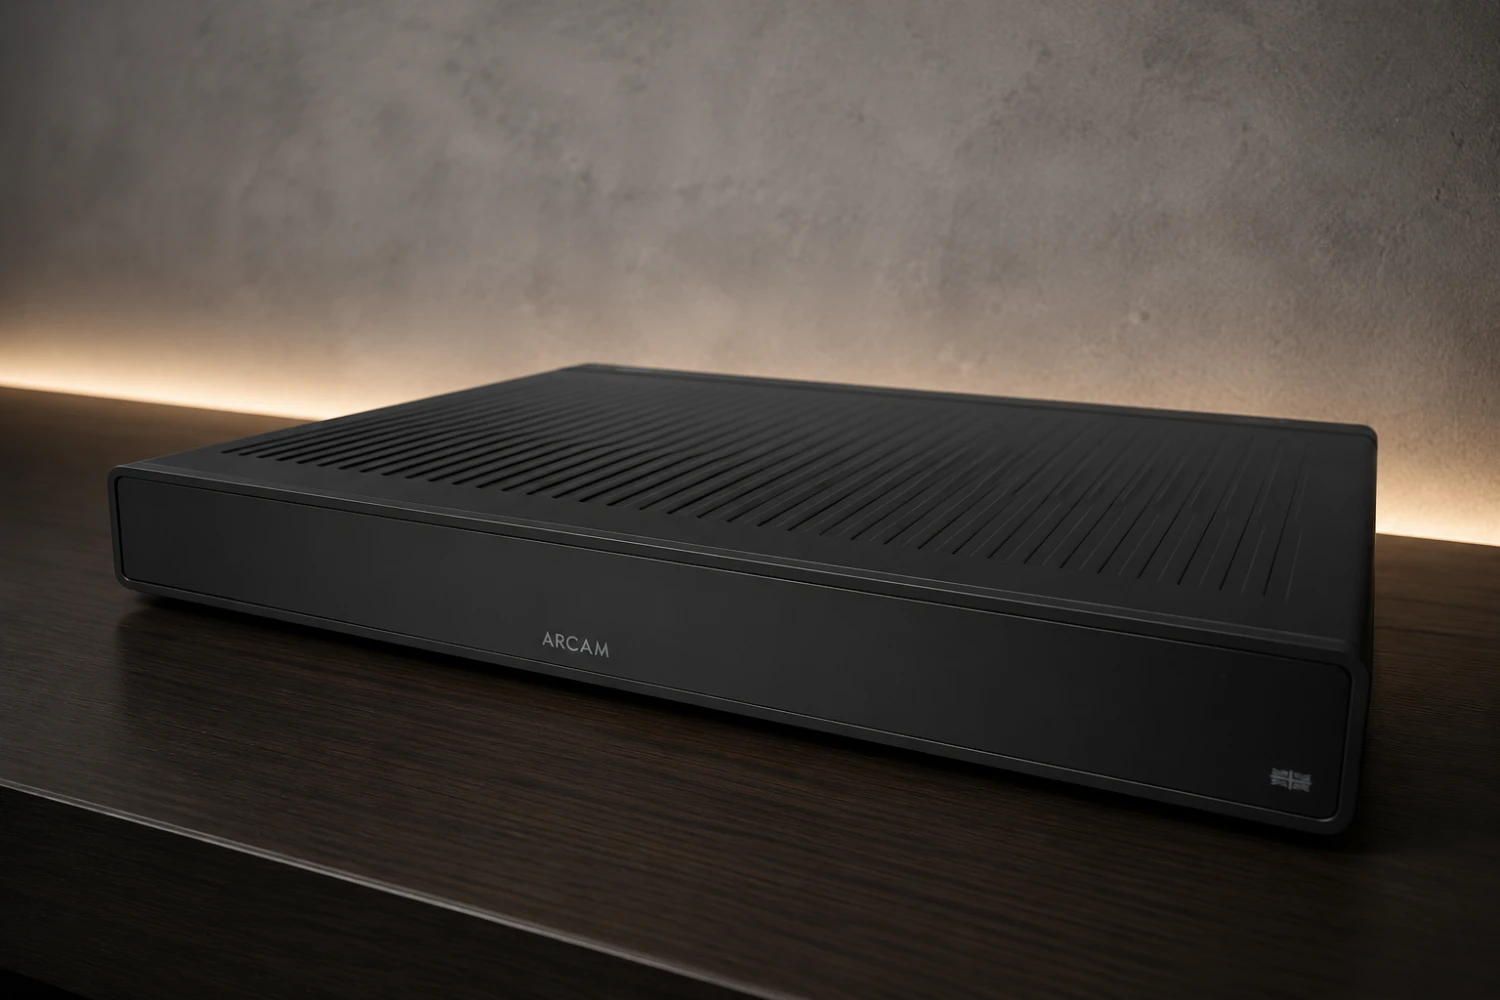
A hi-fi network streamer can make digital music feel effortless: open an app, choose an album from a streaming service or local library, and play it through your main system.
The difficulty is that reliable, high-quality playback depends on more than buying the right box.
Network stability, output choice, DAC compatibility, app setup, storage, power, and software support all matter. This guide explains how to install and configure a network streamer for dependable everyday listening while keeping the signal path appropriate for a serious hi-fi system.
What a network streamer does in a hi-fi system
A network streamer is the bridge between your music sources and your audio system.
It receives music over a home network or from directly attached storage, then sends audio onward either as an analog signal to an amplifier or as a digital signal to an external DAC, integrated amplifier, active speaker, or processor.
Some streamers include their own DAC, so they can connect directly to an amplifier through analog RCA or balanced XLR outputs.
Others are designed mainly as streaming bridges, meaning they output digital audio through connections such as coaxial S/PDIF, optical Toslink, USB, AES/EBU, or I2S over HDMI.
Some modern units combine many roles: a streamer may also include local storage, support UPnP server functions, act as a Roon Core, or integrate services such as Spotify Connect, Tidal Connect, Qobuz, AirPlay 2, Chromecast, internet radio, or Bluetooth.
The first setup decision is therefore not only “How do I get it online?” but “What job should it perform?” If the streamer’s internal DAC is suitable for your system, analog output keeps the system simple.
If you already own a capable DAC or an amplifier with high-quality digital inputs, using the streamer as a digital transport may be the better match.
- Identify whether your streamer has analog outputs, digital outputs, or both.
- Decide whether the streamer or another component will perform digital-to-analog conversion.
- List the services and playback methods you actually use: Roon, UPnP, Spotify Connect, Tidal Connect, Qobuz, AirPlay, Chromecast, internet radio, local USB storage, or NAS playback.
- Check that your chosen control app supports your phone or tablet platform before final installation.
Plan the network before connecting audio cables
Reliable streaming starts with the network.
A hi-fi streamer may support Ethernet, Wi‑Fi, or both.
Some models also provide fiber optic networking, which has a specific advantage: fiber optic cable does not carry electrical noise and provides galvanic isolation between network devices. The Lumin T3X is one example of a network player offering both RJ45 LAN and fiber optic connections, while retaining conventional wired network flexibility.
For most permanent hi-fi systems, use a wired connection whenever practical.
Ethernet avoids many of the variables that affect wireless playback, such as distance from the router, walls, congestion, and interference from other devices.
Wi‑Fi can still be convenient and perfectly usable when the signal is strong, but if you are troubleshooting dropouts, Ethernet is the first comparison to make.
Think about where your music lives.
If you use online services only, the streamer mainly needs stable internet access.
If you use a NAS or local music server, the connection between the streamer and local storage is just as important. Some network players with multiple network connections can sit between a router and another music-storage device, but this should be used only when the manufacturer’s design supports it.
- Place the streamer close enough to the router, switch, or network outlet to use a short, secure Ethernet cable if possible.
- If your streamer supports fiber networking and your system is built around noise isolation, consider fiber as an option, but confirm the required network hardware and cable type in the manual.
- For Wi‑Fi setup, start with the streamer in a location where the signal is strong before moving it into a difficult rack position.
- If using a NAS or music server, confirm that the streamer supports the required protocol, such as UPnP or Roon.
Choose the right audio connection: analog, digital, USB, S/PDIF, or I2S
The audio output you choose affects compatibility, features, and upgrade options.
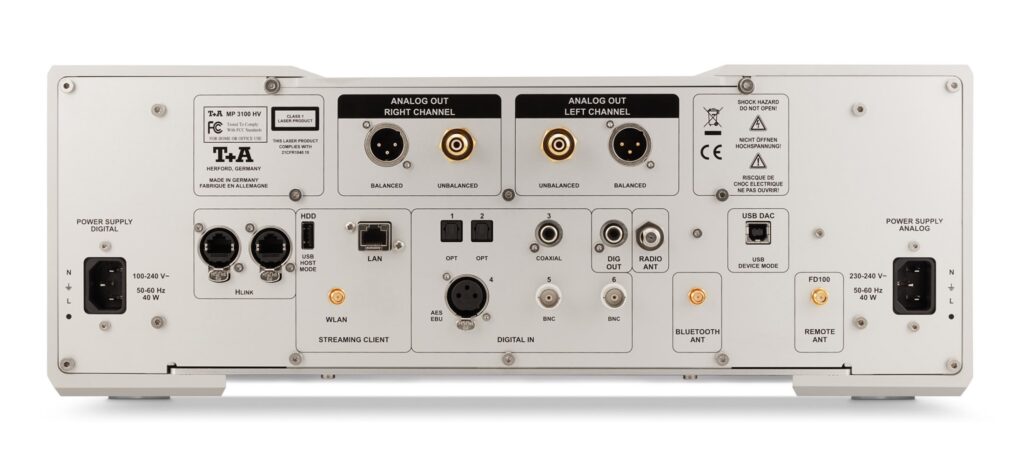
Analog RCA or balanced XLR outputs mean the streamer’s internal DAC is doing the conversion.
This is simple: connect the streamer to a line-level input on an integrated amplifier, preamplifier, or active speaker system. Do not connect a line-level streamer output to a phono input, which is designed for turntables and has the wrong gain and equalization.
Digital outputs send the music data to another DAC-equipped component.
Common choices include coaxial S/PDIF, optical Toslink, USB audio, AES/EBU, and I2S over HDMI.
The Cambridge Audio EXN100, for example, offers both analog outputs and digital connectivity, while the Arcam ST5 provides Ethernet, Wi‑Fi, USB-A for local storage, optical and coaxial digital outputs, and analog RCA outputs. Streamers such as the Volumio Rivo+ emphasize digital output options including coaxial S/PDIF, AES/EBU, and I2S over HDMI for compatible DACs.
Compatibility matters more than connector shape.
I2S over HDMI is not the same as ordinary HDMI video/audio for a television, and pin configurations can vary between manufacturers.
HDMI eARC, on the other hand, is intended for receiving TV audio on products that support it, such as certain streamers with HDMI ARC/eARC inputs. USB-A can mean local storage on one device and digital audio output on another, so read the input/output labeling carefully.
- Power down or mute your amplifier before connecting or disconnecting signal cables.
- Use analog RCA or XLR if you want the simplest setup and the streamer’s built-in DAC will be used.
- Use coaxial, optical, USB, AES/EBU, or I2S only if the receiving DAC or amplifier supports that input and the formats you intend to play.
- For I2S over HDMI, confirm compatibility between the streamer and DAC rather than assuming all HDMI-shaped ports behave alike.
- After connecting, select the correct input on the amplifier or DAC and start with low volume.
Configure the control app and streaming services
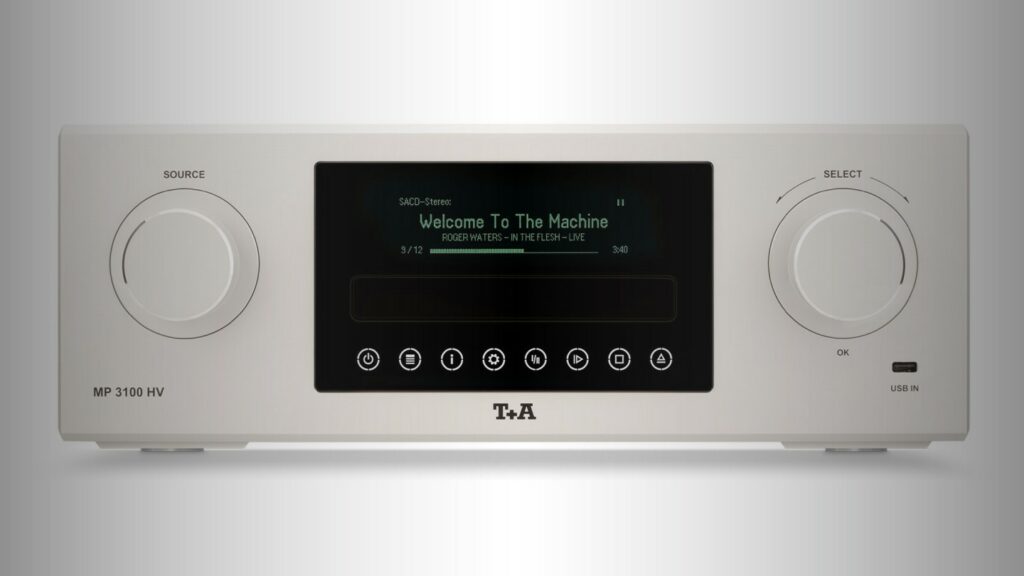
Most modern streamers are controlled primarily from an app.
The app may be manufacturer-specific, such as Cambridge Audio’s StreamMagic platform or Arcam’s Radia app, or it may rely on third-party ecosystems such as Roon, AirPlay, Chromecast, Spotify Connect, Tidal Connect, or UPnP control apps.
The app is not a minor accessory; it is the daily interface for browsing, playback, updates, input selection, and sometimes system settings.
Connect-style services are straightforward because the music app hands playback to the streamer.
Spotify Connect and Tidal Connect are examples found on various streamers.
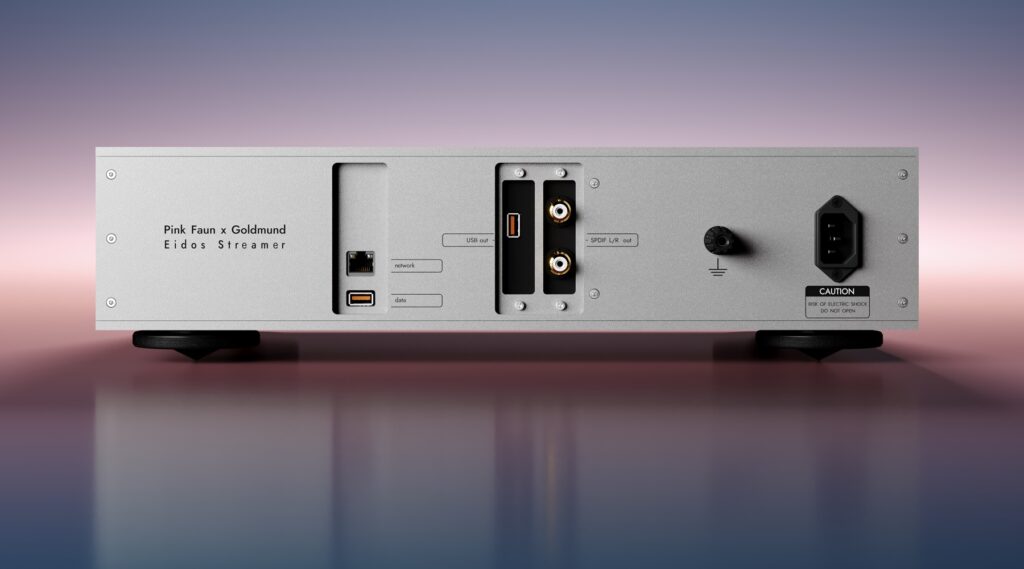
AirPlay 2 and Chromecast provide convenient casting from phones, tablets, and computers. Roon differs because it organizes a library and sends audio to compatible endpoints; some devices are Roon Ready endpoints, while others can function as Roon Core or server devices. The Goldmund x Pink Faun Eidos Streamer and Gustard S26 are examples of streamers described with Roon Core capability, while other models advertise Roon Ready support.
Keep account setup organized.
Sign in to each service inside the appropriate app, name the streamer clearly, and avoid creating several similar device names.
If your streamer supports both its own app and direct service control, test each method. You may prefer one app for album listening, another for casual playlists, and UPnP or Roon for local files.
- Install the official control app on a current iOS or Android device if the streamer supports one.
- Update the streamer’s firmware during initial setup if an update is offered by the manufacturer’s app.
- Give the streamer a clear room name such as “Main System” or “Listening Room.”
- Sign in to streaming services one at a time and verify playback before adding more accounts.
- If using Roon, confirm whether the streamer is an endpoint, a Core/server, or both, then configure it accordingly.
Set up local music libraries, USB storage, and NAS playback
Streaming does not have to mean cloud-only listening.
Many network players support local files from USB drives, internal storage, NAS libraries, or server software.
This matters for listeners who own high-resolution downloads, DSD files, or large archived libraries. Some streamers include large internal storage, while others provide USB-A ports or support network shares and UPnP.
Local libraries also protect part of your system from service changes.
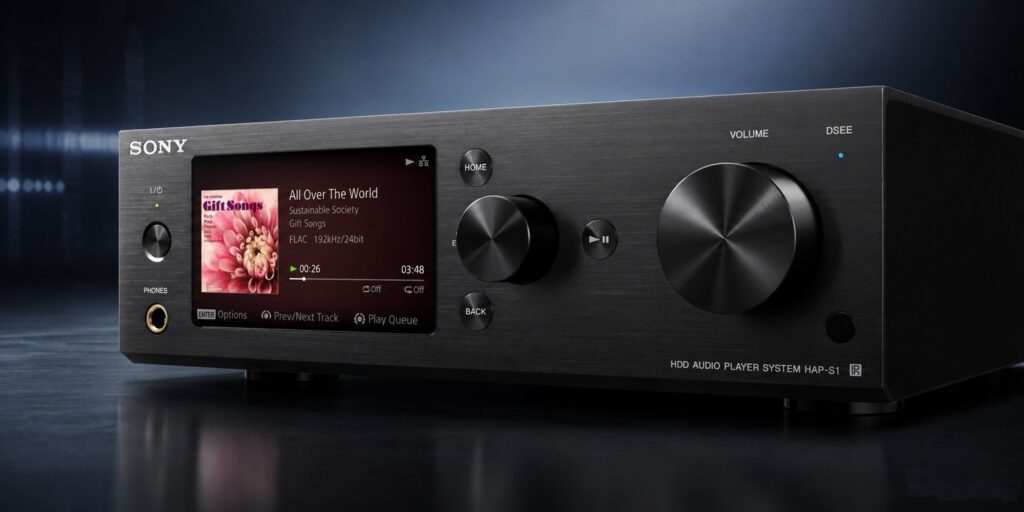
Sony’s decision to discontinue support for several streaming services on older connected products from November 2026 is a reminder that online features can be temporary.
In that case, local playback from internal hard drives on affected music servers remains intact, while certain online services are scheduled to disappear. The broader lesson is evergreen: keep important music accessible locally if long-term availability matters to you.
File-format support varies.
Examples in current streamers include support for FLAC, WAV, ALAC, AIFF, AAC, DSD, and other formats, but supported resolution can depend on the output.
A streamer may handle higher rates over USB or I2S than over optical or coaxial S/PDIF. Do not assume that every input and output supports every format listed on the product page.
- Choose one library location: internal drive, USB storage, NAS, or Roon/UPnP server.
- Use a consistent folder structure and metadata so albums are easy to find in the app.
- If the streamer offers a USB-A port, confirm whether it is for storage, audio output, or both.
- For NAS playback, enable the correct server function, such as UPnP, and make sure the streamer can see it on the same network.
- Test PCM and DSD files separately if you use both, because they may follow different playback paths.
Match the streamer to your DAC, amplifier, and speakers
A network streamer must match the rest of the system electrically and functionally.
If using analog outputs, connect to a normal line input on the amplifier.
If the streamer offers both fixed and variable output, choose fixed output when feeding an integrated amplifier or preamplifier that controls volume. Use variable output only when the streamer is intended to drive active speakers or a power amplifier directly and the manufacturer supports that configuration.
If using digital output, the DAC determines what file types and sample rates can actually be converted.
For example, a streamer may advertise very high PCM or DSD capability on one output, while optical or coaxial outputs may be limited to lower rates.
This is not necessarily a fault; different digital interfaces have different practical roles. Match the output to the receiving device rather than chasing the highest number.
System integration features can also matter.
A 12V trigger output, as found on the Volumio Rivo+, can switch compatible equipment on or off with the streamer.
Control links, trigger inputs and outputs, and paired-system remotes can make streaming feel more like a traditional hi-fi source. Use these features only with compatible components and the correct trigger cables.
- For analog connection, use a line input and begin with the amplifier volume low.
- For digital connection, check the DAC’s supported inputs and formats, not just the streamer’s specifications.
- Use fixed output into an amplifier with its own volume control unless your system design requires variable output.
- If connecting active speakers, confirm whether they accept analog, digital, network, or proprietary inputs.
- Before using a 12V trigger, verify voltage compatibility and connector type in both manuals.
Place the streamer for stability, cooling, and low noise
A streamer is a computer-like audio component, so placement affects reliability.
Give it ventilation, especially if it contains internal storage, a powerful processor, or a substantial power supply.
Some streamers are designed with passive cooling or heatpipe systems for silent operation, while others use carefully arranged internal power supplies and clocking. Regardless of design, heat buildup in a closed cabinet is not helpful.
Mechanical stability is also useful.
Place the streamer on a level shelf where cables do not pull on the rear panel.
Avoid stacking it directly on hot amplifiers unless the manufacturer specifically allows it. Keep power cables and signal cables tidy and avoid bending optical cables sharply. Fiber and optical links can be useful, but damaged or poorly seated connectors can cause intermittent behavior.
Power quality is part of many hi-fi streamer designs.
Some models use linear power supplies, toroidal transformers, separate supply circuits, low-noise regulators, or surge protection internally.
These design choices are handled by the manufacturer; the user’s job is to provide a safe, stable mains connection and avoid unsafe modifications.
- Install the streamer on a stable, ventilated shelf.
- Do not block vents or trap the unit in a sealed cabinet.
- Keep network and audio connectors fully inserted without cable strain.
- Avoid placing the streamer directly on top of a heat-producing amplifier.
- Use the supplied power cable or a manufacturer-approved alternative, and do not open the unit unless the manual explicitly permits user service.
Maintain software, services, and long-term usability
Network streamers depend on software as much as hardware.
Firmware updates can improve app behavior, service compatibility, driver support, and system stability.
Some streaming platforms and operating systems are designed around regular updates and driver optimizations. However, software support is not permanent across the industry, and streaming services can change requirements or disappear from older products.
For long-term reliability, treat a streamer as part hi-fi component and part connected device.
Keep the app installed on a supported phone or tablet.
Save login details for services. Back up local music libraries. If your streamer stores music internally or accepts an SSD upgrade, follow manufacturer instructions and keep another copy of valuable music elsewhere.
When buying or configuring a streamer, prefer open and flexible playback paths where possible.
A device that supports local files, UPnP, Roon, digital outputs, and direct service connections gives you more options if one service changes.
This is not about avoiding streaming services; it is about making sure the system remains useful beyond any single app.
- Check for firmware updates periodically through the official app or manufacturer instructions.
- Keep your phone, tablet, or computer control device current enough to run the required app.
- Back up local music files before changing drives, installing storage, or resetting the streamer.
- Maintain at least one playback method that does not depend on a single cloud service.
- Record your network name, streamer name, and key settings so recovery is easier after router changes.
Troubleshooting dropouts, missing devices, and no sound
Most streamer problems fall into three groups: network discovery, service login, or audio routing.
If the app cannot find the streamer, start with the network.
Confirm that the streamer and control device are on the same home network. Restart the app, then the streamer, and then the router if needed. If Wi‑Fi is unstable, temporarily connect Ethernet to separate wireless problems from streamer problems.
If playback starts but drops out, test with a different source.
Try internet radio or a lower-demand streaming service, then try a local file.
If local playback works but cloud playback fails, the issue may be internet service, account authorization, or the streaming platform. If every source fails, inspect network cabling, router placement, and firmware status.
If there is no sound, follow the signal path.
The streamer may be playing, but the amplifier may be on the wrong input, the DAC may not lock to the signal, or the output mode may be set incorrectly.
Optical, coaxial, USB, analog, and HDMI-related connections are not interchangeable. Also check volume settings: some apps control only playback selection, while others can control digital or analog volume.
- Confirm power, network connection, and app discovery before changing audio settings.
- Try Ethernet if Wi‑Fi playback is unreliable.
- Test another service or a local file to determine whether the problem is network-wide or service-specific.
- Check the selected output in the streamer app and the selected input on the DAC or amplifier.
- If using digital output, confirm that the DAC supports the file format currently being played.
- After firmware updates or router changes, reboot the streamer and reopen the control app.
Concise hi-fi streamer setup checklist
- Decide whether the streamer will use its internal DAC or feed an external DAC.
- Use wired Ethernet where practical; consider fiber only if the streamer and network hardware support it.
- Install the official control app and update firmware before serious listening.
- Name the device clearly and sign in to streaming services one at a time.
- Match digital outputs to DAC inputs and supported formats.
- Use line-level analog inputs, not phono inputs, when connecting RCA or XLR analog outputs.
- Set up local storage, NAS, UPnP, or Roon if you own music files.
- Place the streamer on a stable, ventilated shelf with no cable strain.
- Back up local libraries and keep at least one playback path independent of cloud services.
- Document key settings so troubleshooting is easier later.
Common mistakes and how to avoid them
Assuming Wi‑Fi problems are audio problems.
Test the streamer with Ethernet before changing DACs, cables, or app settings.
If Ethernet fixes dropouts, improve Wi‑Fi placement or keep the wired connection.
Connecting analog outputs to a phono input.
Use a normal line input such as AUX, CD, tuner, or line.
Phono inputs are for turntables and are not suitable for streamer line output.
Assuming every digital output supports every file format.
Check the supported formats for the specific output you are using.
Optical, coaxial, USB, AES/EBU, and I2S may have different capabilities.
Treating I2S over HDMI as ordinary HDMI.
Confirm I2S compatibility between the streamer and DAC.
HDMI-shaped I2S ports are not the same as TV HDMI or HDMI eARC.
Relying entirely on one streaming service.
Keep local files or another playback method available.
Online services and device support can change over time.
Skipping firmware and app maintenance.
Update through the official app when appropriate, keep the control device compatible, and back up important library data before resets or storage changes.
Frequently asked questions
Is Ethernet always better than Wi‑Fi for a network streamer?
Ethernet is usually the safest choice for a fixed hi-fi system because it removes many wireless variables.
Wi‑Fi can work well when the signal is strong, but if you experience dropouts or the app cannot find the streamer reliably, test with Ethernet first.
Should I use the streamer’s analog outputs or digital outputs?
Use analog outputs if you want the streamer’s built-in DAC to handle conversion and you want a simple connection to an amplifier.
Use digital outputs if you prefer an external DAC, a DAC-equipped amplifier, or active speakers with digital inputs.
The best choice depends on system matching and supported formats.
What is UPnP in a streaming system?
UPnP is a network playback method that lets compatible devices find and play music from a local server, such as a NAS or computer-based music library.
It is useful when you own music files and want playback without relying only on cloud services.
What is the difference between Roon Ready and Roon Core?
A Roon Ready device is an endpoint that receives playback from a Roon system.
A Roon Core is the server that manages the library and sends music to endpoints.
Some streamers are endpoints only, while certain music-server-style streamers can run or support Roon Core functions.
Do I need local storage if I mainly use streaming services?
Not necessarily, but local storage is useful if you own downloads, high-resolution files, DSD music, or albums you want available regardless of service changes.
Keeping important music locally also protects you from future app or platform support changes.
Why does my DAC show no signal from the streamer?
Check that the streamer is set to the output you connected, the DAC is on the matching input, and the file format is supported by that input.
Also inspect the cable and try a basic PCM file before testing higher-resolution or DSD material.
Conclusion: build the streaming chain, not just the streamer
A reliable hi-fi streaming setup is the result of a complete chain: stable network, correct output choice, compatible DAC or amplifier, well-configured app, sensible placement, and ongoing software maintenance.
Start with Ethernet where possible, choose analog or digital output deliberately, verify format support at both ends, and keep local playback options if long-term access matters.
Once the fundamentals are right, a network streamer becomes what it should be: a quiet, convenient, high-quality source that integrates modern music access into a serious hi-fi system without constant troubleshooting.


Join the discussion
Share your thoughts, listening impressions or product experience.