


A turntable is a mechanical playback system, not just a source component.
The platter, bearing, motor, tonearm, cartridge, stylus, cables, phono stage, support furniture, and records all affect the signal before it ever reaches your amplifier.
Small setup errors can cause distortion, mistracking, hum, unstable imaging, excessive surface noise, or unnecessary record wear. The good news is that most improvements come from careful installation rather than expensive upgrades. This guide explains how to set up a turntable methodically for cleaner, more stable vinyl playback, with practical steps for placement, cartridge setup, connections, maintenance, and troubleshooting.
Choose a stable location before you unpack the turntable
Turntables are sensitive to vibration because the stylus is reading microscopic groove movement.
Anything that shakes the plinth, platter, tonearm, or record can be added to the music signal as rumble, feedback, blur, or skipping.
That is why placement is the first setup decision, not the last.
Use a rigid, level, low-resonance surface that does not wobble when you walk nearby.
Keep the turntable away from speakers, subwoofers, and furniture that visibly vibrates at higher listening levels.
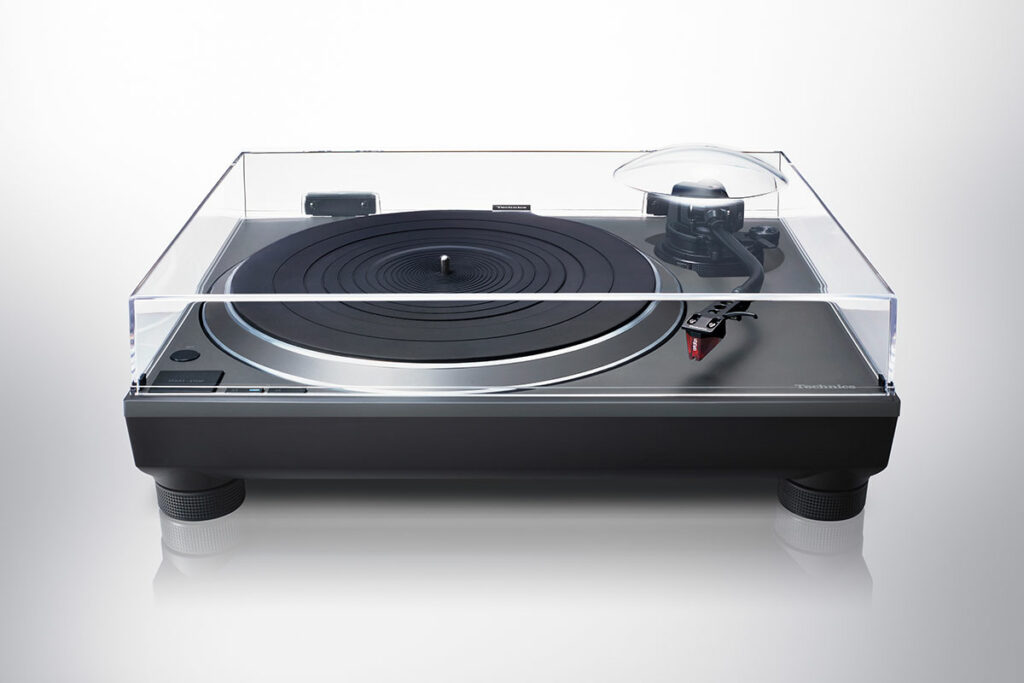
Many modern decks use design features intended to reduce vibration: for example, some Pro-Ject models use CNC-milled plinths, glass platters, selected feet, and belt-drive systems, while Technics direct-drive models combine robust chassis construction with engineered isolation feet. These features help, but they cannot fully compensate for a poor support surface.
Avoid placing a turntable directly on top of a loudspeaker, home-theater subwoofer, lightweight cabinet, or flexible shelf.
Also avoid placing it where the dust cover or tonearm can be knocked by children, pets, sleeves, or cleaning tools.
If the room has springy floors, a wall shelf mounted to a solid wall can sometimes be more stable than a freestanding cabinet.
- Place the turntable on the most rigid, low-vibration surface available.
- Keep it as far from speakers and subwoofers as your room and cable lengths allow.
- Make sure there is enough space behind the deck for cables, hinges, and dust-cover movement.
- Do not run signal cables tightly alongside power cables if avoidable, as this can make hum problems harder to solve.
Level the plinth and platter
A level turntable helps the bearing, platter, tonearm, and cartridge behave as intended.
If the deck tilts, the stylus may press harder on one groove wall than the other, anti-skate may behave unpredictably, and tonearm movement may become less consistent.
Use a small bubble level on the platter surface, not only on the furniture.
If the platter is removable, install it correctly first, including any belt, mat, or sub-platter parts required by the manufacturer.
Some turntables have adjustable feet; others require shims or a better support surface. Do not force the feet beyond their normal adjustment range.
- Install the platter and mat according to the turntable manual.
- Place a bubble level on the platter near the spindle, then check front-to-back and side-to-side.
- Adjust the turntable feet or support surface until the platter is level.
- Recheck level after moving the deck, changing furniture, or adding isolation accessories.
Understand belt drive, direct drive, and speed setup
The drive system rotates the record at the correct speed.
Belt-drive turntables use a motor, belt, and platter or sub-platter arrangement.
The belt can help isolate motor vibration from the platter, but belt condition and correct installation matter. Direct-drive turntables place motor control at the platter system itself. Modern direct-drive designs may use advanced motor control to reduce rotational inconsistency and micro-vibration.
Whichever system you use, stable rotation is essential.
A record played too fast or too slow changes pitch; inconsistent rotation can make sustained piano notes, vocals, and strings sound unstable.
Some turntables switch between 33 and 45 rpm electronically, while others require moving a belt to a different pulley position. Always follow the manual rather than guessing.
If your turntable includes a 45 rpm adapter, keep it nearby but do not leave loose accessories where they can slide into the tonearm path.
For belt-drive models, inspect the belt occasionally for twisting, slipping, contamination, or incorrect seating.
- Confirm whether your record is 33 rpm or 45 rpm before playback.
- Select speed using the turntable’s switch or belt position as specified by the manufacturer.
- On belt-drive decks, make sure the belt sits flat and is not twisted.
- If pitch sounds unstable, check belt seating, platter installation, and whether the turntable is on a stable, level surface.

Install the cartridge carefully, or verify the factory setup
The cartridge converts groove movement into an electrical signal.
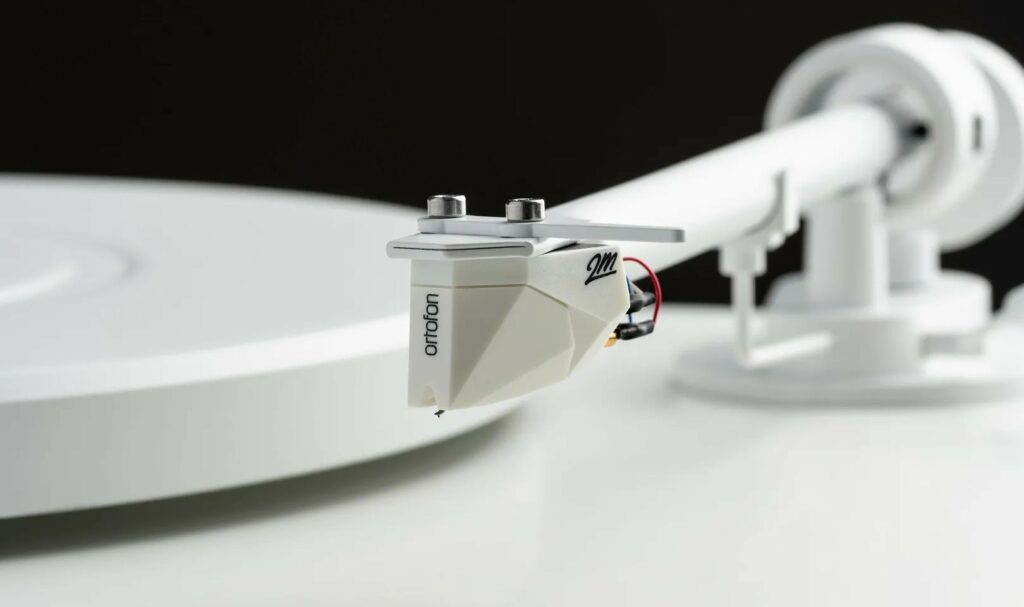
Many entry and mid-level turntables arrive with a pre-installed moving magnet cartridge, such as models supplied with Ortofon, Sumiko, or Pro-Ject-branded cartridges.
A factory-installed cartridge can make setup easier, but it is still worth checking that the stylus guard, tracking force, anti-skate, and tonearm balance are correct before playing valuable records.
If you install a cartridge yourself, handle it as a precision component.
The cantilever is the tiny arm that holds the stylus; it can be bent or broken by a slip of the hand.
Work in good light, use the stylus guard whenever possible, and do not connect or disconnect headshell wires with the amplifier volume turned up.
Cartridge mounting geometry matters because the tonearm does not track the groove in a perfectly straight line across the record.
Alignment adjusts overhang and offset angle so the stylus sits in the groove at the intended angle across the playing area.
Overhang is how far the stylus sits beyond the spindle-to-arm geometry reference; offset angle is the cartridge’s slight twist in the headshell. A tonearm with a detachable armwand or headshell can make this work easier because the cartridge can be handled away from the platter, reducing risk.
- Switch off the amplifier or mute the input before handling cartridge leads.
- Fit the cartridge squarely and loosely enough that it can still move for alignment.
- Connect headshell wires to the correct cartridge pins according to the color code or manual.
- Use the alignment tool or protractor specified for your turntable or tonearm.
- Tighten mounting screws evenly after alignment, but do not overtighten.
Set tracking force accurately
Tracking force is the downward force applied by the stylus in the groove.
Too little force can cause mistracking, sibilance, skipping, and groove damage because the stylus bounces or loses proper contact.
Too much force can also increase wear and reduce cartridge performance. The correct setting is the cartridge manufacturer’s recommended range, not a universal number.
Some cartridges publish a recommended force within a range.
For example, Sumiko’s Oriole moving-coil cartridge specifies a stylus force range of 1.8 grams to 2.2 grams with a recommended setting of 2.0 grams.
That number is specific to that cartridge. A different moving magnet or moving coil cartridge may require a different setting, so always check the cartridge manual or the turntable documentation if the cartridge came pre-installed.
Many tonearms use a counterweight scale, but a stylus force gauge is usually the more reliable way to confirm the real force at record height.
When balancing a tonearm, keep the stylus guard on until you are ready to measure, and make sure anti-skate is temporarily set as instructed by the tonearm manual.
- Find the recommended tracking-force range for your exact cartridge.
- Balance the tonearm according to the tonearm manual.
- Set the counterweight to the recommended value or the middle of the recommended range unless the manufacturer specifies otherwise.
- Verify the result with a stylus force gauge placed at record height.
- Recheck tracking force after changing cartridges, headshells, mats, or counterweights.
Set anti-skate so the stylus tracks both groove walls evenly
Anti-skate is a small outward force that counteracts the tonearm’s natural tendency to pull inward as the record rotates.
Correct anti-skate helps the stylus sit more evenly between the left and right groove walls.
If it is badly wrong, you may hear channel imbalance, inner-groove distortion, uneven stylus wear, or mistracking in demanding passages.
Many turntables provide a dial, weight, spring, or magnetic adjustment.
Some tonearms use more advanced stabilization systems; the principle is still to control tonearm behavior without adding unnecessary friction or instability.
Follow the tonearm instructions first. A common starting point is to match anti-skate to the tracking force where the tonearm design recommends that approach, then fine-tune if the manual provides a method.
Do not obsess over anti-skate before the basics are right.
Leveling, cartridge alignment, and tracking force must be correct first.
Anti-skate is a fine adjustment, not a cure for a tilted plinth, worn stylus, dirty record, or misaligned cartridge.
- Set tracking force first.
- Apply the anti-skate setting recommended by the tonearm or turntable manual.
- Listen for persistent distortion in one channel, especially near the inner grooves.
- If problems remain, recheck alignment and tracking force before making large anti-skate changes.
Check azimuth and stylus orientation where adjustable
Azimuth is the side-to-side angle of the cartridge when viewed from the front.
Ideally, the stylus should sit vertically in the groove rather than leaning left or right.
Poor azimuth can reduce channel separation, disturb channel balance, and increase distortion. Some arms offer azimuth adjustment; others do not, especially on simpler plug-and-play decks.
Advanced tonearms may provide precise azimuth calibration because small geometry errors matter more with refined stylus profiles.
The Graham Phantom platform, for example, uses magnetic lateral stabilization in a way that also enables precise azimuth calibration.
That is a high-end example of the same basic idea: the cartridge must sit correctly relative to the groove.
If your tonearm has no azimuth adjustment, do not force parts that are not designed to move.
Instead, make sure the cartridge is mounted flat, the headshell is properly seated, and the stylus is not damaged.
If the cantilever visibly leans, consult the cartridge supplier or a qualified technician.
- View the cartridge from the front with the stylus resting safely on a stationary record or setup block.
- Check whether the cartridge body appears level and the stylus appears vertical.
- Use only the azimuth adjustment method provided by the tonearm manufacturer.
- If there is no adjustment, verify correct cartridge seating rather than improvising.
Connect the turntable to the right input
A phono cartridge outputs a very small signal that needs special equalization and gain before it can be used like a normal line-level source.
A phono stage, also called a phono preamplifier, performs this job.
Some turntables include a built-in phono stage, allowing direct connection to a standard amplifier input. For example, certain modern turntables are designed with integrated phono amplification for easier system matching. Other decks require an amplifier with a phono input or an external phono preamp.
Do not connect a turntable without a built-in phono stage to a normal AUX, CD, tuner, or line input unless an external phono preamp is in between.
The sound will be extremely quiet and tonally wrong.
Conversely, do not run a turntable’s already-amplified line output into another phono input, because that can overload the phono stage and cause severe distortion.
Grounding also matters.
Many turntables provide a ground wire that should be attached to the amplifier or phono stage ground terminal.
Some cable systems are shielded or semi-balanced to reduce noise, but correct grounding and cable routing remain important. If your turntable offers Bluetooth, treat it as a convenience feature; for the cleanest traditional analog path, use the wired phono or line connection configured correctly.
- Identify whether your turntable output is phono-level, line-level, or switchable.
- If using phono-level output, connect to a phono input or external phono preamp.
- If using line-level output from a built-in phono stage, connect to AUX, CD, line, or another standard analog input.
- Attach the ground wire if your turntable provides one and the receiving component has a ground terminal.
- Keep phono cables away from power supplies and power cords where possible.
Match moving magnet and moving coil cartridges correctly
Moving magnet, abbreviated MM, and moving coil, abbreviated MC, are two common cartridge types.
MM cartridges usually have higher output and are commonly supported by built-in phono stages and amplifier phono inputs.
MC cartridges often have lower output and may require a phono stage with more gain and appropriate loading.
Loading is the electrical resistance and capacitance the cartridge sees at the phono input.
It can affect frequency response, noise, and tonal balance.
Capacitance is especially relevant with many MM cartridges, while impedance loading is central to MC setup. As a concrete example, Sumiko’s Oriole MC cartridge has a low 0.3 mV output and specifies a load impedance greater than 55 ohms, plus capacitance guidance of 100 pF to 200 pF. Those values are not universal; they show why cartridge and phono-stage compatibility must be checked before purchase or installation.
If your phono stage has MM and MC settings, choose the one that matches the cartridge.
If it has adjustable gain or loading, start with the cartridge manufacturer’s recommendation.
If your turntable came with a pre-installed MM cartridge, the built-in or bundled phono connection may already be chosen for that cartridge type, but verify before changing cartridges.
- Identify the cartridge type: MM or MC.
- Check cartridge output, recommended load, tracking force, and capacitance guidance if provided.
- Set the phono stage to MM or MC as appropriate.
- Use manufacturer-recommended loading as the starting point.
- When upgrading from MM to low-output MC, confirm that your phono stage has enough gain and suitable loading options.
Use the dust cover, mat, and accessories thoughtfully
A dust cover protects the platter, tonearm, and record surface when the turntable is not in use.
During playback, the best practice depends on the turntable, room, and dust-cover design.
A raised cover can sometimes catch airborne vibration; a closed cover can sometimes reflect sound or transmit vibration through hinges. If feedback or low-frequency boom appears at higher volume, try playing with the cover removed or open, then compare behavior without changing other settings.
The mat supports the record and affects how securely it sits on the platter.
Use the mat supplied or recommended by the manufacturer unless you understand how a different mat changes record height and vertical tracking angle.
Vertical tracking angle refers to the front-to-back angle of the stylus/cantilever as it sits in the groove. Changing mat thickness can alter that angle and may require tonearm height adjustment if available.
Keep the 45 rpm adapter, stylus brush, and record brush organized away from the platter.
Loose accessories near a spinning record are a needless risk.
- Keep the dust cover closed when the turntable is not in use.
- If acoustic feedback occurs during playback, experiment with cover position or removal.
- Use the supplied mat unless you have a clear reason to change it.
- After changing mat thickness, recheck tonearm height if your arm allows adjustment.
- Never place loose tools or adapters near the moving tonearm.
Concise turntable setup checklist
- Place the turntable on a rigid, low-vibration, level surface away from speakers and subwoofers.
- Install the platter, belt or drive parts, mat, and dust cover according to the manual.
- Level the platter, not just the furniture.
- Confirm the correct record speed and make sure the belt or direct-drive system is operating normally.
- Verify cartridge alignment, overhang, and offset angle if the cartridge is user-adjustable.
- Set tracking force to the cartridge manufacturer’s recommended value or range.
- Set anti-skate according to the tonearm instructions after tracking force is correct.
- Check azimuth only if your tonearm allows safe adjustment.
- Connect phono-level output to a phono input or phono preamp; connect line-level output to a normal line input.
- Attach the ground wire if provided and route cables away from power cords.
- Match MM or MC cartridge type to the correct phono-stage settings.
- Clean records and stylus regularly, and inspect the stylus for wear or damage.
Common turntable setup mistakes and how to avoid them
Connecting a phono-level turntable to a standard line input.
Use a phono input or external phono preamp unless the turntable has a built-in phono stage switched to line output.
Running a line-level turntable output into a phono input.
If the built-in phono stage is active, connect to AUX, CD, tuner, or another line input, not to phono.
Guessing the tracking force.
Use the cartridge’s specified range and verify with a stylus force gauge whenever possible.
Ignoring level and vibration problems.
Level the platter and place the deck on a rigid support away from speaker vibration before adjusting cartridge settings.
Changing cartridges without checking phono-stage compatibility.
Confirm MM or MC type, output level, loading, capacitance guidance, and gain requirements before installation.
Cleaning records only when they look dirty.
Dust and microscopic debris can sit deep in the grooves, so use regular dry brushing and consider deeper wet or ultrasonic cleaning for contaminated records.
Handling the cartridge with the amplifier volume up.
Mute or power down the system before connecting cartridge leads or cueing setup work to avoid pops, hum, and accidental speaker stress.
Blaming the cartridge for every distortion problem.
Check alignment, stylus cleanliness, record condition, tracking force, anti-skate, speed stability, and support vibration before replacing parts.
Frequently asked questions
Do I need a phono preamp for my turntable?
Yes, unless your turntable has a built-in phono stage or your amplifier has a suitable phono input.
A cartridge signal is much lower than a normal line-level source and requires phono equalization.
If your turntable outputs line level, use a standard analog input. If it outputs phono level, use a phono input or external phono preamp.
What tracking force should I use?
Use the tracking-force range specified for your exact cartridge.
There is no universal value.
If the manufacturer gives a recommended setting, start there. For example, Sumiko specifies 2.0 grams as the recommended force for its Oriole MC cartridge within a 1.8 to 2.2 gram range, but that applies to that cartridge only.
Why does my turntable hum?
Hum is often caused by grounding, cable routing, or phono-stage mismatch.
Attach the ground wire if provided, keep phono cables away from power cables and power supplies, and confirm that you are using the correct phono or line input.
If hum changes when you touch the tonearm or cable, grounding should be investigated first.
Is a factory-installed cartridge already aligned?
It may be close enough for initial use, especially on plug-and-play models, but it is still worth verifying tracking force, anti-skate, stylus condition, and cartridge security.
Shipping, handling, or later adjustments can change setup.
Should I clean new records?
A new record can still carry dust, paper particles, or residues from handling and packaging.
Use at least a proper record brush before playback.
For deeper contamination, wet cleaning or ultrasonic cleaning can remove debris from inside the grooves more effectively than surface brushing alone.
Why do records sound distorted near the end of a side?
Inner-groove distortion can be caused by cartridge misalignment, worn or dirty stylus, incorrect tracking force, poor anti-skate, damaged records, or a stylus profile struggling with tight inner grooves.
Recheck alignment and force first, then inspect stylus and record condition.
Conclusion: better vinyl playback comes from careful setup, not guesswork
A turntable performs best when every mechanical and electrical interface is treated carefully.
Start with a rigid, level, low-vibration location.
Install the platter and drive system correctly, verify speed, align the cartridge, set tracking force from the cartridge specification, and apply anti-skate only after the fundamentals are right. Match the cartridge to the correct MM or MC phono input, use the right phono or line connection, and ground the system properly. Finally, keep records and stylus clean, because groove debris can undo the benefits of careful alignment. Follow a methodical setup process and most vinyl playback problems become easier to prevent, diagnose, and solve.



Join the discussion
Share your thoughts, listening impressions or product experience.