


A turntable is a mechanical playback system before it is an audio source.
The stylus has to sit correctly in a microscopic groove, the tonearm has to move freely, the cartridge has to feed the right kind of phono input, and the whole deck has to be protected from vibration.
Small setup errors can make records sound thin, distorted, noisy, unstable, or overly bright. The good news is that most improvements are practical and repeatable: level the deck, set tracking force according to the cartridge maker’s recommendation, apply anti-skate, check vertical tracking angle, place the turntable on a stable surface, and connect it to the correct phono or line input. This guide focuses on the core setup areas that matter for turntables: tracking force, anti-skate, VTA, placement, vibration control, and phono connections.
Start with a stable, level turntable platform
Before touching the tonearm, make sure the turntable itself is sitting correctly.
Vinyl playback is extremely sensitive to movement because the stylus is reading tiny groove modulations and converting them into an electrical signal.
Any unwanted vibration from the floor, furniture, motor, platter, or loudspeakers can interfere with that process.
Place the turntable on a rigid, stable surface that does not wobble when you cue a record or walk nearby.
This matters for every deck, from compact automatic models to very large high-end designs.
Heavy turntables especially demand furniture that can safely support their mass; some extreme designs are explicitly intended for robust, heavy-duty cabinets. Even with lighter models, poor support can cause footfall problems, acoustic feedback, or mistracking.
Leveling is equally important.
If the platter is tilted, the tonearm may not apply force evenly and anti-skate behavior becomes less predictable.
Many turntables include vibration-absorbing or height-adjustable feet, which are useful both for leveling and isolation. If your deck has adjustable feet, use them first rather than shimming the plinth in a makeshift way.
- Place the turntable on a rigid table, rack, or wall shelf away from obvious vibration sources.
- Check that the support surface is stable before placing the deck on it.
- Level the platter from left to right and front to back using the turntable’s adjustable feet if available.
- Keep the turntable away from speaker cabinets and subwoofers, especially if bass causes the stylus to shake or the sound to howl.
- Fit the dust cover or protective cover when the turntable is not in use, but avoid handling records or the tonearm roughly while it is in place.

Understand the cartridge and tonearm before adjusting anything
The cartridge is the small transducer at the end of the tonearm.
Its stylus sits in the record groove, the cantilever transfers motion, and the generator turns that motion into an audio signal.
The tonearm’s job is to hold the cartridge at the correct angle and pressure while allowing it to follow the groove with minimal resistance.
Different turntables offer different levels of adjustment.
Some entry-friendly models come with a pre-installed cartridge, adjustable counterweight, and anti-skating, making them simple to configure.
More advanced decks may add vertical tracking angle adjustment, removable headshells, switchable phono stages, or compatibility with both moving magnet and moving coil cartridges. A removable headshell can be useful if you want to keep different cartridges ready for different record types, but every cartridge still needs correct alignment and force.
Do not assume that a factory-mounted cartridge is permanently maintenance-free.
A pre-mounted cartridge can make setup easier because basic alignment is already handled, but you should still confirm tracking force, anti-skate, stylus condition, and the correct phono connection.
If you replace the stylus, change cartridge type, swap headshells, or move the turntable, repeat the relevant setup checks.
- Identify whether your cartridge is moving magnet (MM), moving coil (MC), or another type supported by your turntable or phono stage.
- Check the cartridge maker’s recommended tracking force and loading information before setup.
- If the cartridge is pre-mounted, inspect that the stylus is secure and the headshell or cartridge screws are not loose.
- If your tonearm has a removable headshell, make sure it is fully seated and locked before balancing the arm.
- Use the stylus guard whenever possible while making coarse adjustments.

Set tracking force correctly
Tracking force is the downward pressure the stylus applies to the record groove.
It is usually set by the counterweight at the back of the tonearm.
Too little force is not gentle; it can cause the stylus to lose stable contact with the groove, creating distortion and possible groove damage. Too much force can increase wear and make the cartridge behave outside its intended range. The correct value is the one specified for the cartridge, not a universal number.
Some turntables provide a clear adjustment range.
For example, one automatic turntable design with an adjustable counterweight allows tracking force adjustment from 0 to 4 grams.
A high-end moving-coil cartridge may specify a precise recommended force, such as 2.5 grams. These examples show why you should not guess: cartridges vary, and the safest setup is the manufacturer’s recommended setting.
If your tonearm uses a calibrated counterweight, you typically balance the arm first, zero the scale, and then rotate the counterweight to the desired tracking force.
If you have access to a stylus force gauge, it can confirm the actual force at record height.
Always make adjustments with the arm secured or carefully supported, and keep the stylus away from the platter edge.
- Turn off or mute the amplifier so accidental stylus contact does not produce a loud thump.
- Fit the stylus guard if it does not interfere with balancing.
- Set anti-skate to zero before balancing the tonearm, unless your turntable manual instructs otherwise.
- With the cueing lever down and the arm unlocked, carefully rotate the counterweight until the tonearm floats level.
- Without moving the counterweight itself, set the tracking-force dial to zero if your arm uses a separate numbered ring.
- Rotate the counterweight to the cartridge’s recommended tracking force.
- Reapply anti-skate after tracking force is set.
- Play a clean, familiar record and listen for mistracking, harsh inner-groove distortion, or channel imbalance. If problems remain, recheck force, alignment, stylus condition, and anti-skate.
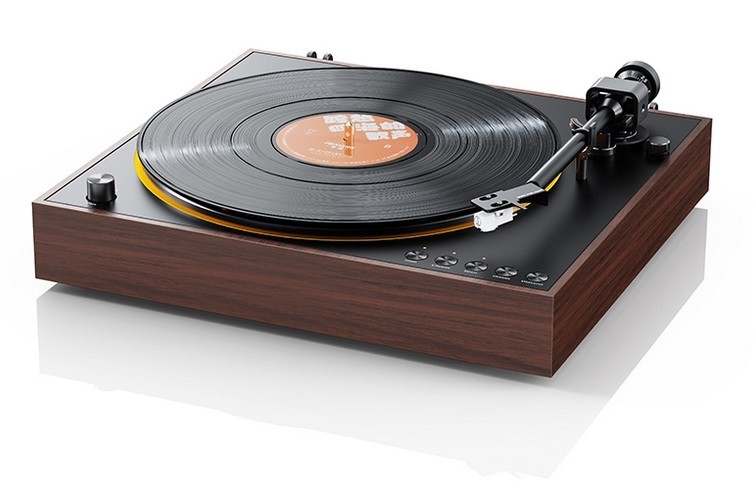
Set anti-skate for stable groove contact
Anti-skate is a small outward force applied to the tonearm to counter the inward pull that occurs during playback.
Without proper anti-skate, the stylus may press harder against one groove wall than the other.
That can affect channel balance, tracking stability, and wear.
Many turntables provide anti-skating adjustment, either as a knob, dial, weight, or mechanism built into the arm.
Some modern user-friendly decks place anti-skate on an accessible rotary control, while more traditional arms may require a weight-and-thread arrangement.
The practical goal is the same: help the stylus sit evenly in the groove.
A good starting point is to follow the tonearm or turntable manual, often relating anti-skate to the selected tracking force.
After that, use listening and behavior as checks.
If the sound distorts more in one channel, if the arm pulls aggressively inward or outward when cued, or if difficult record passages mistrack, anti-skate may need attention. Do not use anti-skate as a cure-all; it cannot fix a damaged stylus, incorrect tracking force, bad cartridge alignment, or warped records.
- Set tracking force first, because anti-skate depends on the tracking setup.
- Apply the anti-skate value or position recommended by the turntable or tonearm maker.
- Cue the arm carefully and confirm it lowers smoothly rather than pulling dramatically sideways.
- Listen for one-sided distortion or unstable imaging on clean records.
- Make small changes only, then re-listen. Avoid large random adjustments.

Check VTA and tonearm height
VTA stands for vertical tracking angle.
In practical setup terms, it is adjusted by changing tonearm height so the cartridge and stylus sit at a suitable angle when playing a record.
Some turntables provide full VTA adjustment, including designs with on-the-fly VTA control or arms that allow the user to fine-tune height for different cartridges.
For many listeners, the basic target is simple: when the stylus is on a normal record, the tonearm should look roughly level from the side, unless the cartridge or tonearm manufacturer specifies otherwise.
This is not a substitute for precision setup, but it is a sensible visual starting point.
If the rear of the arm is much too high or too low, the stylus may meet the groove at an unintended angle, which can affect tonal balance, focus, and tracking.
VTA becomes more important when changing cartridge bodies, mats, platters, headshells, or record thickness.
A turntable with a thick acrylic platter, a no-mat platter design, or a different mat can place the record surface at a different height.
If your deck allows VTA adjustment, revisit tonearm height after such changes.
- Place a typical record on the platter and lower the stylus onto a stationary groove area using the cueing lever.
- View the tonearm from the side at record height.
- If the arm has VTA adjustment, set it so the arm is approximately level as a starting point.
- Tighten any arm-height locking mechanism gently but securely after adjustment.
- Recheck tracking force after significant tonearm-height changes, because geometry changes can slightly affect setup.
- Listen for obvious tonal imbalance or tracking issues, then make small, reversible adjustments if your arm supports them.
Connect the turntable to the correct phono or line input
A turntable cartridge produces a very small signal that normally requires a phono preamplifier, also called a phono stage or RIAA stage.
The phono stage boosts the signal and applies the correct equalization for records.
Some turntables include a built-in phono preamp, allowing direct connection to powered speakers, active speakers, integrated amplifiers, or standard line inputs. Other turntables require an external phono stage or an amplifier with a dedicated phono input.
The most important rule is to know whether your turntable is outputting a phono-level signal or a line-level signal.
If the built-in phono stage is switched on, connect to a line input, active speaker input, or another input intended for normal audio sources.
If the turntable is set to phono output, connect it to a dedicated phono input or external phono preamp. Some models provide separate modes so users can choose direct connection or external phono-stage use.
Cartridge type matters too.
Moving magnet cartridges are common and often used on factory-fitted turntables.
Moving coil cartridges generally need an MC-compatible phono stage or MC setting. Some built-in phono stages support both MM and MC, while others are designed for one type. A high-end MC example may specify very low output and a recommended load above a certain value, such as more than 100 ohms; that kind of information must match the phono stage settings. If your phono input does not support the cartridge type, the sound may be extremely quiet, noisy, dull, or distorted.
- Check whether the turntable has a built-in phono preamp and whether it is switched on or off.
- If using the built-in preamp, connect the RCA outputs to a line-level input or active speakers, not to another phono stage.
- If using an external phono stage, set the turntable to phono output if that option is available.
- Match the phono stage to the cartridge type: MM for moving magnet, MC for moving coil, or the correct switchable setting.
- If the turntable provides balanced XLR outputs, connect to XLR inputs when available; if not, use the supplied or appropriate adapters only if the turntable supports that connection method.
- Turn the amplifier volume down before connecting or switching phono modes.
- If you hear hum, check grounding arrangements, cable seating, input selection, and whether the turntable is connected to the correct type of input.
Use placement and isolation to reduce noise, skipping, and feedback
A well-set cartridge can still misbehave if the turntable is placed badly.
Feedback happens when sound from the speakers, especially bass energy, vibrates the turntable and is picked up again by the stylus.
The result can be a low-frequency howl, muddy bass, unstable imaging, or skipping. Footfall vibration can cause a similar problem when the floor moves under the rack.
Turntable makers address vibration in many ways: heavy plinths, damped platters, isolated motors, vibration-absorbing feet, external power supplies, air bearings, suspension systems, and record weights or vacuum hold-down systems.
You do not need an extreme deck to benefit from the principle.
The practical message is that the stylus needs a quiet mechanical environment.
Keep the turntable on its own stable support whenever possible.
Avoid placing it directly on the same cabinet as large speakers.
If your deck has a dust cover, use it to protect the platter and cartridge when idle, but if you experience acoustic feedback during loud playback, compare behavior with the cover open, closed, or removed if the design allows. The goal is the lowest mechanical disturbance during playback.
- Move the turntable farther from speakers if bass feedback or stylus instability occurs.
- Avoid placing speakers and turntable on the same lightweight furniture.
- Use the turntable’s isolation feet correctly; do not bypass them with unstable decorative objects.
- Make sure the platter, mat if used, and record sit flat and secure.
- If your turntable uses a record weight, clamp, or vacuum hold-down system, follow the manufacturer’s operating instructions exactly.
- Keep the lid, platter, and record surface clean to prevent avoidable noise and stylus contamination.
Maintain the setup after cartridge, stylus, or system changes
Turntable setup is not a one-time job.
Any change at the front end can require new checks.
Replacing a stylus, upgrading within a cartridge family, changing from MM to MC, swapping a headshell, or using a different mat can affect tracking force, VTA, alignment, and phono-stage matching.
Stylus replacement is often easier than full cartridge replacement when the cartridge platform supports it.
Some cartridge families allow stylus upgrades without replacing the body, which can be a practical path for improving precision while keeping the same basic setup.
Even then, you should confirm that the stylus is correctly seated and that tracking force remains appropriate for the new stylus assembly.
Keep records and the stylus clean, store the tonearm securely, and protect the deck when not in use.
If a turntable is fully manual, remember to lift the arm at the end of a side unless it has an auto-stop or arm-lift feature.
If it is automatic, do not force the mechanism by hand; use the controls intended for start, stop, cueing, and repeat.
- Recheck tracking force after any cartridge, stylus, headshell, mat, or platter-height change.
- Recheck anti-skate after changing tracking force.
- Recheck VTA after changing cartridge body height or record support height.
- Confirm MM or MC phono-stage settings after changing cartridge type.
- Inspect cables and connectors whenever the system is moved.
- Use the dust cover or slipcover when the turntable is idle to protect the stylus and platter area.
Troubleshooting common turntable sound problems
If the sound is very quiet, first check the phono connection.
A phono-level signal connected to a normal line input without a phono preamp will be far too low.
If the sound is overloaded, thick, or distorted, the turntable’s built-in phono stage may be feeding an additional phono input. Correct input matching is essential.
If one channel is weak or distorted, check the cartridge leads, headshell seating, RCA plugs, stylus condition, anti-skate, and tracking force.
If distortion increases near the inner grooves, revisit tracking force, anti-skate, cartridge alignment, stylus wear, and record condition.
A cartridge with a fine stylus profile can retrieve a great deal of information, but only when the mechanical setup is accurate.
If the record skips, do not immediately increase tracking force beyond the cartridge’s recommendation.
First check that the turntable is level, the record is clean and not badly warped, the stylus is clean, the arm moves freely, and the tracking force is correctly set.
If the problem occurs when walking across the room, improve support or isolation. If it happens at high volume, move the turntable away from speaker vibration.
- Quiet sound: verify that a phono preamp is in the signal path and that MM/MC settings match the cartridge.
- Distorted sound: check that a line-level turntable output is not connected to a phono input.
- Hum: reseat RCA or XLR connections, check grounding if applicable, and keep signal cables away from obvious power noise sources.
- Skipping: level the deck, check tracking force, clean the stylus and record, and improve placement.
- Harsh inner-groove playback: recheck force, anti-skate, alignment, and stylus condition.
- Unstable speed impression: confirm the correct 33 1/3 or 45 rpm speed setting and that the platter or belt system is installed as intended.
Concise turntable setup checklist
- Place the turntable on a rigid, level, vibration-resistant surface.
- Keep the deck away from loudspeakers and heavy footfall vibration.
- Confirm the cartridge type: MM or MC.
- Use the correct phono connection: phono output to phono stage, line output to line input.
- Balance the tonearm carefully before setting tracking force.
- Set tracking force to the cartridge manufacturer’s recommendation.
- Set anti-skate after tracking force is correct.
- Check that the tonearm is approximately level at record height if VTA is adjustable.
- Confirm the correct speed setting for the record: 33 1/3 or 45 rpm where supported.
- Lower the stylus with the cueing lever and protect it with the guard when adjusting.
- Recheck setup after changing stylus, cartridge, headshell, mat, or phono stage.
- Use the dust cover or protective cover when the turntable is not in use.
Common turntable setup mistakes and how to avoid them
Connecting a built-in phono preamp output to another phono input.
If the turntable’s phono stage is switched on, connect it to a line input, active speakers, or another standard audio input.
Use a phono input only when the turntable is outputting phono level.
Guessing tracking force by feel.
Use the cartridge manufacturer’s recommended tracking force and set it with the counterweight.
Confirm with a stylus force gauge if available.
Thinking lighter tracking force always protects records.
Too little force can cause mistracking.
Correct tracking force is safer than an underweighted stylus that bounces or scrapes through difficult grooves.
Ignoring anti-skate after setting tracking force.
Set anti-skate after tracking force is adjusted, then listen for one-sided distortion or unstable tracking.
Placing the turntable on the same unstable furniture as speakers.
Use a rigid, isolated support and increase distance from speakers if bass feedback, skipping, or low-frequency howl occurs.
Changing cartridges without checking phono-stage compatibility.
Confirm whether the new cartridge is MM or MC and set the phono stage accordingly.
MC cartridges may require different gain and loading than MM cartridges.
Adjusting VTA wildly to fix unrelated problems.
Use VTA to set tonearm height and stylus angle, but first verify tracking force, anti-skate, cartridge alignment, stylus condition, and record condition.
Forcing an automatic tonearm mechanism by hand.
Use the start, stop, cueing, and repeat controls provided by the turntable.
Forcing the arm can damage the mechanism or stylus.
Frequently asked questions
Do I need a separate phono preamp for my turntable?
Only if your turntable or amplifier does not already provide one.
Some turntables include a built-in RIAA or phono stage and can connect directly to line inputs, active speakers, or powered systems.
Others output a low phono-level signal and need an external phono stage or an amplifier with a phono input.
Should anti-skate match tracking force exactly?
Follow the turntable or tonearm maker’s instructions.
Many arms use the tracking-force value as a starting reference, but mechanisms differ.
Set tracking force first, apply the recommended anti-skate setting, then listen for stable tracking and balanced distortion behavior.
What is VTA in simple terms?
VTA, or vertical tracking angle, describes the stylus angle in the groove as seen from the side.
On adjustable tonearms, it is usually changed by raising or lowering the arm.
A practical starting point is a tonearm that looks roughly level when the stylus is playing a normal record, unless the cartridge or tonearm maker specifies otherwise.
Why does my turntable sound very quiet?
The most likely cause is that a phono-level signal is connected to a line input without a phono preamp.
Check whether your turntable’s built-in preamp is switched on, or connect the turntable to a proper phono input or external phono stage.
Also confirm that MM or MC settings match the cartridge.
Can I use an MC cartridge with any phono input?
No.
Moving coil cartridges usually need an MC-compatible phono stage or MC setting.
Some phono stages and turntables support both MM and MC, but others do not. Always check cartridge output, loading recommendations, and phono-stage compatibility before changing cartridge type.
Why does my record skip even though the stylus is new?
A new stylus can still skip if the turntable is not level, tracking force is wrong, anti-skate is poorly set, the record is dirty or warped, or the turntable is picking up vibration from the floor or speakers.
Check setup and placement before increasing tracking force beyond the recommended range.
Conclusion: better vinyl sound starts with correct setup
A good turntable setup is a chain of small, correct decisions.
Start with a stable, level platform, because the stylus cannot track accurately if the deck is moving.
Identify the cartridge and phono-stage requirements before connecting anything. Set tracking force to the cartridge maker’s recommendation, then apply anti-skate and check tonearm height if VTA is adjustable. Use the right signal path: phono output into a phono stage, or built-in phono stage output into a line input. Finally, revisit the setup whenever you change stylus, cartridge, headshell, mat, or placement. Careful adjustment protects records, reduces noise and distortion, improves tracking, and lets the turntable perform as the precise mechanical instrument it is.

