


Turntable speed accuracy matters because vinyl playback depends on the platter rotating at the intended rate.
If 33 1/3, 45, or 78 rpm is off, pitch and timing can be affected.
A strobe disc gives you a direct visual way to check that speed: when the correct markings appear stationary under a synchronized strobe light, the platter is running at the target speed. This guide explains how to use a strobe disc safely and accurately, how to interpret what you see, and what to do when your turntable runs fast, slow, or inconsistently.
What a Strobe Disc Does
A strobe disc is a printed speed-checking tool that sits on the turntable platter, usually over the spindle like a record.
It has rows of markers designed for specific platter speeds such as 33 1/3, 45, and 78 rpm.
When the disc spins under the correct strobe light, the markers create an optical effect: the row for the selected speed appears to stand still if the platter is rotating correctly.
The key idea is synchronization.
The flashing strobe light must match the strobe disc it is being used with.
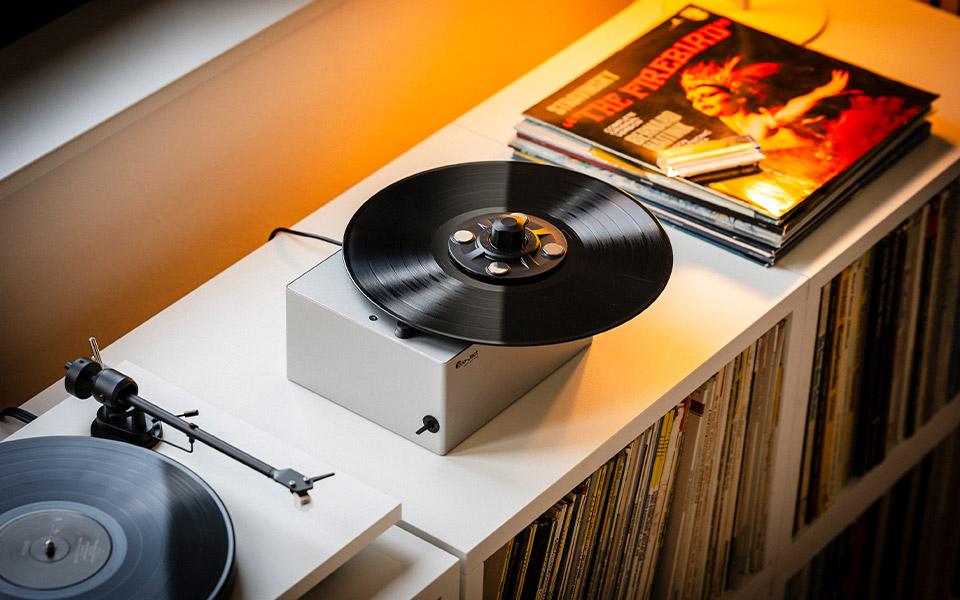
For example, the HumminGuru LUMI Record Stabilizer uses an included 50Hz strobe disc for its speed test. Its built-in strobe light is aimed at the spinning disc, and the pattern appears stationary when the turntable speed is correct. If the pattern drifts forward or backward, the speed is too fast or too slow.
This is different from simply selecting the speed switch on a turntable.
Selecting 33, 45, or 78 rpm tells the turntable what speed to target.
A strobe disc checks whether the platter is actually reaching that speed.
Check Compatibility Before You Start
Before placing any accessory on your turntable, confirm what you are checking and what your deck can adjust.
Many turntables support 33 1/3 and 45 rpm, while some also support 78 rpm.
Examples in the turntable category include decks with 33 1/3, 45, and 78 rpm options, as well as models limited to 33 1/3 and 45 rpm. Use only the speed rows that match your turntable’s available speed settings.
Also check whether your turntable has a speed adjustment method.
Some turntables include pitch control, which allows fine adjustment of platter speed.
The Technics SL-1200M7B, for example, includes pitch control for precise speed adjustment. Some modern turntables may allow speed selection through onboard controls or an app; the Dual CS 529 BT can switch between 33, 45, and 78 rpm via its mobile control system. Other turntables may not provide user-accessible pitch adjustment.
If your turntable has no pitch control or user speed adjustment, do not force mechanical changes.
Use the strobe disc to diagnose the issue, then consult the turntable’s manual or a qualified service technician.
Belt-drive and direct-drive turntables can both be checked with a strobe disc, but the way speed is adjusted depends on the design.

Prepare the Turntable for a Reliable Reading
A speed check is only useful if the turntable is set up in a stable, repeatable way.
Place the turntable on a firm surface, away from unnecessary vibration.
Many turntables use vibration-control measures such as isolated feet, suspended chassis elements, rubber mats, or rigid plinth construction because unwanted vibration can interfere with stable playback. The same principle applies when checking speed: keep the deck steady and undisturbed.
Remove the record before using a flat strobe disc unless your specific accessory is designed to work as a record puck or stabilizer.
The HumminGuru LUMI, for example, is both a 300-gram record stabilizer and a speed-test tool, but a typical paper or plastic strobe disc is used directly on the platter.
If using any heavy stabilizer-style tool, make sure it is appropriate for your turntable and spindle before use.
Keep the tonearm secured or parked while you are checking speed.
You do not need the stylus in the groove to check platter rotation with a strobe disc.
Avoid loose sleeves, cables, brushes, or fingers near the spinning platter.
- Turn the amplifier volume down or mute the system if you are not playing a record.
- Make sure the tonearm is returned to its rest and secured if your turntable has a tonearm clip.
- Remove any record from the platter.
- Place the strobe disc flat on the platter with the spindle through the center hole.
- Select the speed you want to check: 33 1/3, 45, or 78 rpm, depending on your turntable.
How to Use a Strobe Disc Step by Step
The basic method is simple: spin the platter, illuminate the correct strobe markings, and watch whether the pattern appears still.
The exact controls differ by turntable and strobe tool, but the reading method is the same.
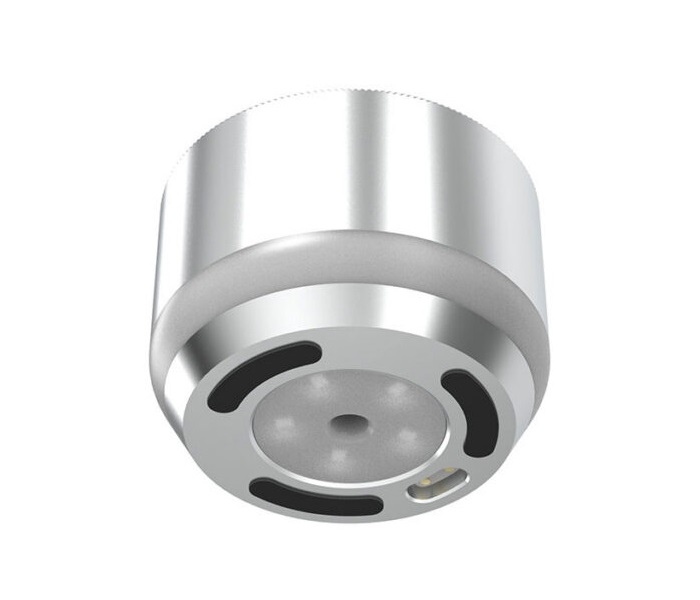
With a tool such as the HumminGuru LUMI Record Stabilizer, the supplied 50Hz strobe disc is placed on the turntable spindle.
The turntable is set to the desired speed, and the strobe light built into the stabilizer is aimed at the spinning disc from about 10 centimeters away.
When the turntable is running at the correct speed, the pattern on the disc appears stationary.
If you are using a different strobe disc and light, follow that tool’s instructions carefully.
The strobe disc and light frequency must correspond; otherwise, the pattern may not give a meaningful reading.
- Place the correct strobe disc on the platter.
- Select the platter speed you want to test.
- Start the turntable and allow the platter to rotate steadily.
- Activate the strobe light or use the strobe source specified by your tool.
- Aim the strobe at the moving markers. With the LUMI system, the stated distance is about 10 centimeters.
- Look at the row of markings for the selected speed.
- If that row appears stationary, the turntable is rotating at the correct speed.
- If the row drifts, use the turntable’s pitch control or approved speed adjustment until the markings appear stationary.
- Repeat the check for each speed you actually use.
How to Read the Strobe Pattern
A stationary pattern is the goal.
It does not mean the platter has stopped; it means the strobe flashes and the printed markers are synchronized closely enough that your eyes see the same marker position each time the light flashes.
If the markings appear to move slightly forward or backward, the platter speed is not correct.
The supplied reference explains the meaning clearly: forward or backward drift indicates that the speed is either too fast or too slow.
Use the turntable’s pitch control, if available, to bring the row to a standstill.
Make adjustments gradually.
Overshooting the correct point can send the pattern drifting in the opposite direction.
On a turntable with pitch control, move the control in small increments, wait for the platter to settle, and check the strobe row again. The correct setting is the point where the markings appear as still as possible.
Adjusting Speed on Different Turntable Types
Direct-drive turntables often emphasize stable rotation and may include electronic speed control.
Some Technics models, for example, use direct-drive motors and speed-control features, and the SL-1200M7B includes pitch control.
On this kind of deck, the strobe disc is useful for confirming that the selected speed and pitch setting are correct.
Belt-drive turntables can also be checked with a strobe disc.
Many belt-drive models offer 33 1/3 and 45 rpm, and some offer 78 rpm.
However, the user adjustment method varies widely. Some may have electronic speed selection, while others may require manufacturer-approved setup or service procedures. If there is no pitch control or documented user adjustment, do not improvise.
Fully automatic turntables need the same speed accuracy as manual turntables, but they add automatic mechanisms for starting and stopping playback.
Keep those mechanisms out of the way during a speed check.
If your automatic deck allows speed switching through controls or an app, select the intended rpm first, then perform the strobe check with the tonearm safely parked unless the manufacturer specifies otherwise.
Using a Built-In Strobe or Strobe Accessory
Some manufacturers integrate strobe speed tests directly into their turntables.
If your turntable already has a built-in strobe system, use the manufacturer’s markings and instructions.
The benefit is convenience: the disc or platter markings and light source are designed to work together.
If your turntable does not have a built-in strobe, an external strobe accessory can add the function.
The HumminGuru LUMI Record Stabilizer is one example of a multifunction accessory that combines a record puck, a built-in strobe light, and a supplied 50Hz strobe disc.
For a speed test, the strobe disc is placed over the spindle, the turntable is set to 33 1/3, 45, or 78 rpm, and the strobe light is aimed at the spinning disc to observe the markers.
When using any accessory that also functions as a record stabilizer, consider compatibility.
The LUMI weighs 300 grams.
That weight may be normal for a stabilizer-style puck, but not every listener will want or need a puck on every turntable. For a speed check, follow the accessory instructions and avoid using extra weight if your turntable manufacturer advises against it.
Troubleshooting Fast, Slow, or Unstable Speed
If the strobe pattern will not stand still, first confirm the basics.
Make sure you are watching the row that corresponds to the selected speed.
A 45 rpm row will not give the correct visual result when the turntable is running at 33 1/3 rpm. Also confirm that the strobe disc and strobe light are matched, especially when using a 50Hz disc.
If the pattern drifts consistently in one direction, the deck is likely running consistently fast or slow.
On a turntable with pitch control, adjust gradually until the markers stop drifting.
If the deck has no pitch adjustment, the strobe result is still useful because it tells you there is a speed issue that may need service or manufacturer-guided adjustment.
If the pattern seems to wander irregularly rather than drift smoothly, look for setup factors before assuming the motor is faulty.
Check that the strobe disc lies flat, the platter is not being touched by anything, and the turntable is on a stable surface.
Turntables use design measures such as vibration isolation, damping, and rigid chassis construction for a reason: mechanical stability supports consistent rotation and tracking.
If only one speed is problematic, repeat the test carefully at the other speeds.
A turntable may behave differently at 33 1/3, 45, and 78 rpm depending on its drive and control system.
Record the observation in plain language, such as “33 1/3 rpm appears stationary, 45 rpm drifts,” before contacting service support.
When to Recheck Turntable Speed
You do not need to check speed before every record unless you are diagnosing a problem.
A sensible approach is to check after setting up a new turntable, moving the deck, changing how it is placed, or noticing that familiar records sound off in pitch or timing.
Recheck after making any adjustment.
If you use pitch control to correct 33 1/3 rpm, also verify 45 rpm if you play singles or 45 rpm albums.
If your turntable supports 78 rpm and you use that speed, check that separately with the matching row on the strobe disc.
Keep the strobe disc clean, flat, and easy to read.
If the markings are warped, dirty, or poorly illuminated, your reading will be less reliable.
Store the disc where it will not bend.
Concise Turntable Speed Check Checklist
- Confirm which speeds your turntable supports: 33 1/3, 45, and/or 78 rpm.
- Use a strobe disc and strobe light that are designed to work together, such as a supplied 50Hz disc with a compatible strobe tool.
- Park and secure the tonearm before starting the speed test.
- Place the strobe disc flat over the platter spindle.
- Select the speed you want to test and start the platter.
- Illuminate the correct markings; with the LUMI example, aim the strobe from about 10 centimeters away.
- Watch the row for the selected speed.
- If the markings appear stationary, the speed is correct.
- If the markings drift, adjust pitch only if your turntable provides an approved control.
- Repeat for every speed you use.
Common Mistakes and How to Avoid Them
Using the wrong strobe disc or light source.
Use the disc and strobe light specified for each other.
A 50Hz strobe disc, for example, should be used with the compatible strobe system supplied for that disc.
Reading the wrong speed row.
Make sure the platter speed and the strobe marking row match.
Check the 33 1/3 row at 33 1/3 rpm, the 45 row at 45 rpm, and the 78 row only when testing 78 rpm.
Trying to adjust a turntable with no user speed control.
If there is no pitch control or documented user adjustment, do not force mechanical changes.
Use the strobe result as a diagnosis and consult the manual or service support.
Checking speed while the tonearm or accessories are in the way.
Park the tonearm, remove the record unless your tool is designed for record-top use, and keep loose items away from the spinning platter.
Making large pitch-control movements.
Adjust in small steps, wait for the platter to settle, and watch whether the strobe markings stop drifting.
Assuming one correct speed means all speeds are correct.
Test each speed you actually use.
A turntable may need separate confirmation at 33 1/3, 45, and 78 rpm.
Frequently asked questions
What should I see when my turntable speed is correct?
The markings for the selected speed should appear stationary under the strobe light.
The platter is still spinning, but the synchronized strobe effect makes the correct row look still.
What does it mean if the strobe pattern moves?
If the pattern appears to move forward or backward, the turntable is running too fast or too slow.
Use pitch control if your turntable has it, and adjust until the markings appear stationary.
Can I use a strobe disc on both belt-drive and direct-drive turntables?
Yes.
A strobe disc checks platter rotation, so it can be used with either drive type.
The difference is how speed is adjusted afterward, which depends on the turntable’s design.
Do I need pitch control to use a strobe disc?
No.
You can still use a strobe disc to check speed.
However, pitch control or another approved user adjustment is needed if you want to correct the speed yourself.
Can I check 78 rpm with the same method?
Yes, if your turntable supports 78 rpm and your strobe disc includes a 78 rpm marking row.
Select 78 rpm, illuminate the disc, and read the corresponding row.
How close should the strobe light be to the disc?
Follow your tool’s instructions.
With the HumminGuru LUMI speed-test method, the strobe light is aimed at the spinning disc from about 10 centimeters away.
Conclusion: Use the Strobe Disc as a Setup Tool, Not a Guessing Game
A strobe disc is a practical, visual way to confirm whether a turntable is rotating at the correct speed.
Place the disc flat on the platter, select the intended rpm, illuminate the matching markings with a compatible strobe light, and look for a stationary pattern.
If the markings drift, the platter is fast or slow; correct it with pitch control only if your turntable provides an approved adjustment. Check each speed you use, keep the tonearm safely parked, and make small, patient adjustments. Used properly, a strobe disc turns speed setup into a clear, repeatable process and helps keep vinyl playback accurate.


Join the discussion
Share your thoughts, listening impressions or product experience.