

In-ear headphones and in-ear monitors can deliver excellent sound from a very small package, but they are unusually dependent on fit.
A poor seal can reduce bass, weaken isolation, blur imaging, and make even a well-designed earphone sound wrong.
A good fit does the opposite: it stabilizes the earpiece, improves passive noise isolation, helps bass develop naturally, and lets the tuning work as intended. This practical guide explains how to choose ear tips, insert in-ear headphones correctly, configure wired and wireless models, avoid comfort problems, and troubleshoot the most common sound issues.
Understand Why Fit Matters So Much
In-ear headphones work by placing a small acoustic system close to the ear canal.
Unlike over-ear headphones, where pads sit around the ear, IEMs rely on an ear tip sealing gently inside the entrance of the ear canal.
That seal is not just about comfort. It is part of the acoustic design.
A seal is the contact between the ear tip and your ear canal that prevents sound pressure from leaking out.
If the seal is incomplete, low frequencies escape first, so bass becomes weak and vocals may sound thin.
Many listeners try to fix this with heavy EQ, but the better first step is almost always mechanical: improve the fit.
Passive isolation means blocking outside noise physically, rather than using microphones and processing.
Some in-ear designs deliberately rely on physical isolation instead of active noise cancellation.
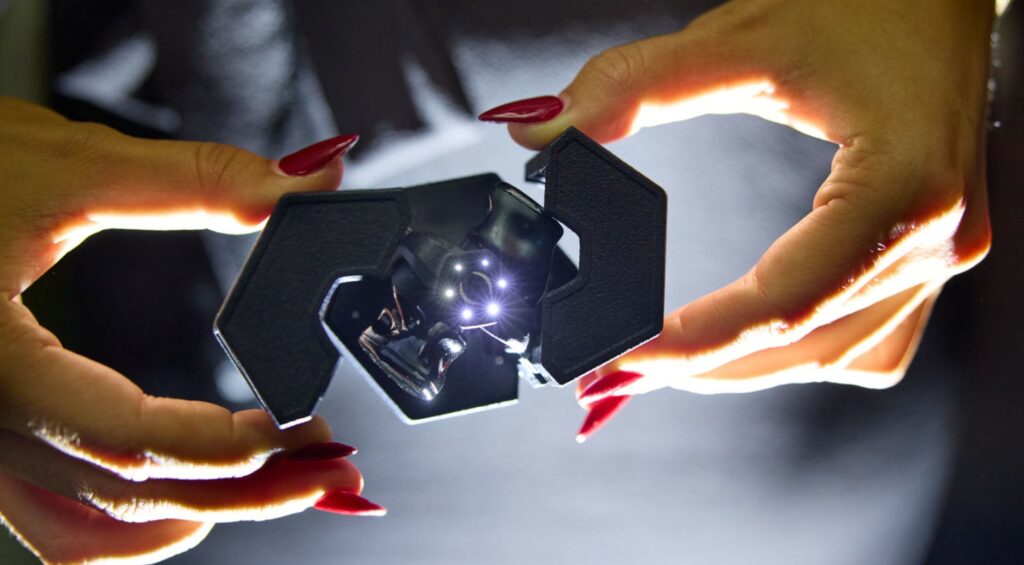
Breggz, for example, describes the Zohn-1 as using precise physical isolation rather than ANC, with the housing and fit doing the heavy lifting. The broader lesson applies to all IEMs: a secure acoustic seal is the foundation of both isolation and tonal balance.
A good seal should feel stable, not painful.
You should not need to force an earpiece deep into the ear, and you should not feel sharp pressure.
If you do, the tip size, tip material, angle, or shell shape may be wrong for your ears.
Choose the Right Ear Tip Size Before Changing Anything Else
Ear tips are the simplest and most important tuning tool for in-ear headphones.
Many models include several sizes because ear canals vary widely.
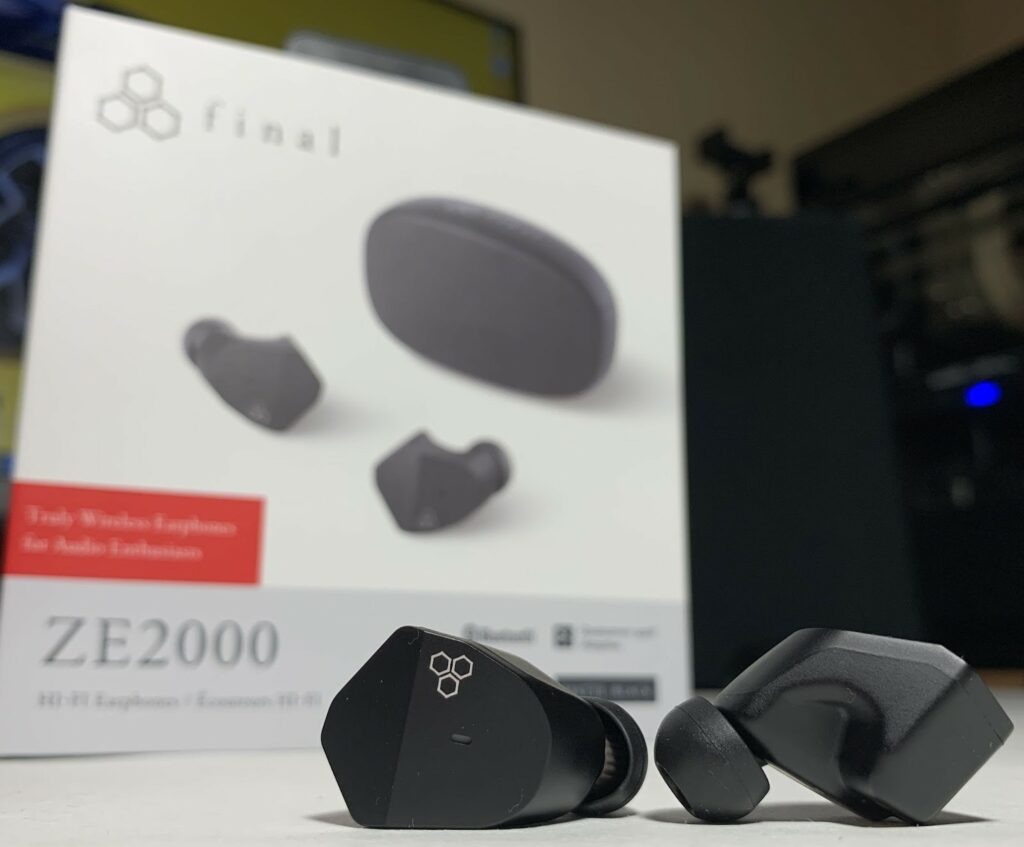
Final Audio’s ZE2000, for instance, is supplied with five sizes of ear tips, while more enthusiast-oriented IEM packages such as Shanling’s ME600 include multiple silicone types plus foam tips. Campfire Audio’s Chimera accessory set also includes silicone and foam options. These examples underline a basic rule: do not assume the pre-installed medium tip is correct.
Start with size rather than material.
A tip that is too small may feel easy to insert but will leak air and reduce bass.
A tip that is too large may seem secure at first but can create pressure, discomfort, or a shallow fit that loosens over time. The correct size usually slides in with light resistance, seals without forcing, and remains stable when you move your jaw.
Test both ears independently.
It is common for the left and right ear canals to differ slightly.
Using different tip sizes on each side is not a mistake if it improves comfort and channel balance.
Use music you know well for testing, especially tracks with steady bass, centered vocals, and clear percussion.
With a proper seal, bass should gain body without sounding bloated, vocals should sit in the center, and outside noise should drop noticeably even before playback starts.
- Remove the installed tips and inspect the nozzle so you know how the tip attaches.
- Try the medium size first, then move one size smaller and one size larger.
- Insert both earpieces and play familiar music at a moderate volume.
- Check bass weight, vocal centering, comfort, and isolation.
- Repeat with different sizes until the seal feels secure but not pressured.
Compare Silicone and Foam Tips
Silicone tips are durable, easy to clean, and often preserve a lively, open sound.
They come in different bore shapes, flange designs, and firmness levels, so two silicone tips of the same size can fit and sound different.
Some included tip sets are intentionally tuned for different effects, such as vocal focus, bass emphasis, spatial presentation, or balanced response.
Foam tips compress before insertion and expand gently inside the ear canal.
They can be useful when silicone tips do not seal consistently, especially for people with irregular ear canal shapes.
Foam tips often provide stronger passive isolation because they conform to the ear more completely. Shanling’s ME600 package, for example, includes foam tips for users who prefer a more adaptive seal and stronger passive isolation.
The trade-off is that foam tips require more care.
They can wear faster than silicone, absorb moisture, and may slightly change the perceived tonal balance.
If the sound becomes dull, check whether the foam is blocking the nozzle or sitting too deep on the stem.
Neither material is automatically better.
Choose silicone if you want easy maintenance and a clean, repeatable fit.
Try foam if you need more isolation, better stability, or relief from pressure points caused by silicone.
- For foam tips, compress the tip between your fingers before insertion.
- Insert the earpiece gently and hold it in place for a few seconds while the foam expands.
- For silicone tips, avoid folding the flange during insertion because a folded tip can leak.
- Clean silicone tips regularly with a dry or lightly damp cloth after removing them from the earphone.
Insert In-Ear Headphones Correctly
Insertion technique affects both sound and comfort.
Many in-ear headphones are designed to sit with the cable or body angled upward, often with the cable routed over the ear.
True wireless earbuds may use a twist-to-lock motion instead. The goal is not maximum depth; it is a stable seal at the correct angle.
For wired IEMs, identify left and right earpieces before insertion.
Many designs use shaped shells, angled nozzles, or ear hooks that only sit correctly on one side.
If the cable uses memory wire or pre-formed ear guides, position those over the ear after the tip is seated, not before.
A gentle ear lift can help.
With one hand, lightly pull the top of your ear upward and backward.
With the other hand, insert the earpiece at the natural angle of the canal. Do not push straight inward if the nozzle is angled; follow the shape of the shell and your ear.
After insertion, speak or gently tap near your ear.
Your own voice may sound slightly more internal when the seal is good.
This is normal. If one side sounds more sealed than the other, reseat the weaker side or try a different tip size.
- Check left and right markings.
- Seat the tip at the canal entrance and angle the shell naturally into the concha of the ear.
- For over-ear cables, guide the cable over the ear and adjust the chin slider if present.
- Move your jaw, turn your head, and walk a few steps to check stability.
- If bass disappears or one side loosens, change tip size or insertion angle.

Use the Seal to Tune Bass, Clarity, and Isolation
A proper seal is the first form of tuning.
Final Audio’s ZE2000 review notes that fit plays a crucial role in bass performance: with the right tips and a proper seal, bass becomes deeper and more articulate.
This is broadly true for in-ear headphones. If bass is weak, do not immediately assume the earphone lacks bass. Check the seal first.
Insertion depth also changes sound.
A shallow fit may increase comfort but reduce isolation and low-end stability.
A deeper fit can improve bass and isolation, but only if it remains comfortable and does not create pressure. If treble sounds sharp, try a slightly different tip type or insertion angle before applying EQ.
Some IEMs offer additional physical tuning.
Shanling’s ME600 includes interchangeable nozzles: one described for fuller sound with more bass and softer treble, one for increased clarity and energy, and one intended as a balanced profile.
If your IEM has swappable nozzles or filters, change only one variable at a time. First find the best tip and fit, then compare nozzles. Otherwise, you will not know whether the change came from the seal or from the tuning hardware.
Avoid using a heavy bass boost to compensate for a poor seal.
EQ can be useful, but it cannot fully replace lost acoustic pressure.
A leaking fit will still sound inconsistent as you move.
- Fix fit and seal before using EQ.
- If bass is weak, try a larger tip, foam tip, or deeper but comfortable insertion.
- If sound is muffled, check for blocked tips, clogged mesh, or foam covering the nozzle.
- If treble is too bright, try a different tip material or a tuning nozzle with a smoother profile if your IEM provides one.
Connect Wired IEMs Safely and Correctly
Wired IEMs may use fixed cables, MMCX connectors, 2-pin connectors, or modular plug systems.
The connector type matters because careless handling can loosen sockets or damage pins.
Campfire Audio’s Chimera uses standard 2-pin connectors, while Shanling’s ME600 uses MMCX connectors and includes modular 3.5mm single-ended and 4.4mm balanced plugs.
MMCX connectors rotate and snap into place, but they are not meant for constant unnecessary removal.
Treat them as a serviceability and upgrade path rather than something to detach every day.
When disconnecting MMCX, pull straight from the connector body, not the cable. For 2-pin connectors, align the pins carefully and avoid rocking them side to side.
A 3.5mm single-ended plug is the common headphone connection found on many devices, dongle DACs, and portable players.
A 4.4mm balanced plug is used by some dedicated audio devices and can provide a separate signal path for each channel when the source supports it.
Do not plug a 4.4mm connector into an incompatible output. Use the plug that matches your device.
Impedance and sensitivity influence how easily an IEM is driven.
The Shanling ME600, for example, is specified with low impedance and moderate sensitivity, indicating a design intended for portable use.
In general, if an IEM gets loud easily from a phone adapter or portable player, start with the volume low and raise it gradually.
- Attach detachable cables before placing the IEMs in your ears.
- Match left and right cable markings to the earpieces.
- Use 3.5mm with standard headphone outputs and 4.4mm only with balanced-compatible outputs.
- Start playback at low volume, then increase slowly.
- When removing cables, hold the connector housing rather than pulling the wire.
Pair and Configure Wireless In-Ear Headphones
True wireless in-ear headphones add Bluetooth pairing, codec support, charging behavior, touch controls, and sometimes app-based features.
Final Audio’s ZE2000, for example, supports common Bluetooth codecs including SBC, AAC, aptX, and aptX Adaptive, while keeping features simple and focusing on sound.
Breggz’s Zohn-1 is described as Bluetooth-based with personalized sound calibration stored directly in the earbuds.
A codec is the method used to transmit audio over Bluetooth.
SBC is the basic universal codec; AAC is widely used by Apple devices; aptX variants are supported by some Android devices and audio players.
The best available codec depends on both the earbuds and the source device. If your phone does not support a codec, the earbuds will fall back to another compatible option.
If your wireless earbuds include a hearing test, calibration, or sound personalization feature, run it in a quiet room with the tips already fitted correctly.
Calibration performed with a poor seal may produce misleading results.
Likewise, if the app offers ANC, transparency, or adaptive modes, remember that these features do not replace mechanical fit. Even adaptive noise cancellation works better when the earbuds are seated consistently.
Touch controls can accidentally trigger during insertion.
Learn the control layout before wearing the earbuds so you can adjust volume or pause playback without pressing the earbud deeper into the canal.
- Fully charge the case and earbuds before first setup.
- Fit the correct tips before pairing or calibration.
- Pair from the source device’s Bluetooth menu or the manufacturer’s app if required.
- Check the selected Bluetooth codec if your device allows it.
- Run personalization or calibration only after the seal is stable.
Protect Your Hearing While Optimizing Sound
A better seal often makes music sound fuller at lower volume because less bass leaks out and less outside noise enters.
Use that advantage.
If you improve isolation, reduce the volume rather than using the same level as before.
Be cautious when inserting or removing IEMs.
A tight seal can create pressure changes.
Break the seal gently by twisting the earpiece slightly before pulling it out. Do not yank sealed tips straight out of the ear canal.
Avoid using in-ear headphones at high volume to overpower traffic, public transport, or loud machinery.
If the environment is too loud for safe listening, stronger passive isolation or proper hearing protection may be more appropriate than turning up music.
Do not use isolating IEMs in situations where awareness is necessary, such as cycling in traffic or walking in hazardous areas, unless your earbuds offer a suitable transparency mode and local safety conditions allow it.
Maintain Tips, Nozzles, Mesh Filters, and Cases
Small acoustic openings are easy to block.
Earwax, lint, skin oils, and moisture can reduce volume, dull treble, or create channel imbalance.
Many IEM packages include cleaning tools or cloths; Campfire Audio’s Chimera accessory set, for example, includes an IEM cleaning tool, microfiber cloth, mesh bag, and case. Use these kinds of accessories as part of routine care, not only after a problem appears.
Remove silicone tips periodically and clean them separately.
Make sure they are completely dry before reinstalling them.
Foam tips should be wiped gently and replaced when they no longer expand properly, no longer seal, or show visible wear.
Inspect nozzle mesh filters under good light.
If one channel sounds quieter or less detailed, a partially blocked mesh is a common cause.
Do not push debris deeper into the nozzle. Use the supplied cleaning tool carefully, following the manufacturer’s instructions.
Store IEMs in their case when not in use.
This protects connectors, nozzles, and tips from dust and mechanical stress.
For wired models, coil the cable loosely rather than wrapping it tightly around the player or case.
- Wipe earpieces after listening, especially after exercise or warm-weather use.
- Remove and clean silicone tips regularly.
- Inspect nozzles and mesh filters if sound becomes dull or uneven.
- Let tips and shells dry before storing them in a closed case.
- Replace worn tips rather than trying to rescue a failing seal with more pressure.
Troubleshoot Fit and Sound Problems
If your in-ear headphones sound wrong, diagnose the physical fit first.
Most common problems have simple causes: the tip is the wrong size, the insertion angle is inconsistent, the nozzle is blocked, or the cable connection is not fully seated.
Weak bass usually points to a leak.
Try a larger tip, foam tip, or different insertion angle.
If only one side lacks bass, compare left and right fit rather than changing EQ globally.
Harsh treble can come from a shallow fit, an overly narrow or stiff tip for your ear, or a tuning nozzle that emphasizes clarity.
Try a different tip material or the balanced/smoother nozzle option if your IEM includes one.
Muffled sound can come from a blocked nozzle, collapsed foam tip, or excessive insertion depth.
Remove the tip and inspect the sound tube.
If the earphone sounds clear without the tip but muffled with it, the tip may be obstructing the nozzle.
Dropouts on wireless earbuds may relate to Bluetooth connection stability, source device behavior, or distance from the device.
Re-pair the earbuds, charge both earpieces, and keep the source close during testing.
For wired IEMs, intermittent sound often points to a loose connector, damaged cable, or plug not fully inserted.
- Change only one variable at a time: tip size, tip material, insertion depth, nozzle, cable, or source.
- Compare left and right sides with the same track.
- Clean the nozzles before assuming a driver problem.
- Test wired IEMs on another source or with another compatible cable if available.
- Reset or re-pair wireless earbuds if Bluetooth behavior becomes inconsistent.
Concise In-Ear Headphone Setup Checklist
- Identify left and right earpieces before insertion.
- Try multiple ear tip sizes; do not assume medium is correct.
- Confirm that both ears seal evenly and comfortably.
- Use foam tips if silicone tips do not isolate or stay secure.
- Fix fit before using EQ, ANC, calibration, or tuning nozzles.
- For wired IEMs, match the plug to the output: 3.5mm for standard, 4.4mm only for compatible balanced outputs.
- Start with low volume after improving the seal.
- Clean tips and inspect nozzle mesh regularly.
- Store IEMs in a case and avoid pulling cables by the wire.
- Re-test fit whenever you change tips, nozzles, cables, or devices.
Common Mistakes and How to Avoid Them
Using the pre-installed ear tips without testing alternatives.
Try at least one size smaller and one size larger.
Many IEMs include multiple tips because fit strongly affects bass, isolation, and comfort.
Trying to fix weak bass with EQ before checking the seal.
Reseat the IEMs, try larger or foam tips, and confirm both ears are sealed.
EQ should come after mechanical fit is correct.
Forcing the earpiece too deeply into the ear.
Aim for a stable, comfortable seal, not maximum depth.
If pressure or pain appears, change tip size, material, or insertion angle.
Swapping tuning nozzles and ear tips randomly.
Change one variable at a time.
First find the best fit, then compare nozzles or filters so you know what changed the sound.
Pulling detachable cables by the wire.
Hold the connector housing.
MMCX and 2-pin connectors can be damaged by twisting, rocking, or yanking the cable.
Ignoring cleaning until one side sounds quiet.
Wipe shells after use, clean tips regularly, and inspect nozzle mesh filters before blockage becomes severe.
Running wireless sound calibration with a poor seal.
Fit the correct tips first, then perform hearing tests or personalization in a quiet room.
Frequently asked questions
How do I know if my in-ear headphones have a proper seal?
Bass should sound full rather than thin, outside noise should drop noticeably, and both channels should feel balanced.
The earpieces should stay stable when you move your jaw or turn your head, without pain or sharp pressure.
Why does one earbud sound quieter or weaker than the other?
Common causes include a weaker seal on one side, different ear canal shape, a blocked tip or nozzle mesh, or a loose cable connection.
Try reseating the weaker side, using a different tip size for that ear, cleaning the nozzle, and checking the connector.
Are foam tips better than silicone tips?
Foam tips are not automatically better, but they can provide a more adaptive seal and stronger passive isolation.
Silicone tips are easier to clean, more durable, and often preserve a more open sound.
The best choice is the one that seals comfortably in your ears.
Should I use active noise cancellation or rely on passive isolation?
Use both intelligently if your earbuds offer ANC, but do not treat ANC as a replacement for fit.
Passive isolation comes from the physical seal, and it improves bass consistency and helps ANC work more effectively.
Some in-ear designs intentionally rely on physical isolation rather than ANC.
Can ear tips change sound quality?
Yes.
Tip size, material, bore shape, and insertion depth can affect bass, treble, isolation, and soundstage perception.
A leaking tip can make bass disappear, while a blocked or poorly matched tip can make sound dull or uneven.
Is a 4.4mm balanced plug always better than 3.5mm?
Not always.
A 4.4mm balanced plug is useful only with a compatible balanced output.
A standard 3.5mm plug is the correct choice for ordinary headphone jacks and many dongle DACs. Use the connection your source is designed to support.
Conclusion: Fit First, Tuning Second
The best sound from in-ear headphones starts with the physical interface between the ear tip and your ear.
Before changing EQ, buying cables, switching codecs, or judging the tuning, make sure the tips fit, the seal is even, and the earpieces sit comfortably.
A correct seal improves bass, passive isolation, clarity, and stability at the same time. Once fit is reliable, you can fine-tune with silicone or foam tips, adjustable nozzles, wireless calibration, or source settings. Handle connectors carefully, listen at safe levels, clean tips and nozzles regularly, and troubleshoot methodically by changing one variable at a time. Get the fit right, and your in-ear headphones will have the best chance to sound as their designers intended.

Join the discussion
Share your thoughts, listening impressions or product experience.