


A 5.1 home theater receiver is the control center of a classic surround system: five speakers, one powered subwoofer, and HDMI switching for your TV or projector and movie sources.
Set up correctly, it can decode common surround formats such as Dolby Digital, Dolby TrueHD, DTS-HD Master Audio, and stereo upmixing modes where supported.
Set up carelessly, it can produce weak dialogue, missing bass, no surround effects, or video compatibility problems. This guide walks through the practical process: planning the system, connecting HDMI devices, wiring speakers safely, configuring receiver menus, running calibration, placing the subwoofer, and solving common faults.
Plan the 5.1 layout before connecting anything
In home cinema, 5.1 means five main speaker channels plus one low-frequency effects channel.
The five speakers are front left, center, front right, surround left, and surround right.
The “.1” is the powered subwoofer, which handles deep bass and the LFE channel found in movie soundtracks.
Before unpacking cables, decide where the display, receiver, speakers, and sources will sit.
Your AV receiver should have enough ventilation, easy access to HDMI inputs, and a clear path for speaker cables.
Avoid stacking heat-producing components tightly on top of it. A receiver is an amplifier as well as a processor, so heat management affects reliability.
A 5.1 receiver is not the same as a Dolby Atmos receiver.
For example, a simple 5.1 model such as Denon’s AVR-S270BT is designed for five powered speaker channels and a subwoofer output; it does not provide the extra amplified height channels required for Atmos.
That is not a weakness if your goal is a straightforward living-room or projector-room surround system. It simply means the correct speaker plan is five ear-level speakers plus a subwoofer, not ceiling or height speakers.
- Place the center speaker close to the screen so dialogue appears to come from the picture.
- Place the front left and right speakers on either side of the screen, aimed toward the listening position where possible.
- Place the surround speakers to the sides or slightly behind the main seats, not at the front of the room.
- Place the receiver where HDMI and speaker cables can reach without strain.
- Leave ventilation space around the receiver and keep it away from enclosed, hot compartments.

Match your receiver, display, and sources before choosing HDMI connections
HDMI carries digital video and audio on one cable.
In a home cinema receiver, HDMI inputs are used for sources such as a Blu-ray player, media player, game console, TV box, or streaming device.
The receiver’s HDMI output then sends the picture to a TV or projector while the receiver plays the sound through the speakers.
Check the receiver’s HDMI capabilities before deciding which source goes into which input.
Some entry-level receivers have a mixture of HDMI input capabilities.
For instance, the Denon AVR-S270BT includes five HDMI inputs, with three compatible with 4K UHD and two limited to up to 1080p. In that kind of system, a 4K Blu-ray player, 4K streaming device, or modern console should use a 4K-capable input, while an older HD source can use a 1080p input.
A receiver such as the Pioneer VSX-532 shows the basic advantage of using the receiver as the HDMI hub: multiple HDMI inputs can feed UltraHD video to a TV or projector, and the receiver can decode multichannel Dolby and DTS soundtracks.
More advanced receivers, such as Yamaha’s RX-A8A, add features for 8K, 4K/120Hz, ALLM, VRR, QMS, and QFT, which are relevant for high-refresh-rate gaming and newer displays.
The practical lesson is simple: the display, source, receiver, and HDMI cable all need to support the video format you want to pass.
- List every HDMI source: Blu-ray player, streamer, console, set-top box, or media player.
- Check which HDMI inputs support the highest video format you need, such as 4K UHD, HDR, HLG, or gaming features.
- Connect high-bandwidth sources to the best HDMI inputs first.
- Connect the receiver’s HDMI output to the TV or projector HDMI input.
- Label HDMI inputs in the receiver menu if the receiver allows it, so “Blu-ray,” “Game,” and “Streamer” are easy to select.
Connect HDMI for a TV or projector home cinema system
For the cleanest installation, connect sources to the receiver and connect one HDMI cable from the receiver to the display.
This lets the receiver handle audio decoding and video switching.
It also reduces the number of cables running to a projector, which is useful when the projector is ceiling-mounted or far from the equipment rack.
If you use the TV’s built-in apps, you may need ARC or eARC.
ARC means Audio Return Channel, which sends audio from the TV back to the receiver over HDMI. eARC is an enhanced version used on some newer equipment and can support more demanding audio links when both the TV and receiver support it.
Some projectors also include eARC-capable HDMI, as seen on models such as the Viewsonic V57-4K. Use the HDMI port specifically marked ARC or eARC on the display and enable the feature in both menus.
Projector users should also consider installation features separately from receiver setup.
Home cinema projectors may provide optical zoom, lens shift, keystone correction, or 4-corner adjustment.
These affect picture geometry, not surround sound, but a clean installation matters: do the image alignment first, then finalize speaker placement around the seating and screen position.
- Power everything off before making HDMI changes.
- Connect each source’s HDMI output to a receiver HDMI input.
- Connect the receiver HDMI output to the TV or projector HDMI input.
- If using TV apps, connect to the ARC/eARC-labeled HDMI port and enable ARC/eARC in the TV and receiver menus.
- Select the matching input on the receiver and confirm that both picture and sound are present.

Wire the five speakers safely and correctly
Speaker wiring is simple, but polarity and channel assignment matter.
Each speaker cable has two conductors: positive and negative.
The receiver’s red terminal is normally positive and the black terminal is negative. Match red to red and black to black at the speaker end. If one speaker is wired with reversed polarity, it may still play sound, but imaging, bass integration, and surround focus can suffer.
Many receivers use different terminal types.
The Pioneer VSX-532, for example, uses screw terminals for the front channels and spring terminals for the rear and center channels.
Screw terminals may accept bare wire or banana plugs depending on the receiver and regional safety design; spring terminals usually take bare wire. Whichever connector you use, make sure there are no stray copper strands touching the adjacent terminal.
Never connect or disconnect speaker wires while the receiver is powered on.
A short circuit between positive and negative terminals can trigger protection mode or damage equipment.
If you are routing cable through walls, use cable rated for that application and follow local electrical codes. Keep speaker wires away from power cables where practical, and avoid sharp bends or crushed cable under furniture.
- Cut speaker cables to practical lengths, leaving a little slack for repositioning.
- Strip only enough insulation to make a secure connection; do not leave long exposed copper ends.
- Connect front left, center, front right, surround left, and surround right to the matching receiver terminals.
- Check polarity at every speaker: positive to positive, negative to negative.
- Gently tug each connection to confirm it is secure, then inspect for stray strands before powering on.

Connect and configure the powered subwoofer
In most 5.1 systems, the subwoofer is powered, meaning it contains its own amplifier.
The receiver sends it a low-level signal from a subwoofer output, usually on an RCA-style connection.
Entry-level receivers such as the Denon AVR-S270BT and Pioneer VSX-532 include a subwoofer output for this purpose.
Connect the receiver’s subwoofer pre-out or powered subwoofer output to the subwoofer’s line-level/LFE input.
If the subwoofer has a crossover knob, a common practical approach is to let the receiver manage bass routing after calibration; many subs have an LFE or bypass setting for this.
If there is no bypass marking, set the crossover high enough that it does not fight the receiver’s bass management, then adjust after calibration if needed. Keep volume moderate before the first test tone so the calibration routine is not overloaded.
Wireless subwoofer options can help placement when running a long cable is difficult.
Some subwoofers or optional modules provide wireless connectivity, and certain models support auto-calibration using a measurement microphone.
Wireless placement is convenient, but the sub still needs power from a wall outlet and may require pairing. If bass seems delayed or weak after wireless setup, rerun the receiver’s calibration and check the subwoofer manufacturer’s pairing and delay guidance.
- Place the subwoofer near the front of the room to start, or along a wall where power and cable access are easy.
- Connect receiver subwoofer output to the subwoofer LFE/line input.
- Set the subwoofer power to on or auto, depending on your preference.
- Set subwoofer volume to a moderate starting point, not maximum.
- Run receiver calibration before making fine bass adjustments by ear.
Run automatic room calibration, then verify the results
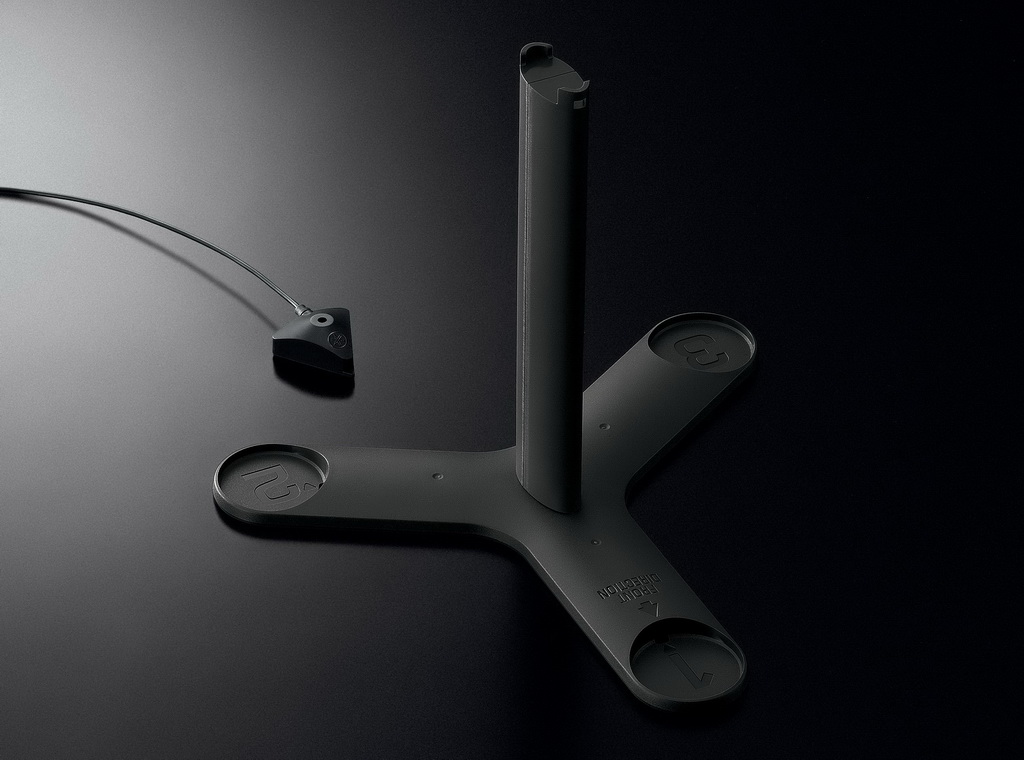
Automatic calibration uses a microphone and test signals to adapt the receiver to your room, speaker distances, levels, and placement.
Pioneer’s MCACC is one example of an automatic acoustic calibration system that fine-tunes sound to match the room, speakers, and speaker placement.
Some subwoofers also offer their own microphone-based calibration, as seen in models that include auto-calibration features.
Place the calibration microphone at ear height in the main listening position.
The room should be quiet: turn off fans, avoid talking, and keep pets or people away from the measurement area.
Follow the on-screen prompts exactly. If the receiver allows multiple measurement positions, use positions around the main seating area rather than random points across the room.
After calibration, do not assume every result is perfect.
Check that all speakers were detected, the subwoofer is active, and channels are assigned correctly.
If the receiver reports a missing speaker, reversed polarity, or unusually low subwoofer level, inspect the wiring and rerun the measurement. Calibration is a starting point; verification is what turns it into a reliable home cinema setup.
- Mount or place the calibration microphone at seated ear height.
- Run the receiver’s automatic setup routine with the room quiet.
- Confirm that all five speakers and the subwoofer are detected.
- Play the receiver’s test tones and verify that each sound comes from the correct speaker.
- Save the calibration, then make only small manual adjustments if necessary.
Set speaker size, bass management, and listening modes
Receiver menus often ask whether speakers are “large” or “small.” These labels do not describe physical size as much as bass handling.
In home cinema, many systems work best when the main speakers are set to small and deep bass is redirected to the powered subwoofer.
This reduces strain on compact speakers and lets the subwoofer handle the effects-heavy low-frequency content in movies.
Bass management is the receiver’s system for deciding which frequencies go to which speaker.
The crossover is the point where bass begins to move from the main speakers to the subwoofer.
The best setting depends on your speakers and room, so use the receiver’s calibration result as a starting point and consult your speaker manuals if available. Avoid setting every speaker to large simply because floorstanding speakers look capable; the goal is smooth bass at the seats, not maximum bass from every channel.
Choose listening modes according to the source.
A Blu-ray or UHD disc may carry Dolby TrueHD or DTS-HD Master Audio, both supported by various 5.1 receivers.
Stereo TV, older discs, or music can be played in stereo or upmixed to surround using formats such as Dolby Pro Logic II or DTS Neo:6 where supported. If dialogue becomes vague or effects sound artificial, return to the native soundtrack mode and compare.
- Open the receiver speaker configuration menu after calibration.
- Confirm a 5.1 layout rather than 7.1, Atmos, or unused channels.
- Use the calibration crossover as a starting point for each speaker group.
- Enable the subwoofer in the receiver menu, even if the sub is physically connected.
- Select native Dolby or DTS playback for movies when available, and use upmixing only when useful.
Optimize dialogue, surround effects, and bass after the first movie test
Once wiring and calibration are complete, test the system with familiar film scenes that include dialogue, ambience, and bass effects.
Dialogue should lock to the screen through the center channel.
If voices are too low, raise the center channel level slightly in the receiver’s speaker level menu rather than turning up the whole system.
Surround speakers should create space and movement, not constantly dominate.
If rear effects are distracting, check that the surround channels are not placed too close to your ears or set too high in level.
If you hear almost nothing from the surrounds, confirm the source is actually multichannel, the receiver is in the correct listening mode, and the speakers are connected to surround terminals rather than unused back-surround terminals.
Bass should feel integrated, not separate from the picture.
If the subwoofer booms in one note, try moving it away from a corner or reducing its level slightly.
If bass is weak, confirm the subwoofer is enabled in the receiver, the RCA cable is connected to the correct input, the sub is powered on, and the receiver’s speaker size/bass management is not sending bass only to the main speakers.
- Play a known surround soundtrack, not only a stereo broadcast or music video.
- Check center dialogue level and adjust only a little at a time.
- Confirm surround activity with real multichannel content or receiver test tones.
- Adjust subwoofer position before making large EQ or level changes.
- Write down settings that work so you can restore them after menu resets.
Maintain the system and prevent future connection problems
A home cinema receiver setup should remain stable for years if it is kept cool, clean, and well documented.
Dust can block ventilation, and tight cable bends can loosen HDMI or speaker connections.
Every few months, inspect the rear panel with the system powered off and make sure no speaker wires have frayed or shifted.
HDMI problems can appear after changing a source, display, or cable.
Because video features such as 4K UHD, HDR, HLG, 4K/120Hz, ALLM, and VRR require support from the source, receiver, display, and cable, a single weak link can force a lower resolution or cause blank screens.
If you upgrade to a new game console or projector, revisit the HDMI input assignment and cable path.
Keep firmware and settings in mind where your receiver supports updates, but do not change multiple things at once when troubleshooting.
Make one change, test it, and then continue.
This approach makes it much easier to identify whether the fault is a cable, menu setting, source output format, or display input.
- Power down before moving cables or speakers.
- Keep ventilation openings clear and avoid enclosed heat buildup.
- Periodically check speaker terminals for loose wire or stray strands.
- Label HDMI and speaker cables at both ends.
- After major equipment changes, rerun room calibration.
Concise 5.1 receiver setup checklist
- Confirm you have five speakers, one powered subwoofer, HDMI sources, and a TV or projector.
- Place the center speaker near the screen, fronts left/right beside it, and surrounds to the sides or slightly behind the seats.
- Connect HDMI sources to the receiver, using 4K/HDR-capable inputs for 4K devices where applicable.
- Connect the receiver HDMI output to the TV or projector; use ARC/eARC ports if returning TV-app audio to the receiver.
- Wire each speaker to the matching channel with correct positive/negative polarity.
- Connect the receiver subwoofer output to the subwoofer LFE or line input.
- Run automatic calibration with the microphone at ear height in a quiet room.
- Verify that every speaker and the subwoofer are detected and playing from the correct channel.
- Set the receiver for a 5.1 layout and choose suitable Dolby/DTS listening modes for movie sources.
- Test with real movie content, then make small level or placement adjustments.
Common 5.1 home theater setup mistakes and how to avoid them
Using the wrong HDMI input for a 4K source.
Check the receiver manual or rear-panel markings.
If only some inputs support 4K UHD, HDR, or HLG, connect your 4K player, streamer, or console to those inputs and reserve lower-capability inputs for HD sources.
Expecting Atmos from a basic 5.1 receiver.
A 5.1 receiver powers five ear-level channels and a subwoofer.
Use a standard 5.1 speaker layout unless your receiver has the extra processing and amplification for height channels.
Reversing speaker polarity or connecting a speaker to the wrong terminal.
Match red to red and black to black at both ends.
Use the receiver’s test tones after wiring to confirm that front left, center, front right, surround left, and surround right all play from the correct speaker.
Turning the subwoofer volume to maximum before calibration.
Start with a moderate subwoofer level, run calibration, then adjust in small steps.
Excessive initial gain can confuse calibration and produce boomy bass.
Placing surround speakers at the front of the room.
Surround speakers are meant to create side and rear ambience.
Place them beside or slightly behind the listening position rather than next to the TV.
Changing many settings at once when troubleshooting.
Change one variable at a time: HDMI cable, input assignment, source output, speaker wiring, or receiver mode.
Test after each change so the real cause is clear.
Frequently asked questions
Can I connect all HDMI devices to the TV instead of the receiver?
You can, but the receiver-as-hub method is usually cleaner for home cinema because it lets the receiver decode sound and switch sources while sending one HDMI cable to the TV or projector.
If you use TV apps, ARC or eARC can return audio from the TV to the receiver.
Why do I get picture but no surround sound?
The source may be outputting stereo, the receiver may be in the wrong listening mode, or the HDMI audio setting may be incorrect.
Check the source audio output, select a Dolby or DTS soundtrack when available, and use the receiver’s test tones to confirm all speakers work.
Do I need a special receiver for a projector?
Not necessarily.
A projector usually connects to the receiver’s HDMI output like a TV.
The important points are HDMI compatibility, cable length and quality, and whether you need ARC/eARC from the projector. Some projectors include eARC-capable HDMI, but many systems simply send sources into the receiver and video out to the projector.
Should my speakers be set to large or small?
In many 5.1 home theater rooms, “small” is the practical setting because it lets the powered subwoofer handle deep bass.
Use automatic calibration as a starting point, then consult your speaker manuals and adjust bass management if the sound is thin or boomy.
Why is dialogue too quiet compared with explosions?
First confirm the center speaker is connected and aimed toward the seats.
Then raise the center channel level slightly in the receiver menu.
Avoid solving the issue only by increasing master volume, because that also makes effects louder.
When should I rerun automatic calibration?
Rerun calibration after moving speakers, changing the subwoofer location, replacing speakers, changing the main seating position, or making major room changes such as adding large furniture or heavy curtains.
Conclusion: build the system methodically, then fine-tune
A reliable 5.1 home theater setup comes from doing the basics in the right order.
Plan the five-speaker layout around the screen and seating, connect HDMI sources to compatible receiver inputs, wire every speaker with correct channel assignment and polarity, connect the powered subwoofer to the receiver’s sub output, and run automatic calibration in a quiet room.
After that, verify results with test tones and real movie content. The most important takeaways are simple: do not expect height-channel formats from a 5.1 receiver, use the right HDMI path for 4K/HDR or gaming features, let calibration establish a baseline, and make small, deliberate adjustments to center level, surround level, and subwoofer placement. Done carefully, a 5.1 receiver remains one of the most direct ways to get true home cinema sound from discs, streaming devices, consoles, and TV or projector systems.


Join the discussion
Share your thoughts, listening impressions or product experience.