


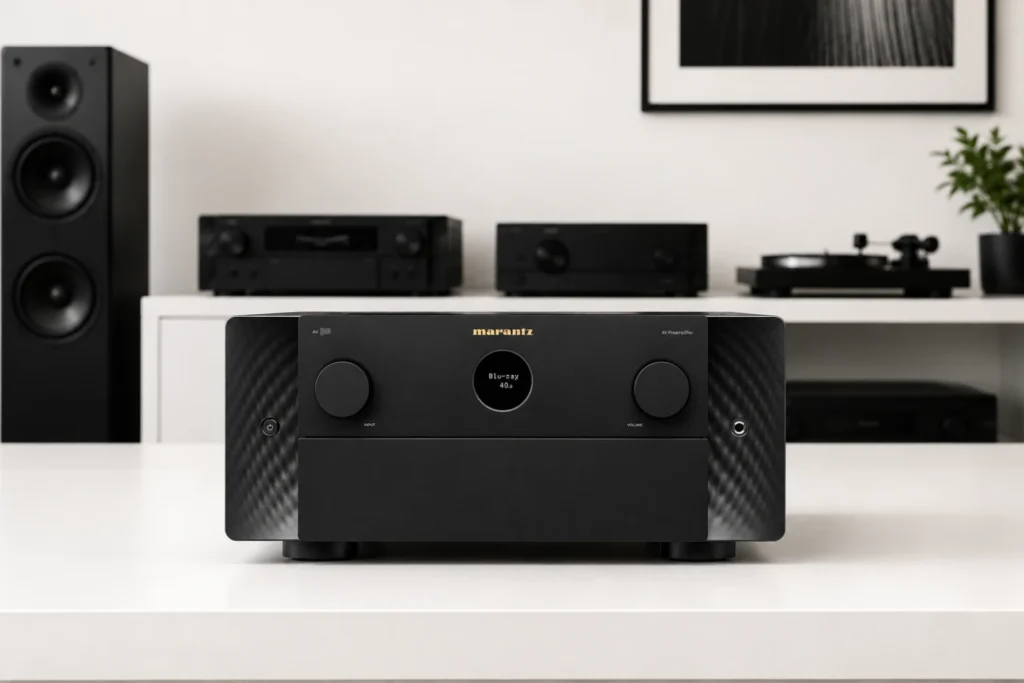
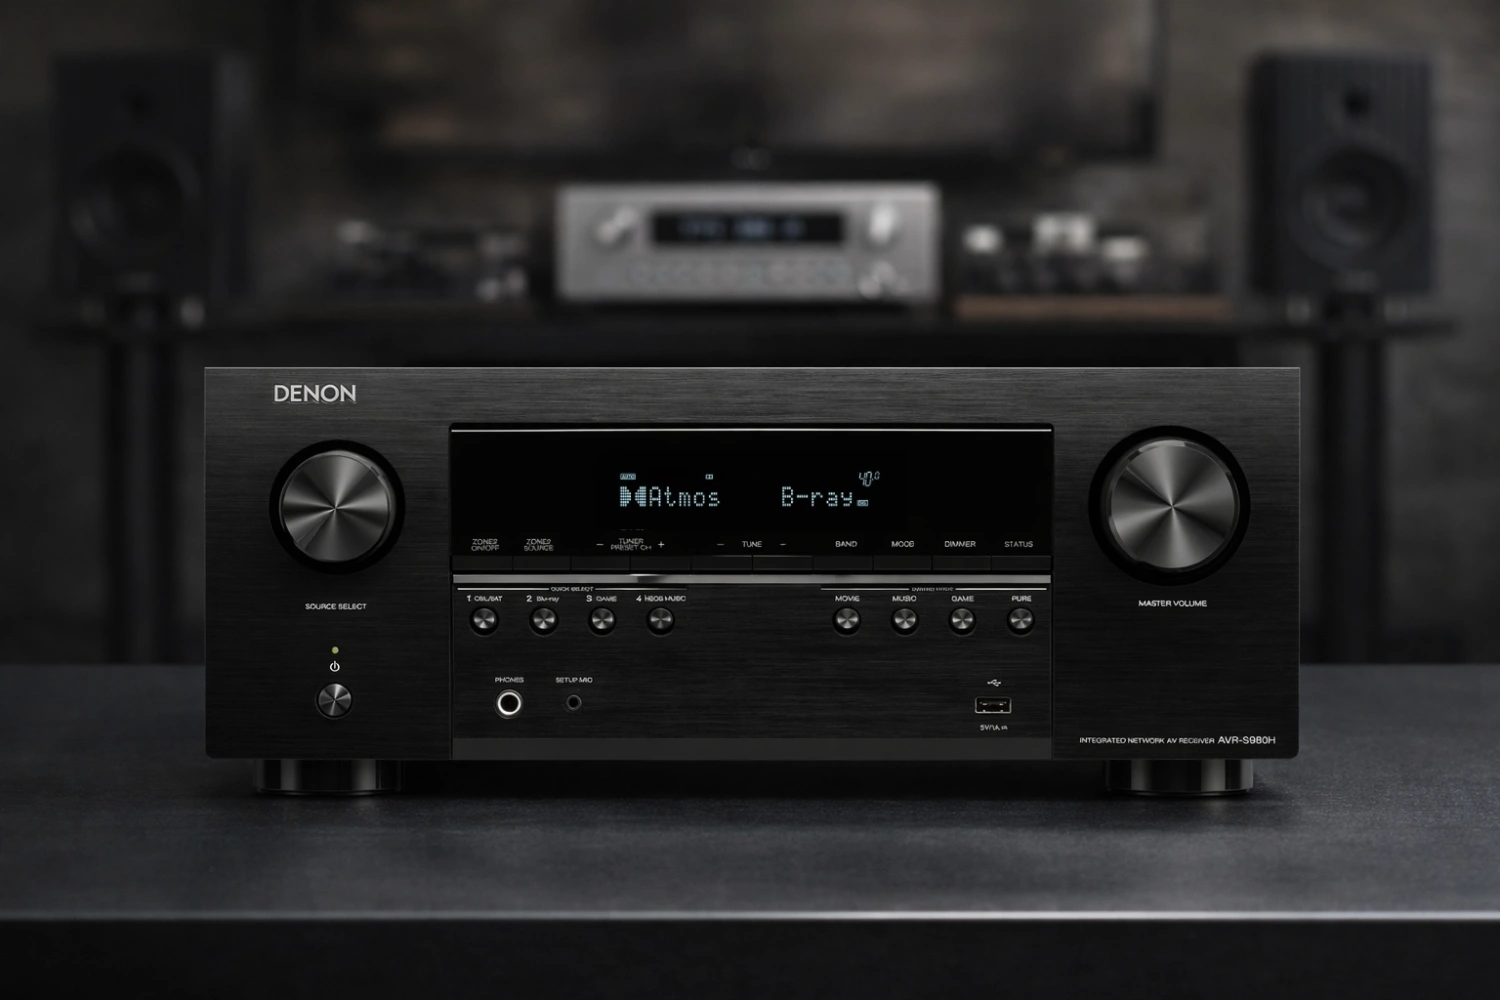
An AV receiver is the switching, decoding, amplification, and control hub of most home cinema systems.
It takes video and audio from sources such as a streaming box, game console, Blu-ray player, TV, USB drive, or Bluetooth device, sends video to the display, and drives the speakers that create surround sound.
A good setup is not only about plugging everything in; it is about choosing the right speaker layout, matching connections, enabling the correct audio and video formats, running calibration, and avoiding small mistakes that can limit performance.
Start with the role of the AV receiver in a home cinema
In a home cinema system, the AV receiver normally performs four jobs.
First, it switches between sources through inputs such as HDMI, optical digital, coaxial digital, analog RCA, USB, Bluetooth, or network streaming.
Second, it decodes movie soundtracks such as Dolby Digital, Dolby TrueHD, DTS, or DTS-HD, depending on the model. Third, it amplifies the sound for passive speakers. Fourth, it sends video to the television or projector through HDMI.
Some components look similar but work differently.
A conventional AV receiver, such as a 5.2-channel or 7-channel model, includes power amplifiers for passive speakers.
A surround processor or preamplifier, such as an 11-channel processor, handles decoding, switching, calibration, and volume control but requires separate power amplifiers for the speakers. Before you begin, confirm whether your unit has speaker terminals for passive speakers or only preamp outputs for external amplification.
The number in a layout such as 5.1, 5.2, 7.1, or 7.4.4 describes the speaker plan.
The first number is the main bed-layer speakers, the second is the number of subwoofers, and the third, when present, is the number of height or overhead speakers used for immersive formats such as Dolby Atmos or DTS:X.
A 5.2 receiver can run five speakers and two subwoofer outputs but will not necessarily support height channels. Always match the layout to the receiver’s actual channel count and decoding capability.
Plan the speaker layout before connecting cables
Planning the home cinema layout first prevents most setup problems.
For a straightforward 5.1 or 5.2 system, use front left, center, front right, surround left, surround right, and one or two active subwoofers.
The center speaker handles much of the dialogue, so place it as close as practical to the screen’s center line. The front left and right speakers create width and should be placed symmetrically around the screen. Surround speakers should sit to the sides or slightly behind the main seating area so effects can wrap around the listener.
For a 7-channel receiver, the additional speakers are usually surround back left and surround back right.
For an immersive system, a processor or receiver must specifically support height channels and formats such as Dolby Atmos or DTS:X.
Do not assume that every modern AV receiver supports these formats. Some 5.2 receivers decode high-definition surround formats but do not support Atmos because they lack the required extra processing and amplifier channels.
Subwoofers are different from the other speakers.
Most home cinema subwoofers are active, meaning they contain their own amplifier.
They connect to the receiver’s subwoofer output rather than to the normal speaker terminals. If your receiver has two subwoofer outputs, you can connect two active subwoofers, but you still need to configure them correctly in the setup menu and during calibration.
- Choose the final speaker layout supported by your receiver or processor.
- Place the center speaker near the screen and aim it toward the listening position.
- Place front left and right speakers symmetrically around the screen.
- Place surround speakers to the sides or slightly behind the main seats.
- Connect active subwoofers only to subwoofer/pre-out connections, not to passive speaker terminals.

Check compatibility before you wire the system
Compatibility matters in three areas: speakers, audio formats, and video formats.
For speakers, confirm that the receiver supports the impedance of your passive speakers.
Some receivers specify a permitted impedance range; for example, an entry-level 5.2 receiver may specify compatibility with speakers in a stated ohm range. If your speakers fall outside the receiver’s supported range, the amplifier may overheat or shut down. If you are unsure, check the speaker rating and the receiver’s manual before connecting.
For audio formats, match the receiver to the movie sources you actually use.
Dolby Digital and DTS are common surround formats, while Dolby TrueHD and DTS-HD Master Audio are high-definition formats often associated with disc playback and high-quality movie sources.
Dolby Digital Plus is commonly used for streaming services. Dolby Atmos and DTS:X require compatible decoding and enough channels for height or object-based playback. If your receiver is limited to 5.2 and does not support Atmos, it can still form a proper surround system, but it will not create a true height-channel layout.
For video, all devices in the HDMI chain must support the format you want.
If you want 4K HDR, Dolby Vision, HDR10+, 8K switching, VRR, or ALLM for gaming, the source, HDMI cable, AV receiver, and TV or projector must all support the relevant feature.
A receiver with advanced HDMI switching can pass these signals, but a weak link anywhere in the chain can force a lower resolution, disable HDR, or remove gaming features.
Connect HDMI sources and the TV correctly
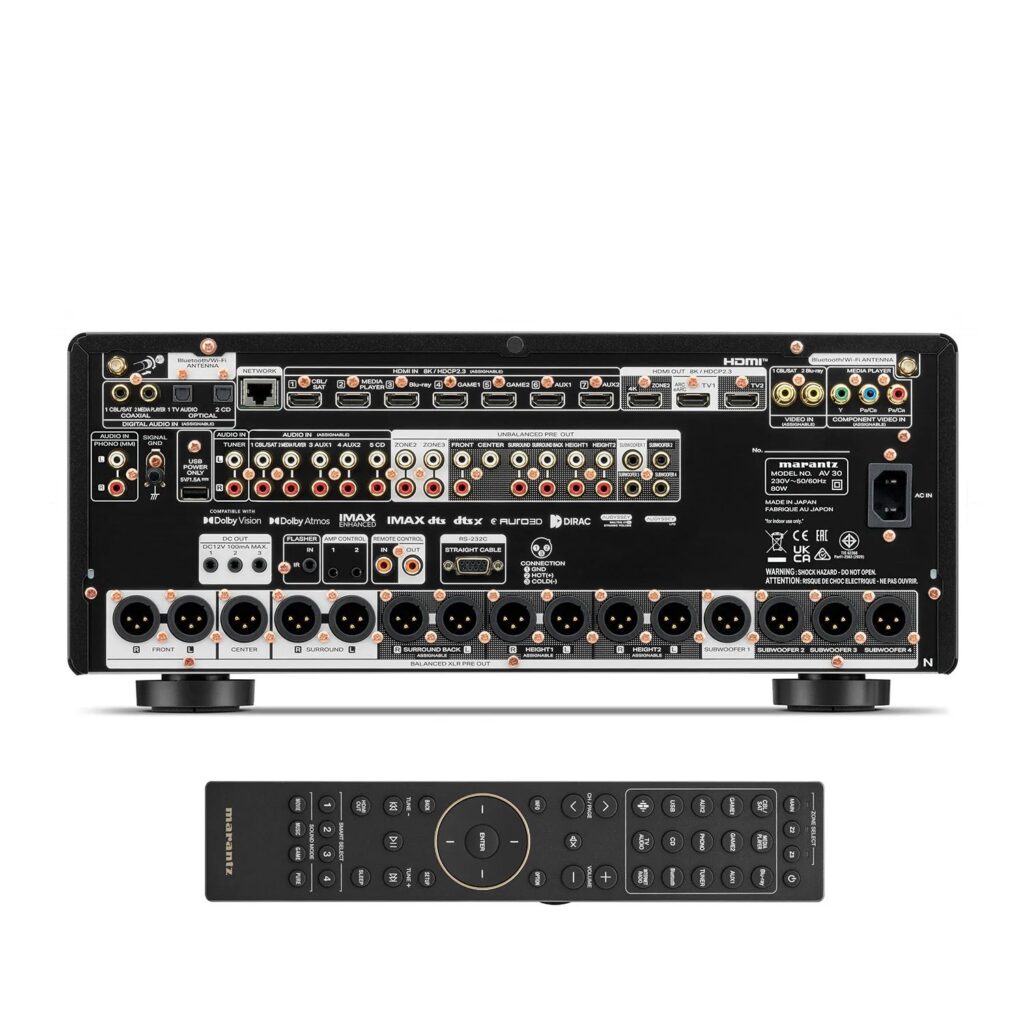
HDMI is the main connection for modern home cinema because it carries both picture and sound.
The most common arrangement is to connect all source devices to the AV receiver’s HDMI inputs, then connect the receiver’s HDMI output to the TV or projector.
This allows the receiver to extract and decode the audio while passing the video to the display. Typical HDMI sources include a media streamer, disc player, game console, set-top box, or computer.
If your receiver and TV support ARC or eARC, connect the receiver’s HDMI output labeled ARC or eARC to the TV’s matching HDMI ARC/eARC input.
ARC means Audio Return Channel, which lets sound from the TV’s built-in apps or tuner travel back to the receiver over the same HDMI cable. eARC is the enhanced version and is designed for higher-quality audio return where supported.
Enable ARC or eARC in both the TV and receiver menus, and also enable HDMI CEC if you want basic control through one remote. CEC can allow the TV remote to control volume or power, though behavior varies by equipment.
If ARC/eARC is unreliable or not available, use an optical Toslink cable from the TV to the receiver as a fallback.
Optical digital connections are useful, but they do not carry every modern high-bandwidth format.
For the best movie-audio compatibility, connect important sources directly to the receiver by HDMI when possible.
- Power off the receiver, TV, and source devices before making connections.
- Connect each source device to an HDMI input on the receiver.
- Connect the receiver’s HDMI output to the TV’s HDMI ARC/eARC input if available.
- In the TV menu, enable ARC/eARC and HDMI CEC if you want audio return and shared control.
- In the receiver menu, assign HDMI inputs to clear names such as Streamer, Blu-ray, or Game.
Wire passive speakers safely and cleanly
Passive speakers connect to the receiver’s speaker terminals.
Each speaker channel has a positive and negative connection, often color-coded.
Keep polarity consistent: positive on the receiver goes to positive on the speaker, and negative goes to negative. If one speaker is wired backward, it may still make sound, but bass and imaging can suffer because that speaker moves out of phase with the others.
Use enough speaker cable length to avoid tension, but do not leave messy coils near power cables.
Strip only enough insulation to fit the terminal securely.
Loose copper strands can touch the neighboring terminal and cause a short circuit, which may trigger protection mode or damage equipment. If your receiver uses spring terminals, insert the bare wire firmly. If it uses binding posts, tighten them securely but do not overtighten.
Never connect or disconnect speaker wires while the receiver is powered on.
Before first power-up, inspect every terminal with a flashlight and confirm that no stray wire strands bridge positive and negative.
Also make sure each speaker is connected to the correct channel. Accidentally wiring the center speaker to a surround output will make dialogue appear in the wrong location.
- Turn off and unplug the receiver before wiring speakers.
- Connect front left, center, front right, surround left, and surround right to their matching terminals.
- Maintain correct positive-to-positive and negative-to-negative polarity.
- Check for stray wire strands before switching on the receiver.
- Set any unused speaker channels to None or Not Used in the setup menu.
Connect subwoofers, analog sources, USB, Bluetooth, and network audio
For a home cinema subwoofer, use the receiver’s subwoofer output or LFE output and connect it to the active subwoofer’s line-level input.
If the receiver has dual subwoofer outputs, connect each subwoofer with its own cable.
Set the subwoofer volume to a sensible starting point, then let the receiver’s calibration system measure and balance the level. If the subwoofer has its own crossover control, many systems work best when the receiver handles bass management; consult the subwoofer and receiver manuals for the correct bypass or maximum-crossover setting.
Analog RCA inputs are useful for legacy sources, stereo devices, or a turntable if the receiver includes a phono input for the cartridge type you use.
A phono input for MM cartridges is not the same as a standard line input; a turntable without its own phono stage needs the correct phono input or an external phono preamplifier.
Plugging a turntable directly into a normal line input usually produces very low, thin sound.
USB and Bluetooth are convenient for music playback and quick testing, while network streaming features such as UPnP, Spotify Connect, Chromecast, AirPlay2, HEOS, or internet radio depend on the receiver or processor.
Some units connect to the network by Wi-Fi only, while others provide Ethernet and Wi-Fi.
For home cinema, however, keep the main movie sources on HDMI whenever possible so the receiver can handle video switching and surround decoding.
Run the setup wizard and room calibration
Many modern AV receivers include a setup assistant or wizard.
Use it.
The wizard usually confirms speaker presence, speaker layout, HDMI assignments, subwoofer setup, and basic playback. Skipping this step can leave channels disabled or misassigned, especially on receivers that support multiple layout options.
Room calibration uses a microphone to measure how speakers and subwoofers behave in your room.
Systems such as Audyssey or Dirac Live analyze levels, timing, and room effects, then apply corrections.
Place the microphone at the main listening position at ear height, keep the room quiet, and avoid holding the microphone in your hand during measurement. If the receiver asks for multiple positions, measure around the main seating area rather than random locations across the room.
After calibration, review the results.
Confirm that every connected speaker was detected, that subwoofers are active, and that no speaker was identified in the wrong location.
If a speaker is missing, check the wiring and rerun calibration. If a distance or level setting looks obviously wrong, investigate before assuming the software made a mistake; reversed polarity, a loose wire, or a muted subwoofer can confuse the measurement.
- Connect the supplied calibration microphone to the receiver.
- Select the correct speaker layout in the setup menu.
- Place the microphone at the main listening position in a quiet room.
- Run all requested measurements without moving speakers during the process.
- Review detected speakers, levels, distances, and subwoofer status before saving.
Set bass management, listening modes, and dialogue clarity
Bass management tells the receiver which frequencies go to the main speakers and which go to the subwoofer.
In many home cinema systems, even large speakers benefit from being set to Small in the receiver menu because the subwoofer is designed to handle deep bass.
The crossover setting determines where that handover happens. Use the receiver’s calibration result as a starting point, then adjust only if you understand the effect.
Listening modes determine how incoming soundtracks are played.
If a movie source provides Dolby Digital, Dolby TrueHD, DTS, or DTS-HD, choose a mode that preserves the original surround format rather than forcing everything into stereo.
For two-channel TV or older content, modes such as Dolby Pro Logic II or Dolby Surround can expand stereo into surround, if supported by the receiver. Direct or Pure modes may bypass processing and can be useful for music, but for movies they may also bypass some bass management or room correction depending on the receiver.
For dialogue problems, first check the center speaker.
Make sure it is connected to the center output, placed close to the screen, and not blocked by furniture.
Then use the receiver’s channel level menu to raise the center slightly if needed. Avoid solving dialogue issues by turning the entire system too loud; that can make effects overwhelming while speech remains unclear if the center channel is poorly placed or misconfigured.
Configure video pass-through, HDR, gaming, and disc playback
Once the audio works, verify the video chain.
Set each source device to output the resolution and HDR format your TV and receiver both support.
If your receiver supports 4K HDR or 8K switching, that does not automatically mean the TV, cable, and source are configured correctly. Use the TV’s information screen or the source device’s display settings to confirm the actual incoming resolution and HDR mode.
For gaming, features such as VRR and ALLM require support throughout the HDMI path.
VRR helps match display refresh behavior to the game system, while ALLM can switch the display into a low-latency mode automatically.
If these features disappear when the console is routed through the receiver, check whether the specific HDMI input on the receiver supports them, whether the TV input is set to the correct enhanced mode, and whether the HDMI cable is suitable for the signal.
Blu-ray and UHD disc playback remains relevant for many home cinema users, even as streaming has become dominant and several manufacturers have reduced or exited optical-disc production.
If you use a disc player or a game console with an optical drive, connect it to the receiver by HDMI and set the player’s audio output so the receiver can decode the soundtrack.
If the receiver display only shows stereo when playing a surround disc, check the disc audio menu, player output setting, and receiver input mode.
Maintain the receiver and keep the system reliable
AV receivers contain amplifiers, video circuits, network modules, and power supplies, so heat management matters.
Install the receiver on a stable shelf with space around it and avoid sealing it inside a tight cabinet without airflow.
If the receiver shuts down during loud scenes, check for overheating, blocked ventilation, low speaker impedance, or shorted speaker wires.
Label cables at both ends.
A home cinema system can include multiple HDMI cables, speaker cables, subwoofer cables, optical cables, USB devices, and power cords.
Labels make troubleshooting faster and prevent accidental swaps when you upgrade a source device or move furniture.
Keep firmware and app control in mind.
Some receivers can be managed by a mobile app for volume, source selection, USB browsing, or streaming control.
If control becomes unreliable, check the network connection, restart the app, and confirm the receiver is on the same network as the mobile device. For Wi-Fi-only receivers, placement and signal strength can affect streaming stability.
Concise AV receiver setup checklist
- Choose a speaker layout the receiver actually supports: 5.1, 5.2, 7.1, or an immersive layout only if the unit supports it.
- Place front, center, surround, and subwoofer channels before cutting or routing cables.
- Connect HDMI sources to the receiver and the receiver’s HDMI ARC/eARC output to the TV’s matching input.
- Wire passive speakers with correct polarity and no stray strands touching adjacent terminals.
- Connect active subwoofers to subwoofer outputs, not speaker terminals.
- Enable ARC/eARC, HDMI CEC, HDR, VRR, or ALLM only where supported by every device in the chain.
- Run the setup wizard and microphone-based room calibration.
- Confirm every speaker is detected and assigned to the correct channel.
- Set bass management and listening modes for movie playback, then save settings.
- Label cables and keep the receiver ventilated.
Common mistakes and how to avoid them
Buying or configuring for Dolby Atmos when the receiver only supports a 5.2 layout.
Check the channel count and decoding formats before planning height speakers.
A 5.2 receiver can make an effective surround system, but it cannot become a true Atmos setup unless the model specifically supports the required processing and channels.
Connecting the TV to a normal HDMI input instead of the ARC/eARC connection.
Use the receiver’s HDMI output labeled ARC/eARC and the TV’s HDMI input labeled ARC/eARC.
Then enable ARC/eARC in both menus.
Reversing speaker polarity or leaving loose wire strands.
Match positive to positive and negative to negative on every speaker.
Inspect terminals before power-up and remove stray copper strands that could cause a short.
Expecting optical digital audio to behave like HDMI.
Use HDMI for primary movie sources when possible.
Optical is useful as a fallback from a TV, but HDMI is the main connection for modern surround, video switching, and ARC/eARC workflows.
Skipping room calibration because sound is already coming from every speaker.
Run the supplied microphone calibration to set levels, timing, and room correction.
Then review the results for missing speakers or obvious wiring errors.
Routing a console or streamer through a receiver input that does not support the desired video feature.
Confirm that the chosen HDMI input, the HDMI output, the TV input, the cable, and the source all support the required resolution, HDR format, VRR, or ALLM.
Frequently asked questions
Should I connect my streaming box to the TV or to the AV receiver?
For a home cinema system, connecting the streaming box to the AV receiver by HDMI is usually the cleanest approach because the receiver can decode the audio and pass video to the TV.
If you connect the streamer to the TV instead, use ARC or eARC to send audio back to the receiver.
What is the difference between ARC and eARC?
ARC stands for Audio Return Channel and sends TV audio back to the receiver over HDMI. eARC is the enhanced version and is intended for higher-quality audio return when both the TV and receiver support it.
Both require the correct HDMI ports and menu settings.
Can I use two subwoofers with a 5.2 receiver?
Yes, if the receiver provides two subwoofer outputs and your subwoofers are active models with their own amplification.
Connect each subwoofer to a subwoofer output and include both during calibration.
Why does my receiver show stereo instead of surround sound?
Check the source audio setting, the movie or app audio track, the HDMI input assignment, and the receiver listening mode.
Some content is only stereo, and some players must be set to output bitstream or surround audio rather than downmixed stereo.
Do I need an AV receiver or an AV processor?
Choose an AV receiver if you want one box that decodes surround sound and powers passive speakers.
Choose an AV processor only if you plan to use separate power amplifiers, because processors provide decoding and preamp outputs rather than built-in amplification for every speaker.
Why does my receiver shut down during loud movie scenes?
Common causes include overheating, blocked ventilation, speaker wires shorting at the terminals, or speakers that are not compatible with the receiver’s supported impedance range.
Turn the system off, inspect wiring and airflow, and confirm speaker compatibility before trying again.
Conclusion: build the system around correct signal flow
A successful home cinema receiver setup follows a simple signal path: sources into the receiver, video out to the display, amplified sound out to passive speakers, and low-frequency effects out to active subwoofers.
Start by choosing a speaker layout the receiver genuinely supports, then wire carefully, use HDMI ARC/eARC correctly, confirm video-format compatibility, and run the setup wizard with microphone calibration.
The biggest improvements usually come from correct placement, clean wiring, accurate speaker assignment, sensible bass management, and solving compatibility issues before chasing new equipment. Once configured properly, the AV receiver becomes the stable control center that lets movies, games, streaming, and disc playback work together as a true home cinema system.

Join the discussion
Share your thoughts, listening impressions or product experience.