


A turntable is not connected like every other audio source.
Some record players send a very low phono-level signal that must pass through a phono stage before it can be used by an amplifier, receiver or powered speaker.
Others include a built-in phono stage and can connect directly to a normal line input. Modern models may also add Bluetooth, Wi-Fi, USB digitizing or app-based playback. The key is to identify what your turntable outputs, set the phono/line switch correctly, and avoid sending the wrong signal into the wrong input.
Understand the three basic turntable signal paths
Before plugging in cables, identify which kind of output your turntable provides.
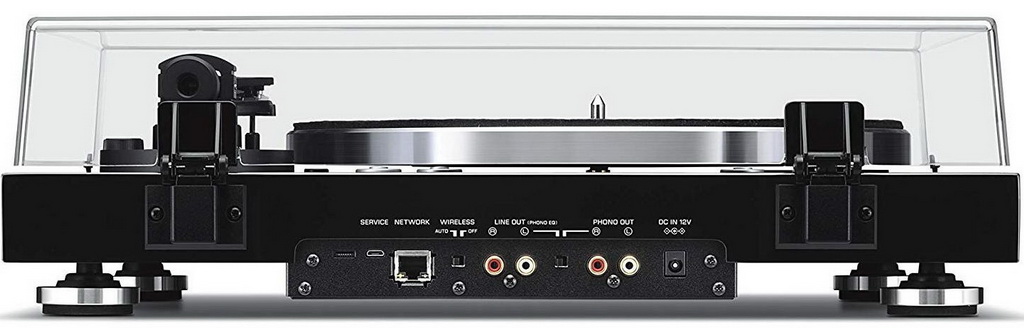
Many turntables have RCA sockets labeled Phono, Line, or Phono/Line.
Some portable models use a 3.5 mm AUX output. Wireless turntables may also offer Bluetooth, Wi-Fi or Apple AirPlay alongside standard analog outputs.
A phono output is the raw signal from the cartridge.
It is much lower in level than a CD player, streamer or DAC.
For example, published turntable specifications often show phono output in only a few millivolts, while line output is far higher. That is why a phono output must be connected to a phono input or an external phono stage.
A line output has already been amplified by a built-in phono preamplifier.
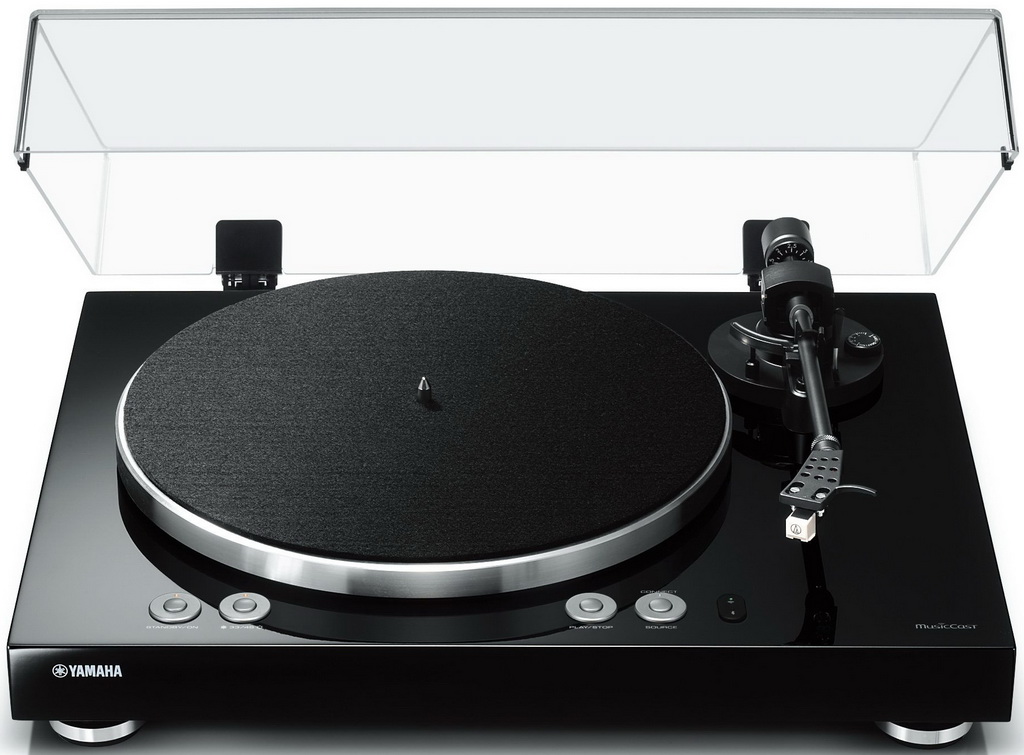
Turntables such as the TEAC TN-3B, Denon DP-300F and Yamaha MusicCast VINYL 500 include switchable phono/line outputs, which means they can feed either a phono input or a normal line input depending on the switch position.
This flexibility is useful, but it also makes correct setup important.
- Look for output labels on the back or underside of the turntable.
- Check whether there is a Phono/Line switch.
- If the switch is set to Phono, connect to a phono input or external phono stage.
- If the switch is set to Line, connect to an AUX, CD, Tuner, Line, Tape or powered-speaker analog input.
- Never assume the setting: verify it before powering up the system.
Connecting a turntable to an amplifier or AV receiver with a phono input
If your amplifier, stereo receiver or AV receiver has a dedicated Phono input, it contains a phono stage.
In that case, a turntable with a phono-level output can connect directly to it using RCA cables.
If your turntable has a switchable output, set it to Phono so the receiver’s phono stage does the work.
Most built-in phono stages on accessible turntables are designed for moving-magnet cartridges.
The TEAC TN-3B, Denon DP-300F and Yamaha MusicCast VINYL 500 are all supplied with MM cartridges and provide built-in MM phono preamplification.
If you use a moving-coil cartridge, confirm that the phono input or external phono stage supports it. A moving-coil cartridge should not simply be treated as if it were any other cartridge type.
The signal chain is simple: turntable phono output to receiver phono input, then receiver speaker outputs to passive speakers.
If you use an AV receiver, select the Phono input on the receiver and keep any turntable line switch in the correct position.
- Turn the amplifier or receiver volume down before connecting.
- Connect left and right RCA plugs from the turntable to the Phono input.
- If your turntable has a ground wire, attach it to the receiver’s ground terminal where provided.
- Set the turntable’s output switch to Phono if it has one.
- Select Phono on the amplifier or receiver and raise volume gradually.
Connecting a turntable to a normal line input
Many amplifiers, receivers and powered speakers do not have a phono input.
They may instead offer inputs labeled Line, AUX, CD, Tape or Audio In.
These inputs expect a line-level signal, so the turntable must either have its internal phono stage switched on or use an external phono preamplifier between the turntable and the input.
This is where switchable turntables are especially convenient.
The TEAC TN-3B can be connected to any free line input because it includes a built-in phono stage.
The Denon DP-300F also includes a switchable MM phono preamplifier, allowing it to work with almost any amplifier or AV receiver. The Yamaha MusicCast VINYL 500 likewise provides switchable phono and line outputs.
The most common connection mistake is using two phono stages at once.
If the turntable is set to Line and you connect it to a receiver’s Phono input, the signal is amplified and equalized twice, often causing an overblown, distorted sound.
The opposite mistake is connecting a Phono output to a Line input, which usually produces very low volume and thin sound.
- If using a built-in phono stage, set the turntable switch to Line.
- Connect the RCA outputs to a Line, AUX, CD or similar input.
- Do not use the receiver’s Phono input when the turntable is set to Line.
- If the turntable has no line output, insert an external phono stage between the turntable and the line input.
- Start playback at low volume and listen for clean, balanced sound.

Connecting a turntable to powered speakers
Powered speakers contain their own amplification, so you do not connect them to an amplifier’s speaker terminals.
Instead, they need an audio signal at their input.
If the powered speakers have an analog line input, a turntable with line output can connect directly. If the turntable only has phono output, you need a phono stage between the turntable and the speakers.
Some compact and portable turntables make this especially simple.
The Audio-Technica Sound Burger includes an AUX output for connection to an amplifier or a pair of powered speakers, along with Bluetooth for wireless playback.
Turntables with RCA line outputs can connect to powered speakers with RCA inputs, or to speakers with a 3.5 mm input using the correct cable.
Check volume control before you play a record.
Some powered speakers have their own volume knob or remote control; some systems may rely on a preamp, app or source volume.
A turntable’s phono/line switch does not replace a proper volume control. Avoid connecting directly to speakers that cannot accept the signal type your turntable provides.
- Confirm the powered speakers have an analog input, such as RCA or 3.5 mm AUX.
- Set a switchable turntable to Line.
- Use the correct cable: RCA-to-RCA, RCA-to-3.5 mm, or 3.5 mm AUX as required.
- If the turntable is phono-only, connect turntable to phono stage, then phono stage to powered speakers.
- Set speaker volume low before lowering the stylus.
Using an external phono stage
An external phono stage is used when the turntable has only phono output and the rest of the system has no phono input, or when you want to bypass a turntable’s built-in phono stage.
Several turntables with built-in phono stages allow that upgrade path: the Denon DP-300F and TEAC TN-3B both provide switchable phono/line operation.
When using an external phono stage, the wiring is turntable to phono stage, then phono stage to a line input on the amplifier, receiver or powered speakers.
The phono stage must match the cartridge type.
For the MM cartridges supplied with many accessible turntables, use an MM-compatible phono input. If a turntable is fitted with a moving-coil cartridge, use a phono stage intended for moving-coil use.
Place the phono stage close enough for tidy cabling but not where cables are stretched or strained.
Keep the setup simple at first: confirm both channels work, then tidy the installation.
If hum appears, check grounding, cable seating and whether any signal cables are loosely connected.
- Set the turntable output to Phono, not Line.
- Connect the turntable’s RCA cables to the phono stage input.
- Connect the phono stage output to a normal line input.
- Connect the ground wire if the turntable and phono stage provide ground terminals.
- Select the line input on your amplifier or speakers and test at low volume.
Wireless turntable options: Bluetooth, Wi-Fi and app-based playback
Wireless turntables are useful when you cannot run cables across a room, want to use wireless speakers or headphones, or want a turntable to integrate with a multiroom system.
The Audio-Technica Sound Burger includes Bluetooth and a rechargeable battery, making it a portable option for casual use.
Yamaha’s MusicCast VINYL 500 goes further with Wi-Fi, Bluetooth, Apple AirPlay, Ethernet and app-based MusicCast control.
Bluetooth is the simplest wireless path: pair the turntable with a Bluetooth speaker, headphones or receiver, then play the record.
Wi-Fi systems can be more integrated, especially when they are part of a platform that also controls speakers and streaming sources.
The Yamaha MusicCast VINYL 500, for example, is designed to connect with MusicCast speakers and can also access streaming services through its network features.
Wireless does not remove the mechanical needs of vinyl playback.
The turntable still needs a stable, level surface.
A portable record player should not be carried around while a record is playing; the stylus is physically tracing the groove, and movement or vibration can cause mistracking. Treat Bluetooth as a connection method, not as permission to use the turntable like a phone.
- Put the wireless speaker, headphones or receiver into pairing mode.
- Enable Bluetooth or wireless output on the turntable according to its controls or app.
- Keep the turntable stationary on a stable surface during playback.
- If using a Wi-Fi ecosystem, complete network setup before placing the turntable in its final position.
- If wireless playback is unreliable, test a short wired connection to separate setup problems from wireless problems.
USB and computer connection for digitizing records
Some turntables include USB output for transferring records to a computer.
The TEAC TN-3B, for instance, includes a built-in ADC with USB output and can digitize vinyl to a computer.
This is different from simply connecting a turntable to speakers: the USB connection is intended for recording or digitizing through computer software.
When using USB, keep the analog side of the turntable set up correctly first.
The cartridge, tonearm, platter and speed still determine the quality of the signal before it reaches the computer.
A USB cable does not fix a dirty record, worn stylus, wrong speed or incorrect tracking setup.
If you want both listening and digitizing, check the turntable’s connection options.
Some systems let you listen through analog outputs while using USB for recording, but you should follow the turntable’s manual for the exact operating mode.
Avoid changing cables while the stylus is on the record.
- Install any required computer recording software or drivers specified for the turntable.
- Connect the USB cable between turntable and computer.
- Select the correct audio input in the recording software.
- Set recording levels conservatively to avoid clipping.
- Clean the record and cue the stylus carefully before starting the recording.
Turntable setup settings that affect every connection
A correct connection will not deliver good playback if the turntable is poorly set up.
Most turntables require attention to speed, cartridge, tracking force, anti-skate and cueing.
Some arrive almost assembled and configured, such as the TEAC TN-3B; others require the user to install a counterweight and set tracking force, as described for the Denon DP-300F.
Set the record speed correctly.
Most full-size turntables in the supplied examples support 33 1/3 and 45 rpm.
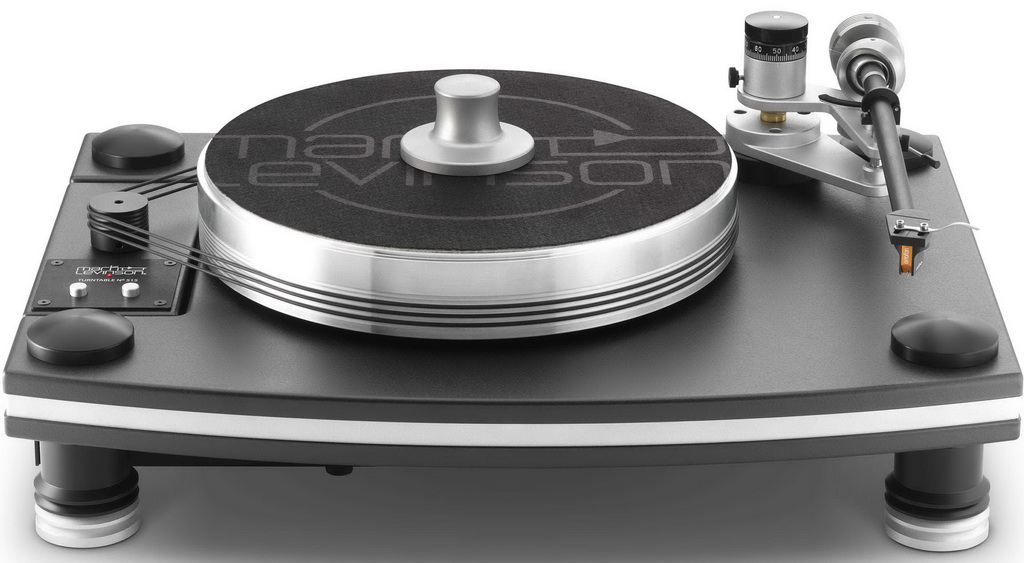
Some models provide electronic speed switching, while others may use a control button or external power supply. Rega’s Planar 6 RS Edition, for example, includes a Neo Mk2 power supply with speed selection and electronic fine-tuning. High-end designs may use sophisticated motor controllers to support stable rotation.
If your turntable has anti-skate, set it according to the cartridge and manufacturer guidance.
If it has automatic operation, such as the Denon DP-300F, also select the correct record size before pressing Start.
If it is manual, use the cueing lever or microlift to lower the stylus gently. Never drag the stylus sideways across the record.
- Place the platter, mat and belt as instructed for the turntable design.
- Set 33 1/3 or 45 rpm to match the record.
- Balance the tonearm and set tracking force if your model requires it.
- Set anti-skate where provided.
- Use the cueing mechanism rather than dropping the stylus by hand.
Placement, vibration control and cable management
Vinyl playback is mechanical, so placement matters.
Turntables in the source material repeatedly use anti-vibration ideas: anti-vibration feet, rigid plinths, damping, heavy platters, external motor control and vibration-control systems.
The practical lesson is simple: keep the turntable level, stable and isolated from avoidable vibration.
Do not place a turntable on a wobbly table, directly on a speaker cabinet, or where footfalls cause skipping.
Keep dust covers, cables and accessories from touching the tonearm or platter.
If your turntable has an external power supply or motor controller, place it where its cable is not pulling on the deck and where controls remain accessible.
Cable routing should be neat but not tight.
RCA connectors should be fully seated.
Keep left and right channels consistent: red is usually right, white or black is usually left. If you use a 3.5 mm adapter for powered speakers, make sure it is fully inserted, because a half-seated plug can cause missing channels or weak sound.
- Use a rigid, level surface away from speaker vibration.
- Leave enough clearance for the dust cover and tonearm movement.
- Route signal cables without strain.
- Check that RCA and AUX plugs are fully inserted.
- Keep records, adapters and accessories away from the spinning platter.
Troubleshooting turntable connection problems
Very low volume usually means a phono signal is plugged into a line input without a phono stage.
Fix it by switching the turntable to Line if it has a built-in phono stage, using an external phono stage, or moving the cable to a real Phono input.
Loud, distorted or boomy sound often means the opposite: the turntable is set to Line but connected to a Phono input.
Move the cable to a line input or switch the turntable back to Phono, depending on which phono stage you want to use.
Hum can come from grounding, loose connections or poor cable contact.
Check that RCA plugs are fully inserted and that the ground wire is attached if your equipment provides one.
One silent channel is usually a cable, cartridge connection or input-selection issue, so swap cables left-to-right only for diagnosis and return them correctly afterward.
Skipping, mistracking or repeated grooves are not usually caused by the amplifier connection.
Check that the turntable is level, the record is clean, the stylus is not damaged, and tracking force and anti-skate are set correctly.
Wireless dropouts are different: first confirm the turntable plays properly through a wired connection, then troubleshoot pairing, distance and network setup.
- Identify the symptom: low level, distortion, hum, missing channel, skipping or wireless dropout.
- Check the phono/line switch before changing anything else.
- Confirm the selected input matches the cable path.
- Inspect cable seating and grounding.
- Test with a known clean record and low volume.
Concise turntable setup checklist
- Identify the turntable output: Phono, Line, AUX, USB, Bluetooth or Wi-Fi.
- Set the Phono/Line switch correctly before connecting.
- Use Phono output only into a phono input or external phono stage.
- Use Line output into AUX, CD, Tape, Line, powered speakers or another line-level input.
- For powered speakers, confirm they have volume control and the correct analog input.
- Match the phono stage to the cartridge type, especially MM versus moving-coil.
- Set the correct record speed: 33 1/3 or 45 rpm.
- Set tracking force and anti-skate according to the turntable and cartridge instructions.
- Place the turntable on a stable, level surface away from vibration.
- Start with low volume and raise it only after clean playback is confirmed.
Common turntable connection mistakes and how to avoid them
Connecting a phono output to a normal line input.
Use a phono input, switch the turntable to Line if it has a built-in phono stage, or add an external phono stage.
Connecting a line output to a phono input.
Move the cable to AUX, CD, Line or another line input, or switch the turntable output back to Phono if you want to use the amplifier’s phono stage.
Assuming powered speakers can accept any turntable directly.
Powered speakers need a line-level signal unless they specifically include a phono input.
Use the turntable’s line output or an external phono stage.
Ignoring cartridge and phono-stage compatibility.
Use an MM-compatible phono stage for MM cartridges.
If using a moving-coil cartridge, confirm that the phono input or phono stage supports it.
Treating a wireless portable turntable like a handheld player while a record is spinning.
Keep the turntable stationary and level during playback.
Bluetooth removes the signal cable, not the need for stable mechanical playback.
Troubleshooting wireless before confirming basic playback.
If possible, test the turntable with a wired connection first.
Once analog playback is clean, troubleshoot Bluetooth pairing, Wi-Fi setup or app configuration.
Frequently asked questions
Do I need a phono stage to connect a turntable?
You need a phono stage if the turntable is sending a phono-level signal.
If the turntable has a built-in phono stage and is switched to Line, you can connect it to a normal line input or powered speakers with a suitable input.
What happens if I use the wrong Phono/Line switch setting?
If Phono output goes into a line input, playback will usually be too quiet and thin.
If Line output goes into a Phono input, playback is likely to be too loud, distorted or boomy.
Match the switch setting to the input you are using.
Can I connect a turntable directly to powered speakers?
Yes, if the turntable provides a line-level output or the powered speakers include a phono input.
If the turntable only has phono output and the speakers only have line input, place an external phono stage between them.
Is Bluetooth the same as using a line output?
No.
Bluetooth is a wireless transmission method, while line output is an analog wired signal.
A Bluetooth turntable can pair with compatible wireless speakers or headphones, but the turntable still needs stable placement and correct mechanical setup.
Can I use a USB turntable as my main speaker connection?
USB on a turntable is normally intended for sending audio to a computer for recording or digitizing.
For everyday listening through speakers, use the analog phono or line outputs, or a supported wireless connection if the turntable provides one.
Why does my turntable hum?
Check that the RCA plugs are fully seated, the correct input is selected, and the ground wire is attached where your turntable and phono stage or amplifier provide ground terminals.
If hum remains, simplify the system and test one connection path at a time.
Conclusion: choose the connection path before you plug in
The correct way to connect a turntable depends on one decision: are you using a phono-level signal or a line-level signal?
A phono output must go to a phono input or external phono stage.
A line output can feed a normal amplifier input, AV receiver line input or powered speakers. Wireless turntables add Bluetooth, Wi-Fi or app-based convenience, but they still require stable placement, correct speed, proper tonearm setup and careful handling. Set the Phono/Line switch deliberately, match the phono stage to the cartridge, start at low volume, and troubleshoot methodically. Do that, and almost any turntable system—from a compact Bluetooth portable to a traditional belt-drive deck—becomes much easier to install and enjoy.


Join the discussion
Share your thoughts, listening impressions or product experience.