


A turntable is a mechanical playback system, not just an audio source.
The stylus has to trace a microscopic groove while the platter rotates at a stable speed and the tonearm lets the cartridge move freely.
Small setup errors can cause mistracking, distortion, unstable pitch, weak bass, excessive record wear, or hum. The good news is that most improvements come from patient, repeatable setup rather than expensive upgrades. This guide explains the practical order: place the turntable correctly, level it, align the cartridge, set tracking force, dial in anti-skate, verify speed, connect the phono stage properly, and keep everything maintained.
### Start with a stable place for the turntable
Before adjusting the cartridge or tonearm, give the turntable a stable foundation.
The plinth, platter, bearing, motor, tonearm, and cartridge all respond to vibration.
If the support furniture rocks, flexes, or sits too close to a loudspeaker, the stylus can pick up that movement as low-frequency noise, feedback, or blurred bass.
Choose a rigid, level surface that is not shared with large speakers or a subwoofer.
A wall shelf can be useful where floors are springy, but even a normal rack can work well if it is steady and not overloaded.
Keep the turntable away from strong heat, direct sunlight, and places where people will bump the support during playback.
Many turntables use anti-vibration or adjustable feet.
Some designs, such as heavier belt-drive models with damped plinths and adjustable feet, are relatively unfussy about placement, but they still need proper leveling.
Do not assume that a heavy turntable is automatically level or immune to vibration. Mass and damping help, but setup still matters.
- Place the turntable on a rigid support before installing or fine-adjusting the cartridge.
- Keep speakers and subwoofers off the same surface as the turntable whenever possible.
- Fit the platter, mat, and belt according to the turntable manual before final leveling.
- Install the dust cover if supplied, but check whether playing with it open or closed creates acoustic feedback in your room.
- Do not move the turntable with the tonearm unsecured or the stylus exposed.

### Level the platter, not just the shelf
Leveling means making the platter surface horizontal from front to back and side to side.
This matters because the tonearm’s bearings and anti-skate system are designed to work with gravity acting straight down.
If the deck leans, tracking force and skating behavior can become inconsistent across the record.
Use a small bubble level placed on the platter or a reliable leveling tool.
Check in more than one direction.
If your turntable has adjustable feet, turn them gradually until the platter is level. If it does not, level the support furniture rather than placing random soft objects under the deck. Soft, uneven shims can make vibration control worse.
Always level the turntable in its real playback condition: platter installed, mat fitted, and the unit in the place where it will be used.
Some platters are heavy, and the suspension or feet may settle differently once the turntable is fully assembled.
- Switch the turntable off and secure the tonearm.
- Place the level on the platter surface, avoiding the spindle if the level does not sit flat.
- Check left-to-right and front-to-back level.
- Adjust the feet or support until both directions are level.
- Recheck after the turntable has been in position for a few minutes, especially if the support is soft or the deck is heavy.
### Confirm the tonearm and cartridge are compatible
A cartridge is not a universal plug-in part.
It must physically fit the headshell or tonearm, work with the arm’s adjustment range, and match the phono input electrically.
Some turntables are designed as complete systems with pre-installed cartridges and non-replaceable or difficult-to-replace tonearms. Others are made for user cartridge changes.
Check whether your tonearm allows the adjustments your cartridge needs: overhang, offset angle, tracking force, anti-skate, and sometimes height.
Tonearm height affects vertical tracking angle, often shortened to VTA, which describes the angle of the stylus assembly relative to the record surface.
Not every arm offers height adjustment. Some Rega-style arms, for example, may need spacers for height changes, and some integrated designs are not intended for casual tonearm removal.
Also identify whether your cartridge is moving magnet, usually called MM, or moving coil, called MC.
MM cartridges typically connect to an MM phono input.
MC cartridges usually need an MC phono input or a suitable step-up device, and MC phono stages may offer impedance and gain settings. Some turntables include a built-in switchable phono preamplifier, while others require an external phono stage.
- Look up the cartridge manufacturer’s recommended tracking force and loading requirements.
- Check that the turntable or phono stage is set for MM or MC as required.
- If the turntable has a built-in phono preamp, confirm whether the rear switch is set to phono-level or line-level output before connecting it.
- Do not fit a cartridge that requires tonearm height or mounting adjustments your turntable cannot provide.
- If the tonearm wiring is internal or soldered, do not attempt tonearm removal unless you are qualified to service it.
### Align the cartridge carefully
Cartridge alignment sets the stylus at the correct position and angle in the groove.
The two most important ideas are overhang and offset angle.
Overhang is how far the stylus sits beyond the tonearm’s ideal pivot-to-spindle geometry. Offset angle is the twist of the cartridge in the headshell. Together they reduce tracking error as the tonearm arcs across the record.
If your turntable came with a factory-mounted cartridge, do not assume it is wrong, but do verify it if the sound is distorted, the cartridge has been replaced, or the headshell has been removed.
Use the alignment tool specified by the turntable manufacturer when available.
If not, use a suitable two-point cartridge protractor designed for your tonearm geometry.
Work slowly and protect the stylus.
Remove the stylus guard only when you need to check the exact stylus position, and avoid pushing sideways on the cantilever.
Loosen cartridge screws just enough that the cartridge can move with gentle pressure. Tighten evenly when finished; overtightening can damage cartridge bodies or headshell threads.
- Unplug or switch off the turntable motor and secure the platter so it does not spin unexpectedly.
- Set tracking force approximately to the cartridge’s recommended value before alignment so the stylus sits normally on the protractor.
- Place the protractor on the platter and move the tonearm so the stylus rests on the first alignment point.
- Adjust the cartridge forward or backward until the stylus sits exactly on the target point.
- Rotate the cartridge body until it is square with the printed grid, not merely square with the headshell.
- Check the second point and repeat until both points agree.
- Tighten the mounting screws evenly, then recheck alignment because tightening can shift the cartridge slightly.

### Set tracking force accurately
Tracking force is the downward pressure of the stylus on the record.
Too little force is not safer; it can make the stylus bounce or mistrack, which may damage grooves and sound harsh.
Too much force can also increase wear and reduce performance. The correct setting is the cartridge maker’s recommended value or range.
Many tonearms use a counterweight at the rear.
On common designs, you balance the arm so it floats level with anti-skate set to zero, then rotate the tracking-force dial or counterweight to the target value.
Some tonearms use different mechanisms, so follow the arm manual. A digital stylus force gauge can make the setting more repeatable, especially after moving the turntable or changing cartridges.
Set tracking force with the stylus at record height, not high above the platter, because arm geometry can affect the reading.
If the turntable uses a thick mat that is part of the design, keep it installed.
Do not substitute mats casually on decks where the mat is part of the intended tonearm and platter geometry.
- Protect the stylus until you are ready to measure.
- Set anti-skate to zero if the tonearm manual instructs this for balancing.
- Float the tonearm level using the counterweight, taking care that the stylus does not hit the platter.
- Set the tracking force to the cartridge manufacturer’s recommended value.
- Verify with a stylus force gauge if available.
- After changing tracking force, recheck anti-skate and cueing clearance.
### Adjust anti-skate without overthinking it
Anti-skate is a small outward force that counteracts the tonearm’s natural tendency to pull inward toward the center of the record.
Without suitable anti-skate, one groove wall may carry more load than the other.
This can contribute to channel imbalance, uneven stylus wear, and distortion, especially toward the inner grooves.
Some tonearms have a numbered dial, some use a hanging weight, and some have factory-set or simplified systems.
A practical starting point is to set anti-skate according to the tonearm manual, often near the tracking-force value when the arm provides a matching scale.
From there, listen for symptoms rather than chasing perfection.
If you hear distortion mainly in one channel, especially on loud inner-groove passages, anti-skate may be part of the problem.
But alignment, stylus condition, record wear, and tracking force can cause similar symptoms, so do not treat anti-skate as the only control that matters.
- Set tracking force first; anti-skate depends on it.
- Use the tonearm manufacturer’s recommended anti-skate method.
- If the arm has a simple matching scale, use the tracking-force value as a starting point when the manual supports that approach.
- Listen to a clean, familiar record for stable center image and balanced distortion behavior.
- Make small changes only, and return to the starting point if the sound gets worse.
### Check platter speed and drive behavior
Correct speed is essential for pitch stability and timing.
Most turntables play 33 1/3 and 45 rpm records; some also support 78 rpm.
Speed selection may be manual, electronic, or button-controlled. Belt-drive decks may require the belt to move between pulley steps, while many modern designs offer electronic speed change. Direct-drive designs use the motor as the platter drive and may include more elaborate speed control.
Speed problems can come from belt wear, incorrect belt installation, dirty pulley surfaces, unstable power, or a motor-control issue.
Some high-end turntables use electronic or DSP-controlled stabilization and indicators that show when the selected speed is reached.
Other designs use upgraded power supplies to improve filtering and reduce mechanical interference, but the first step is always correct basic setup.
Use a strobe disc, turntable speed app, or the turntable’s built-in indicator if supplied.
Apps are convenient but depend on the phone and method, so treat them as a helpful check rather than a laboratory instrument.
If pitch wavers audibly on sustained piano or violin notes, investigate speed stability, platter seating, belt condition, and whether the record itself is off-center or warped.
- Confirm the record speed before playback: 33 1/3, 45, or 78 rpm where supported.
- Make sure the belt, platter, and mat are installed exactly as the manufacturer specifies.
- Let the platter reach stable speed before lowering the stylus.
- Check speed with a strobe or reliable tool if pitch sounds wrong.
- Replace or service belts only with parts appropriate for the turntable.
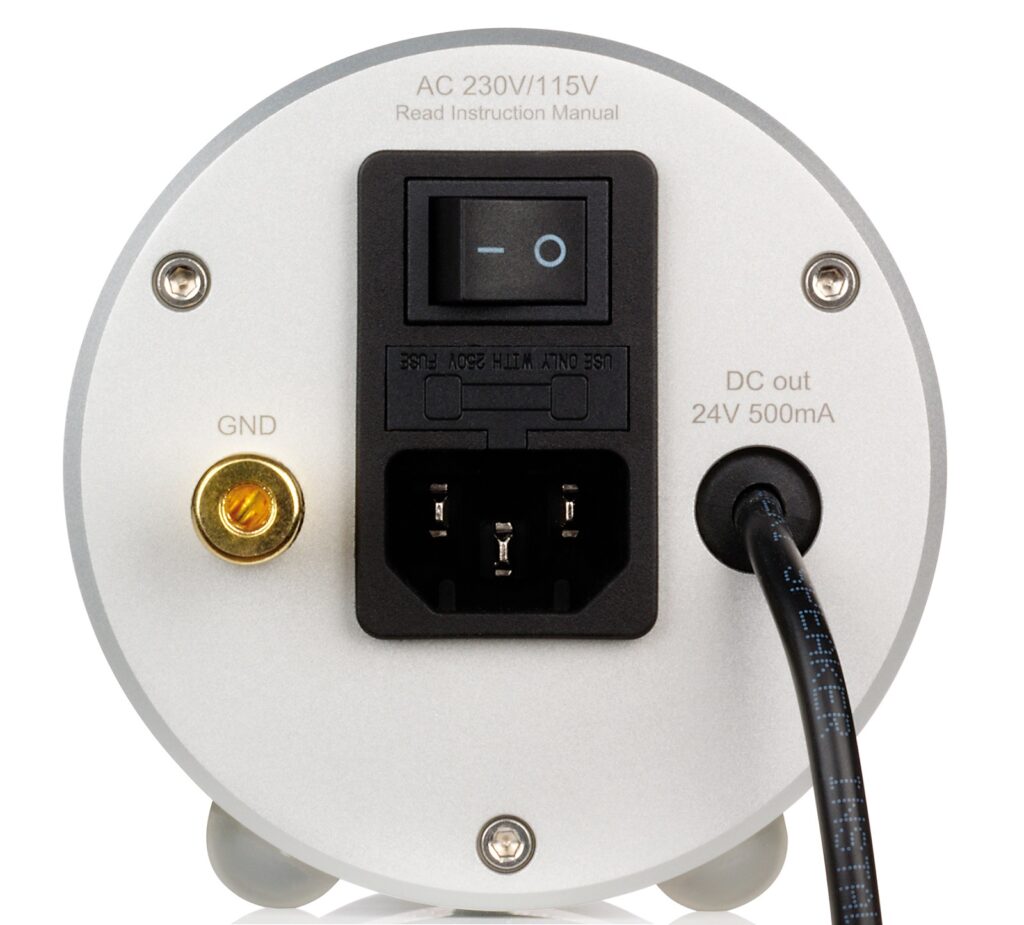
- If the turntable uses an external power supply, use the correct voltage supply intended for that model.
### Connect the phono stage correctly
A cartridge produces a very small signal that needs phono equalization and gain before a normal amplifier input can use it.
A phono preamplifier, or phono stage, provides that boost and equalization.
Some turntables have a built-in phono stage; some amplifiers have a phono input; some systems use a separate external phono preamp.
The most common connection mistake is sending the wrong signal level to the wrong input.
If the turntable’s built-in phono stage is switched on, connect it to a normal line input such as AUX, CD, or LINE.
If the built-in phono stage is switched off, connect the turntable to a proper phono input. Do not run a line-level output into a phono input unless the manual specifically says to do so; it will overload and sound badly distorted.
For MM and MC cartridges, use the correct phono input type.
Adjustable phono stages may offer gain, capacitance, or impedance settings.
Gain is the amount of amplification. Capacitance is an electrical load that matters especially for many MM cartridges. Impedance is a load setting often important for MC cartridges. Use the cartridge maker’s recommended loading as your starting point.
- Identify whether the cartridge is MM or MC.
- Set the turntable’s phono/line switch correctly if it has one.
- Connect phono-level output only to a phono input; connect line-level output to a line input.
- Attach the ground wire if the turntable provides one and the phono stage has a ground terminal.
- Keep signal cables away from power cords and power supplies to reduce hum.
- If hum appears, power down before changing cables or ground connections.
### Maintain the stylus, records, belt, and bearing
Setup is not a one-time job.
The stylus, records, belt, and bearing all affect playback.
A dirty stylus can mistrack even when alignment is correct. Dusty records can sound noisy and accelerate stylus contamination. A stretched belt can affect startup and speed stability. A bearing that requires oil should be maintained only as the manufacturer instructs.
Clean the stylus with a proper stylus brush or approved cleaner, brushing in the safe direction specified by the cartridge maker.
Never scrape sideways across the cantilever.
Keep records in clean sleeves, handle them by the edges, and remove dust before playback.
Some turntables include bearing oil, but that does not mean every user should oil frequently or improvise with substitutes.
Use only the correct oil and schedule recommended for the model.
If the platter, bearing, or motor begins making noise, stop using the turntable and investigate rather than letting the stylus ride through a mechanical problem.
- Brush the stylus gently and regularly using an appropriate stylus tool.
- Keep records clean and return them to sleeves after listening.
- Inspect the belt for slipping, twisting, or visible wear if speed becomes unstable.
- Use manufacturer-specified bearing oil only where the turntable manual calls for it.
- Recheck level, tracking force, and anti-skate after moving the turntable.
### Troubleshoot common sound problems by symptom
Turntable problems are easier to solve when you work in order.
Do not change five settings at once.
Make one adjustment, listen or measure, then continue. Start with the mechanical basics before assuming the cartridge or phono stage is defective.
Distortion near the end of a side often points to cartridge alignment, stylus wear, tracking force, or anti-skate.
Hum usually points to grounding, cable routing, or phono-stage connection.
Weak, thin sound may come from incorrect phono loading, wrong input selection, or a cartridge wired out of phase. Warbling pitch can be a speed issue, but it can also be caused by an off-center or warped record.
If the turntable is a complete factory-configured design, be careful about unnecessary modifications.
Changing mats, tonearms, power supplies, or cartridges without checking compatibility can create more problems than it solves.
When the manufacturer has designed the platter mat, tonearm height, and cartridge as a system, preserve that geometry unless the manual supports the change.
- For distortion, check stylus cleanliness, tracking force, cartridge alignment, and anti-skate in that order.
- For hum, check ground wire, cable placement, phono/line switch position, and MM/MC input selection.
- For pitch instability, check record condition, belt condition, platter seating, speed setting, and power supply connection.
- For skipping, confirm the turntable is level, the record is clean and flat, and tracking force is not set too low.
- For channel imbalance, inspect cartridge wiring, stylus condition, anti-skate, and phono-stage settings.
Concise turntable setup checklist
- Place the turntable on a rigid, low-vibration support away from speakers and subwoofers.
- Install platter, mat, belt, counterweight, headshell, and dust cover according to the manual.
- Level the platter front-to-back and side-to-side using the feet or support furniture.
- Confirm cartridge type: MM or MC, and set the phono stage accordingly.
- Align the cartridge with the correct protractor or manufacturer gauge.
- Set tracking force to the cartridge manufacturer’s recommended value.
- Set anti-skate according to the tonearm manual, then fine-tune gently if needed.
- Check that the phono/line output switch matches the amplifier input.
- Verify speed selection and investigate pitch instability if sustained notes waver.
- Clean the stylus and records regularly, and recheck setup after moving the turntable.
Common turntable setup mistakes and how to avoid them
Leveling the rack but not the platter.
Always check level on the platter surface with the turntable fully assembled.
Adjust the feet or support until the platter itself is level.
Using too little tracking force to protect records.
Set tracking force to the cartridge maker’s recommended value.
Too little force can cause mistracking, which may be more damaging than correct tracking.
Ignoring cartridge alignment after replacing a cartridge or headshell.
Use the correct protractor or alignment gauge and verify both overhang and cartridge angle before tightening the screws fully.
Connecting a line-level turntable output to a phono input.
If the built-in phono preamp is on, use a line input.
If it is off, use a phono input.
Match the switch position to the amplifier connection.
Assuming any cartridge will fit any tonearm.
Check mounting, tracking-force range, arm height, MM/MC compatibility, and phono-stage loading before buying or installing a cartridge.
Changing mats or accessories without checking geometry.
Use the supplied mat unless the turntable manual supports alternatives.
Mat thickness can affect tonearm height and stylus angle.
Trying to fix all distortion with anti-skate.
Check stylus cleanliness, tracking force, and alignment first.
Anti-skate is important, but it cannot correct a badly aligned or worn stylus.
Forgetting speed and belt maintenance.
Confirm the correct speed for each record, let the platter stabilize, and inspect the belt if startup or pitch becomes inconsistent.
Frequently asked questions
Do I need a cartridge protractor if my turntable came pre-assembled?
Not always, but it is useful.
A factory-installed cartridge may be correctly set, especially on turntables sold as complete systems.
However, alignment should be checked if the cartridge has been changed, the headshell has been removed, or you hear persistent distortion that cleaning and tracking-force checks do not solve.
Should anti-skate always equal tracking force?
Use the tonearm manual as the authority.
On many arms with a matching anti-skate scale, setting anti-skate near the tracking-force value is a practical starting point.
Other arms use weights, fixed systems, or different scales. Set tracking force first, then adjust anti-skate only in small steps.
What is the difference between phono and line output on a turntable?
Phono output is the tiny signal directly from the cartridge and must go to a phono stage.
Line output has already passed through a built-in phono preamplifier and should go to a normal amplifier input such as AUX or LINE.
Using the wrong input can cause very low volume, heavy noise, or severe distortion.
Why does my turntable sound distorted near the inner grooves?
Inner-groove distortion can be caused by poor cartridge alignment, a dirty or worn stylus, incorrect tracking force, unsuitable anti-skate, or a worn record.
Start by cleaning the stylus and record, then verify tracking force and alignment before making anti-skate changes.
How often should I recheck turntable setup?
Recheck level, tracking force, and anti-skate whenever you move the turntable, change the cartridge, remove the headshell, replace the mat, or notice new distortion, skipping, hum, or pitch instability.
Routine stylus and record cleaning should happen much more often.
Can an external or upgraded power supply improve turntable speed?
Some turntable makers offer stabilized external power supplies intended for specific models, and these are designed to support cleaner motor operation.
Compatibility is essential: use only a power supply specified for your turntable’s voltage and design.
For most problems, first check belt condition, platter seating, correct speed selection, and basic setup.
Conclusion: better vinyl sound comes from correct setup, not guesswork
A turntable performs at its best when the mechanical and electrical setup work together.
Start with stable placement and a level platter.
Confirm that the cartridge, tonearm, and phono stage are compatible. Align the cartridge carefully, set tracking force to the cartridge manufacturer’s recommendation, and apply anti-skate according to the tonearm design. Verify speed, keep the stylus and records clean, and avoid unsupported modifications that change the geometry of a complete turntable system. If a problem appears, troubleshoot methodically: clean first, check level and force, confirm alignment, then examine anti-skate, speed, cabling, and phono settings. Patient setup protects records, reduces distortion, improves pitch stability, and lets the cartridge retrieve more music from the groove.


Join the discussion
Share your thoughts, listening impressions or product experience.