

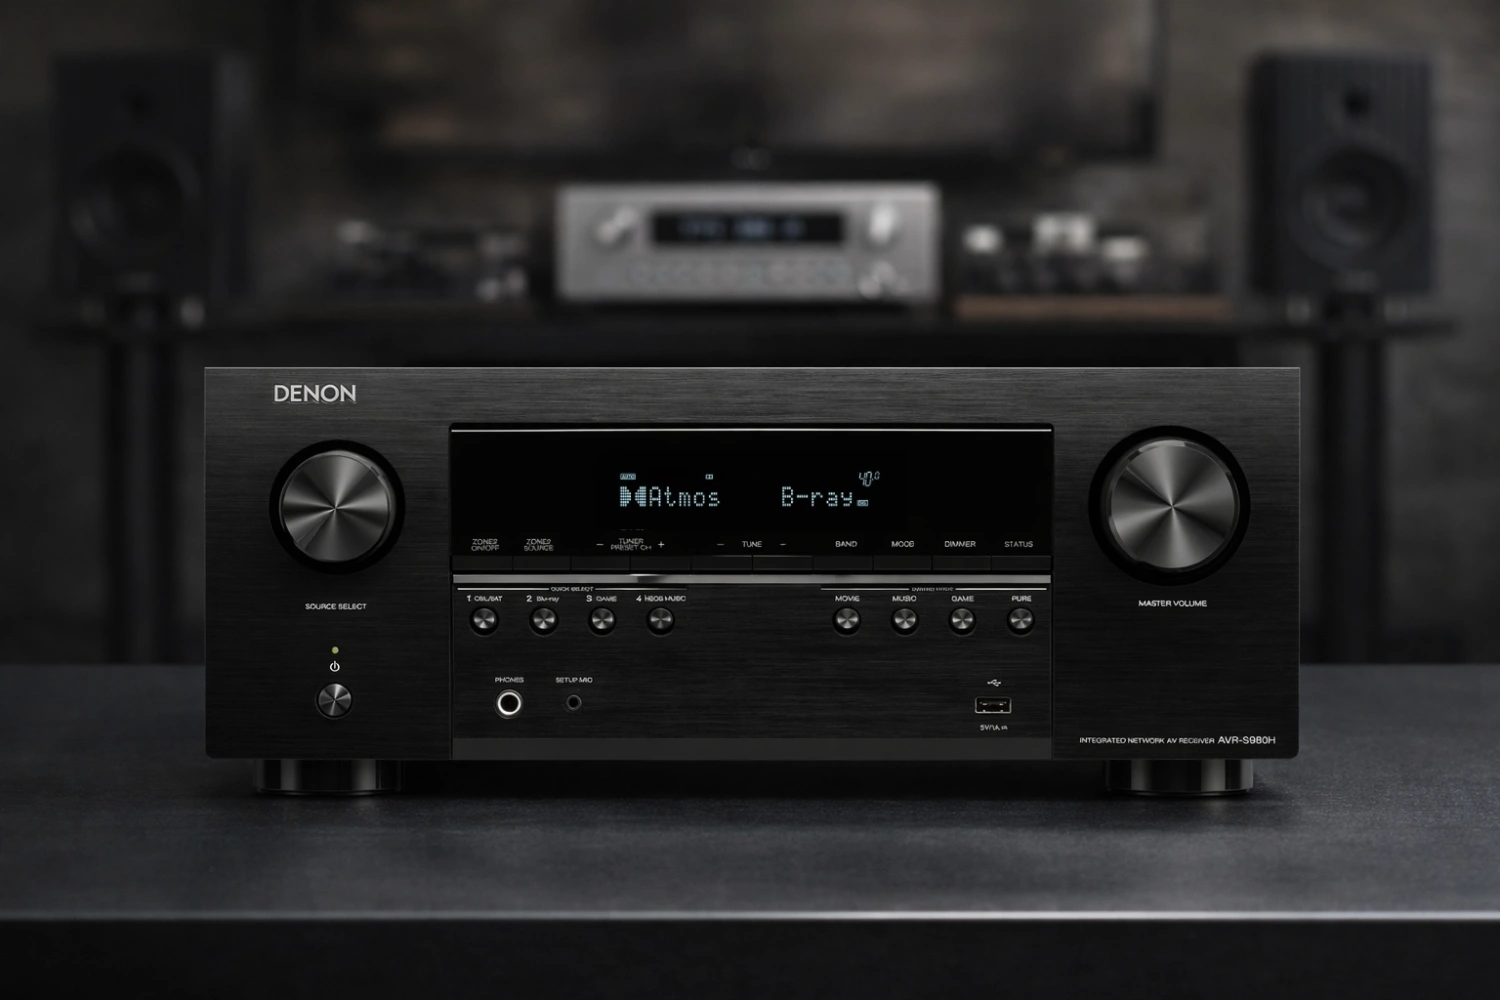
A Dolby Atmos home cinema system can be simple or ambitious, but the setup logic is always the same: choose a speaker layout your AV receiver can actually drive, connect every source and speaker correctly, tell the receiver what is installed, then run room calibration and verify the results.
This guide explains the practical process for setting up an Atmos system around an AV receiver, with clear steps for wiring, HDMI/eARC, speaker assignment, subwoofers, calibration, and troubleshooting.
Plan the Atmos layout before you buy or move anything
Dolby Atmos is an object-based surround format.
In practical home cinema terms, that means the soundtrack can place effects not only around you, but also above you when the system has height speakers or a virtual height mode.
The receiver then maps that soundtrack to the speakers you have installed.
Start by matching the speaker layout to the receiver’s amplifier channels and processing channels.
A 7-channel AV receiver that supports Dolby Atmos is commonly used for a 5.1.2 or 5.2.2 layout: five ear-level speakers, one or two subwoofers, and two height speakers.
A 9-channel receiver can support larger Atmos layouts such as 7.2.2 or 5.2.4, depending on its configuration options. Some receivers can process more channels than they amplify, allowing expansion with external power amplifiers through pre-outs.
The numbers in a layout are easy to decode.
In 5.1.2, the first number is the main speaker count at ear level, the second is the subwoofer count, and the third is the number of height channels.
A 5.1.2 system therefore has front left, center, front right, two surrounds, one subwoofer, and two height speakers. A 5.2.4 system adds a second subwoofer and four height channels.
If your room or budget does not allow height speakers, check whether the receiver includes Dolby Atmos Height Virtualization or a similar virtual mode.
This does not replace the precision of dedicated height speakers, but it can create a sense of overhead sound without installing ceiling speakers.
- Choose the maximum layout your receiver can support and amplify without overloading it.
- Decide whether the room suits a 5.1.2, 5.2.2, 7.1.2, 7.2.2, or 5.2.4 layout.
- Confirm whether any extra channels require an external power amplifier connected to pre-out sockets.
- Plan cable routes before drilling, mounting, or moving furniture.
- Leave space for ventilation around the AV receiver, especially in cabinets.

Match the AV receiver to your home cinema system
The AV receiver is the hub of a Dolby Atmos home cinema.
It receives HDMI sources, decodes Dolby Atmos and other surround formats, powers the speakers, manages bass, sends video to the TV or projector, and often runs automatic room calibration.
When comparing receiver capabilities, focus on the channel count, HDMI features, room correction system, subwoofer outputs, and whether it has pre-outs for future expansion.
For example, some 7.2-channel receivers support 5.1.2 Atmos layouts, while 9-channel models can support larger Atmos speaker arrays.
Higher-end processors and AV DSP units can provide many more channels, but they require external amplification or active speakers.
HDMI compatibility matters because modern home cinema systems often combine streaming boxes, Blu-ray players, game consoles, TVs, and projectors.
Look for the video formats you actually need: 4K or 8K passthrough, HDR10+, Dolby Vision, Dynamic HDR, HDCP support, and enough HDMI inputs for your sources.
If your TV apps are an important source, eARC is especially useful because it can send audio from an eARC-compatible TV back to the receiver, including immersive formats when the TV and app support them.
Also check speaker impedance compatibility and terminal type.
Some receivers specify support for 4-ohm to 16-ohm speakers, while others are designed around typical home cinema speaker loads.
If your speakers are low-impedance or difficult to drive, make sure the receiver is suitable before pushing volume levels.
- Count your source devices and make sure the receiver has enough HDMI inputs.
- Check that the receiver supports Dolby Atmos and the speaker layout you want.
- Confirm whether eARC is available if TV apps will be used for streaming movies and series.
- Check whether the receiver has one or two subwoofer outputs if you plan to use dual subwoofers.
- If expanding later, look for pre-outs or processor outputs that allow external amplifiers.
Place the speakers for a coherent surround bubble
Good Atmos setup starts with symmetrical, logical placement.
Automatic calibration can correct timing, level, and tonal balance to a degree, but it cannot fully fix a speaker that is in the wrong place or blocked by furniture.
Place the front left and right speakers on either side of the screen and aim them toward the main seating area if their design allows.
The center speaker should be as close to the screen as practical, because it carries most dialogue in films and series.
Keep it clear of cabinet doors and avoid pushing it deep into a shelf where the sound can become boxy.
Surround speakers should create side and rear ambience rather than act like extra front speakers.
In a 5-channel base layout, place the surrounds to the sides or slightly behind the main seats.
In a 7-channel base layout, side surrounds and rear surrounds work together to fill the space behind and around the listener.
Height speakers are the Atmos-specific part of the system.
Use the receiver’s speaker assignment menu to tell it whether you have two or four height channels.
If you install ceiling or high-mounted speakers, place them so they clearly serve the listening area rather than one side of the room. Keep left/right height placement balanced, and avoid placing one height speaker much closer to the seating position than the other unless unavoidable.
Subwoofer placement is more flexible because deep bass is less directional, but room boundaries strongly affect bass response.
A single subwoofer should be positioned where it integrates smoothly with the main speakers and does not boom excessively.
With two subwoofers, use the receiver’s subwoofer calibration tools if available; systems such as Audyssey Sub EQ HT, Dirac Bass Control, or other bass-management functions can help tune dual-subwoofer setups.
- Place the TV or projector screen first, then build the speaker layout around the main viewing seat.
- Keep the center speaker close to the picture and unobstructed.
- Make left/right speaker pairs as symmetrical as the room allows.
- Install height speakers so the overhead effect is balanced over the seating area.
- Place subwoofers before calibration, then fine-tune after listening and measurement.

Wire the system safely and cleanly
Before connecting anything, switch off the receiver and source components.
Speaker outputs carry amplified signals, and a stray wire strand touching another terminal can cause protection shutdown or damage.
Strip only enough speaker cable to fit the binding post or spring clip, twist the wire neatly, and confirm that positive and negative are consistent at both ends.
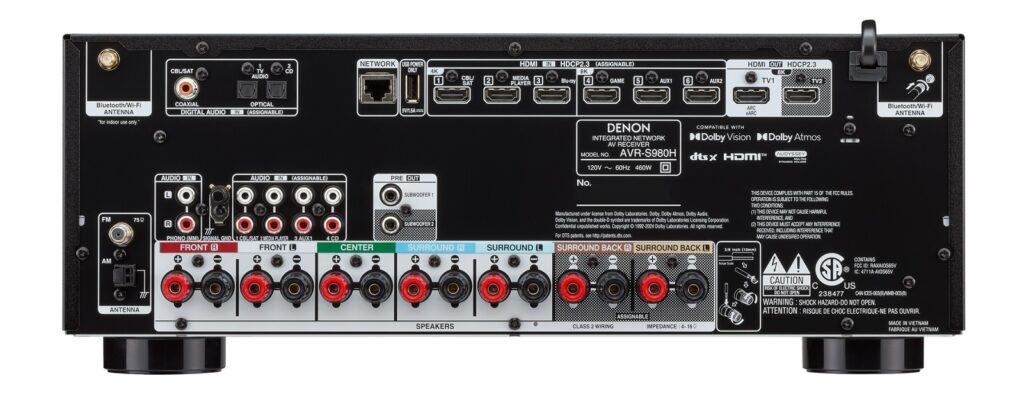
Most AV receivers use labeled terminals for front, center, surround, surround back, and height or assignable channels.
Read the labeling carefully because Atmos layouts often use assignable terminals.
For example, the same amplifier channels may be assigned as surround back speakers in a 7.1 layout or height speakers in a 5.1.2 layout.
Subwoofers are usually connected with line-level RCA cables from the receiver’s subwoofer output to the powered subwoofer input.
If your receiver has two subwoofer outputs, connect both subs directly where supported.
If it has only one, avoid improvising unless your subwoofer and setup method allow it.
Keep HDMI cables, speaker cables, and power cables organized.
Do not coil excess speaker cable tightly next to power adapters or power strips.
If long cable runs are unavoidable, balanced connections can reduce interference in processor-based systems that offer XLR outputs, but typical AV receivers usually use speaker cable directly from the amplifier channels.
- Turn off and unplug equipment before making speaker connections.
- Connect each speaker to the correct labeled terminal and preserve polarity.
- Check for loose wire strands at every speaker and receiver terminal.
- Connect powered subwoofers using the receiver’s subwoofer output or outputs.
- Label cables before pushing the receiver into a cabinet.

Connect HDMI sources, TV, and projector correctly
For most modern home cinemas, HDMI is the main connection because it carries video and audio together.
Connect source devices such as media players, disc players, and game consoles to the receiver’s HDMI inputs, then connect the receiver’s HDMI output to the TV or projector.
This lets the receiver decode Atmos and other surround formats directly.
If you use the TV’s built-in streaming apps, connect the TV’s eARC HDMI port to the receiver’s eARC-capable HDMI output. eARC is the enhanced audio return channel; it sends sound from the TV back to the receiver over HDMI.
This is useful when the TV is the source rather than an external player.
Make sure every link in the chain supports the formats you need.
A receiver may support 4K, 8K, Dolby Vision, HDR10+, or Dynamic HDR, but the source, cable, display, and selected HDMI input must also be compatible.
If the picture is unstable, missing HDR, or limited to a lower resolution, test with a shorter certified HDMI cable and check the receiver’s HDMI signal settings.
Gaming features can also depend on the receiver and display.
Some receivers support features such as high-refresh video, variable refresh technologies, or quick frame transport, but only on specific HDMI inputs or settings.
Use the receiver’s on-screen information display, if available, to confirm the current video mode.
- Connect external sources to HDMI inputs on the receiver whenever possible.
- Connect the receiver’s main HDMI output to the TV or projector.
- Use eARC if TV apps need to send immersive audio to the receiver.
- Enable enhanced HDMI modes in the TV and receiver menus if required for HDR or high-resolution video.
- If video fails, simplify the chain and test one source, one HDMI cable, and one display at a time.
Configure speaker assignment and bass management
Once the wiring is complete, use the receiver’s on-screen setup menu.
Many modern receivers provide guided setup, which is helpful for first-time Atmos users.
Do not skip this stage: the receiver must know the speaker layout before it can decode and route Atmos correctly.
Select the exact speaker configuration installed in the room.
If you wired a 5.1.2 system, choose that rather than a generic 7.1 layout.
If you have no height speakers, enable the appropriate virtual height mode only if you want a simulated overhead effect. If you have external amplifiers connected through pre-outs, assign those channels correctly in the amplifier assignment menu.
Bass management tells the receiver which low frequencies go to the subwoofer and which remain with the main speakers.
Most home cinema systems benefit from using the subwoofer for the deepest bass, but the best crossover setting depends on the speakers and room.
Some receivers allow independent crossover settings for each channel group. After auto-calibration, review the detected speaker sizes and crossover values; if the result obviously does not match your actual speakers, adjust it carefully in the manual setup menu.
Also set the number of subwoofers correctly.
Receivers with dual-subwoofer processing may calibrate each subwoofer separately before blending them.
If the receiver only treats both outputs as the same signal, placement and level matching become more important.
- Open the receiver’s speaker setup or guided setup menu.
- Select the correct Atmos layout and height speaker type.
- Assign any unused amplifier channels correctly.
- Set the subwoofer count to match your system.
- Review speaker size, distance, level, and crossover settings after calibration.
Run automatic room calibration properly
Room calibration measures how sound arrives at the listening area and adjusts levels, delays, equalization, and sometimes bass behavior.
Common systems include Audyssey MultEQ XT32, Pioneer MCACC, and Dirac Live.
More advanced processors may include Dirac Bass Control or Active Room Treatment. The goal is not to make the system artificially processed; it is to align all speakers so movie soundtracks image correctly in your room.
Use the supplied calibration microphone and connect it to the receiver’s mic input.
Place it at the main listening position at ear height, not on the sofa cushion or in your hand.
Keep the room quiet: no talking, footsteps, HVAC noise, or clattering dishes during the measurement tones. If the system asks for multiple positions, use seats around the main listening area rather than random spots around the room.
After calibration, inspect the results.
Check that every speaker was detected, that no speaker is shown with reversed polarity unless you intentionally wired it that way, and that the distances and levels look plausible.
Automatic systems can be very useful, but they still depend on correct wiring and sensible microphone placement.
If your receiver offers Dynamic EQ, Dynamic Volume, LFC, or similar features, understand what they do before enabling them.
Dynamic EQ can help preserve tonal balance at lower listening levels.
Dynamic Volume can reduce big jumps between quiet and loud passages. LFC-type processing can reduce low-frequency leakage into nearby rooms. These can be useful in apartments or late-night viewing, but for the most transparent movie playback you may prefer fewer processing modes.
- Connect the calibration microphone and place it at ear height in the main seat.
- Run the full measurement sequence in a quiet room.
- Move the microphone only when the receiver instructs you to do so.
- Save the calibration and review speaker detection, levels, distances, and crossovers.
- Listen to familiar film scenes and adjust only if a clear problem remains.
Verify Atmos playback and listening modes
After setup, confirm that the receiver is actually receiving a Dolby Atmos signal.
The front-panel or on-screen display should show the incoming audio format or active sound mode.
If it only shows stereo or basic surround, the source device or TV may be outputting a downmixed signal.
In streaming apps and disc players, audio output settings often determine whether the receiver receives bitstream audio.
Use bitstream, passthrough, or auto output modes when available, rather than forcing PCM stereo.
If using eARC from a TV, check that the TV’s audio output is set to eARC or passthrough and that any internal audio processing that limits output is disabled.
Do not confuse upmixing with native Atmos.
Modes such as Dolby Surround, DTS Neural:X, DTS Virtual:X, and Atmos Height Virtualization can be useful for non-Atmos content, but they are not the same as a native Atmos soundtrack.
Use them deliberately: upmixing can make older 5.1 soundtracks more enveloping, while Direct or Pure Direct modes may be preferable for checking the unprocessed source signal.
If the soundstage seems flat, revisit speaker assignment and height-channel settings first.
An Atmos receiver cannot create discrete overhead effects from physical height speakers unless those speakers are assigned, connected, and detected correctly.
- Play confirmed Atmos content from a capable source or app.
- Check the receiver display for the incoming format.
- Set source devices to bitstream, passthrough, or auto audio output where appropriate.
- Check TV eARC and passthrough settings if using TV apps.
- Compare native Atmos playback with virtual or upmixed modes so you know what each mode is doing.
Maintain and optimize the system over time
A home cinema system changes over time.
Furniture moves, rugs are added, speakers are replaced, and firmware updates can add or improve features.
Re-run calibration whenever you change speaker placement, add a subwoofer, replace speakers, or significantly alter the room.
Keep the receiver firmware up to date, especially if it supports network features, eARC, streaming platforms, wireless surrounds, or app control.
Some features on modern receivers are added after launch through firmware updates, so update checks are part of good maintenance.
Dust and heat are long-term enemies of AV receivers.
Keep vents clear, avoid stacking hot devices directly on top, and do not trap the receiver in a sealed cabinet.
If the receiver shuts down during loud scenes, check ventilation, speaker wiring, and speaker impedance before assuming the unit is faulty.
Finally, keep a record of your settings.
Photograph speaker assignment screens, crossover settings, calibration results, and HDMI assignments.
If you ever reset the receiver or troubleshoot a problem, these records save time.
- Re-run calibration after moving speakers, seating, or subwoofers.
- Check for firmware updates periodically.
- Keep receiver vents open and free from dust.
- Inspect speaker terminals occasionally for loose wires.
- Save or photograph key setup menus after successful calibration.
Concise Dolby Atmos AV Receiver Setup Checklist
- Choose a speaker layout the receiver can amplify and process, such as 5.1.2, 5.2.2, 7.2.2, or 5.2.4 where supported.
- Place front, center, surround, height, and subwoofer speakers before running any calibration.
- Connect speakers with correct polarity and no loose wire strands.
- Connect HDMI sources to the receiver and connect the receiver to the TV or projector.
- Use eARC when TV apps need to send audio back to the receiver.
- Select the exact speaker layout in the receiver’s setup menu.
- Set the correct number of subwoofers and review bass-management settings.
- Run the receiver’s room correction system with the microphone at ear height in a quiet room.
- Verify that Atmos content is displayed as Atmos or the correct immersive format on the receiver.
- Save settings and re-run calibration after major room or equipment changes.
Common Dolby Atmos Setup Mistakes and How to Avoid Them
Choosing a speaker layout the receiver cannot power.
Check both amplification channels and processing channels.
A receiver may decode more channels than it can amplify, so some layouts require external power amplifiers.
Wiring height speakers but assigning them as surround back speakers.
Use the speaker assignment menu and select the actual Atmos layout, such as 5.1.2 or 5.1.4 where supported.
Relying on eARC without enabling the correct TV audio settings.
Enable eARC and passthrough or auto audio output in the TV menu, and use the TV’s eARC HDMI port connected to the receiver’s eARC-capable HDMI output.
Running calibration with the microphone in the wrong place.
Place the calibration microphone at ear height in the listening area, keep the room quiet, and follow the receiver’s measurement sequence.
Ignoring the calibration results.
After calibration, check that all speakers were detected correctly and review levels, distances, polarity warnings, and crossover settings.
Using virtual height modes when physical height speakers are installed.
Virtual modes are useful when you lack height speakers.
If you installed real height speakers, configure and use them as discrete Atmos channels.
Hiding the center speaker inside a cabinet.
Keep the center speaker close to the screen and unobstructed so dialogue remains clear and anchored to the picture.
Forgetting ventilation.
Leave space around the AV receiver, keep vents clear, and investigate overheating or protection shutdowns immediately.
Frequently asked questions
Do I need ceiling speakers for Dolby Atmos?
Dedicated height or ceiling speakers provide the most direct overhead effect, but some AV receivers include Dolby Atmos Height Virtualization for rooms without height speakers.
Virtualization can be useful, but it is not the same as discrete height channels.
Is a 7-channel AV receiver enough for Atmos?
Yes, if it supports Dolby Atmos and the layout you want.
A 7-channel Atmos receiver can typically be used for a 5.1.2 or 5.2.2-style system, depending on the model’s configuration options.
Why does my receiver not show Dolby Atmos?
The source may be outputting stereo or standard surround, the app or disc may not be playing an Atmos track, the TV may not be passing the format through eARC, or the source audio output may be set incorrectly.
Check the receiver display, source audio menu, and TV eARC settings.
Should I use Audyssey, MCACC, Dirac Live, or manual setup?
Use the room correction system built into your receiver or processor as the starting point.
Audyssey MultEQ XT32, MCACC, and Dirac Live are designed to align speakers to the room.
After calibration, review the results and make sensible manual corrections if something is clearly wrong.
Can I add more Atmos speakers later?
Often yes, but only within the receiver’s channel limits.
Some receivers let you start with stereo or 5.1 and expand to Atmos later.
Larger layouts may require a receiver with more amplifier channels, more processing channels, or pre-outs for external amplification.
Do two subwoofers make setup harder?
Two subwoofers add setup steps, but receivers with dual-subwoofer tools can help.
Systems with features such as Sub EQ HT or advanced bass-management options can measure and tune dual subs more effectively than treating them as a single speaker.
Conclusion: Build the system around the room, then let calibration refine it
A successful Dolby Atmos home cinema is not created by turning on an Atmos mode alone.
Start with a receiver that supports the layout, HDMI features, eARC needs, and subwoofer configuration you require.
Place the speakers logically, wire them safely, assign the correct layout in the setup menu, and run room calibration carefully with the microphone in the listening area. Afterward, verify that Atmos content is actually reaching the receiver and review the calibration results rather than assuming everything is correct. The best approach is practical and methodical: plan the layout, connect cleanly, configure accurately, calibrate in a quiet room, then troubleshoot one link at a time if something does not behave as expected.


Join the discussion
Share your thoughts, listening impressions or product experience.