


A network music streamer turns online services, internet radio, local files, NAS libraries, USB drives, and sometimes Bluetooth or AirPlay into a source your hi-fi system can play.
Set up well, it can behave like a dedicated digital transport, a full DAC-equipped source, or even a compact digital hub for headphones and speakers.
Set up poorly, it can suffer from dropouts, wrong output levels, format limitations, app confusion, or unnecessary conversion. This guide explains the practical steps: choosing the right connection path, getting the streamer onto your network, matching it with your amplifier or DAC, configuring apps and services, and solving common streaming problems without turning the process into guesswork.
Understand what role your streamer will play
Before connecting cables, decide whether your network streamer will act as a complete source with its own digital-to-analog converter, or as a digital transport feeding an external DAC.
This matters because it determines which outputs you should use and which device controls final sound conversion.
A DAC, or digital-to-analog converter, turns digital music data into the analog signal required by an amplifier.
Many streamers include a DAC and provide analog RCA outputs, balanced XLR outputs, or a headphone output.
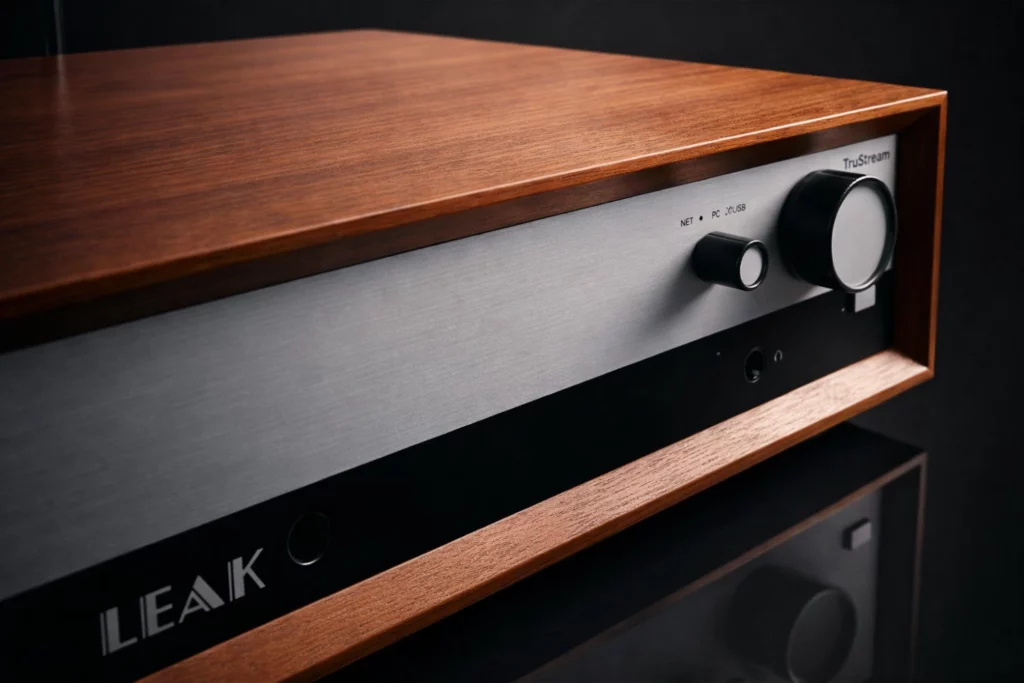
Examples include models with built-in conversion and analog outputs such as the Leak TruStream, Shanling SM1.3, FiiO S15, Aune N5 EVO, Denon DNP-800NE, and Atoll MS120. Some streamers are designed specifically without a DAC, such as the Kalista DreamPlay S, and are intended to feed an external converter through digital outputs.
If your amplifier has only analog inputs, use the streamer’s analog output.
If you already own a DAC you prefer, or your integrated amplifier includes a high-quality digital input section, use the streamer’s optical, coaxial, USB, AES/EBU, or I2S output where available.
Treat the streamer as you would a CD transport: the digital output carries data, while the DAC handles conversion.
- Check whether your streamer has analog outputs, digital outputs, or both.
- Check what inputs are available on your amplifier, preamplifier, DAC, headphone amplifier, or active speakers.
- Choose one main signal path before setup: streamer analog out to amplifier, or streamer digital out to external DAC.
- Avoid connecting multiple output paths at first; simplify the system until streaming is stable.

Choose Ethernet first when possible, Wi-Fi when necessary
A network streamer depends on stable data delivery.
For hi-fi playback, wired Ethernet is usually the simplest and most reliable option when your router, switch, or network point is nearby.
Many streamers include an Ethernet port alongside Wi-Fi, and some support faster wired networking. Ethernet avoids many household wireless issues such as weak signal, interference, congestion, and changing connection quality.
Wi-Fi is still a valid option, especially where running a cable is impractical.
Modern streamers may support dual-band Wi-Fi, meaning both 2.4 GHz and 5 GHz operation.
In plain terms, 2.4 GHz can travel farther but is often more crowded, while 5 GHz may offer higher throughput at shorter range. Some streamers also support features intended to simplify or stabilize wireless setup, such as WPS for fast secure pairing, Wi-Fi Sharing for Apple devices, or Wi-Fi Multimedia packet prioritization.
If your streamer supports Wi-Fi 6, dual-band Wi-Fi, or MIMO, those features can help, but they cannot compensate for a poor router location or a weak signal.
For high-resolution local files, large libraries, and multiroom playback, network stability matters more than theoretical format support.
- Use Ethernet for the initial setup if possible, even if you later switch to Wi-Fi.
- If using Wi-Fi, place the streamer where its antennas are not blocked by metal racks, large amplifiers, or thick walls.
- Try 5 GHz when the router is nearby and 2.4 GHz when distance or walls cause instability.
- Keep the streamer, NAS, and control phone/tablet on the same local network unless the manufacturer’s app specifies otherwise.
- If playback stutters on Wi-Fi, test Ethernet before blaming the streaming service or DAC.

Place and power the streamer correctly
A streamer is a digital device, but physical setup still matters.
Many modern streamers combine digital processing, analog output stages, power supplies, touchscreens, headphone amplifiers, and wireless modules inside one chassis.
Good placement helps ventilation, wireless performance, and cable reliability.
Put the streamer on a stable shelf with enough space for its cables and ventilation.
Avoid stacking it directly on top of hot amplifiers or receivers.
Some network players use metal enclosures, rigid chassis construction, anti-vibration feet, or separated internal sections to reduce interference, but these design choices do not eliminate the need for sensible installation.
Safety is simple: power down your amplifier before making analog connections, lower the volume before first playback, and do not force digital connectors into sockets.
If the streamer has a selectable voltage power supply or regional power requirement, verify it before connecting to mains power.
If the device includes a grounding terminal, use it only as the manufacturer directs.
- Place the streamer on a level, ventilated surface away from heat sources.
- Fit Wi-Fi antennas securely if the streamer uses external antennas.
- Connect power only after signal cables and network cables are seated properly.
- Before first playback, set the amplifier volume low and confirm the correct input is selected.
- Leave enough rear-panel clearance so Ethernet, USB, HDMI/I2S, RCA, XLR, coaxial, and optical cables are not bent sharply.
Connect analog outputs: RCA, XLR, and headphone use
If you use the streamer’s internal DAC, connect its analog output to your amplifier, preamplifier, active speakers, or headphone section.
RCA is the common unbalanced analog connection and works with nearly all integrated amplifiers.
XLR is a balanced analog connection found on some streamers and amplifiers; it can be useful in systems designed for balanced operation, especially with longer cable runs or fully balanced electronics.
Do not assume XLR is automatically better in every system.
Use XLR only if both the streamer and the receiving component support it properly.
If your amplifier has only RCA inputs, use RCA. Keep the layout simple and avoid feeding both RCA and XLR into the same amplifier unless the equipment manuals explicitly allow it and you know which input is active.
Some streamers include a headphone output with gain settings.
Gain controls how much amplification is applied before the headphones.
Low gain is generally the safer starting point for sensitive headphones; higher gain is for headphones that need more voltage or power. The Denon DNP-800NE, for example, includes selectable headphone amplifier stages, and the Shanling SM1.3 also provides multiple gain levels. Always start low to avoid sudden loud playback.
- Turn off or mute the amplifier before connecting RCA or XLR cables.
- Connect left and right channels correctly; red usually indicates right channel on RCA.
- Select the matching input on the amplifier or preamplifier.
- If using headphones, start with low gain and low volume, then increase gradually.
- If sound is distorted, check whether the streamer has a fixed/variable output setting and whether the receiving input is appropriate.
Connect digital outputs to an external DAC
Using a streamer as a digital transport can be ideal when your external DAC is the preferred conversion stage.
Common digital outputs include optical Toslink, coaxial S/PDIF, USB, AES/EBU, and I2S over HDMI-style connectors.
Not every streamer has every output, and not every output supports the same file resolutions.
Optical and coaxial connections are widely supported and often handle PCM up to 24-bit/192 kHz on many devices.
Some devices also support DSD over DoP through certain outputs.
DoP means DSD over PCM; it packages DSD data in a way that can travel over PCM-based digital links when both devices support it. USB and I2S may support higher PCM and DSD rates on some streamers, but compatibility is more device-specific.
I2S deserves special caution.
Even when it uses an HDMI-shaped connector, it is not the same as a normal home-theater HDMI audio connection.
Some streamers provide I2S digital output over HDMI-type ports, and compatibility can depend on pin configuration and DAC support. Use it only when your DAC and streamer are known to match. Similarly, HDMI ARC on a streamer is intended for audio return from a TV or AV system where supported, not as a universal replacement for I2S.
- Choose the digital output your DAC supports best: coaxial, optical, USB, AES/EBU, or I2S.
- Check both devices for supported PCM and DSD formats over that exact connection.
- Start with coaxial or optical for basic compatibility, then try USB or I2S only if you need supported higher-rate playback.
- Set the external DAC to the correct input.
- If there is no sound, test a standard PCM file first before troubleshooting high-resolution DSD or unusual formats.
Install the control app and update firmware
Most network streamers are controlled through a mobile app, touchscreen, remote control, desktop software, or a combination of these.
Examples include proprietary iOS and Android apps, the Eddict app for Shanling streamers, HEOS app control on Denon models, app control for Atoll players, Android-based interfaces on some universal media streamers, and ecosystem control through Roon, AirPlay, or Connect services.
Firmware updates matter because streaming services change, file-format support can evolve, and app compatibility may improve.
Some streamers support internet-based software updates, while others support local or over-the-air updates.
Do the update early in setup, before building playlists or diagnosing problems.
Use one control method at a time during initial setup.
A touchscreen, phone app, Roon, Spotify Connect, TIDAL Connect, Qobuz Connect, AirPlay 2, and UPnP controller may all be available on one device, but switching between them while troubleshooting can make it unclear which path is responsible for a problem.
- Install the manufacturer’s recommended app on your phone or tablet.
- Connect the streamer to the network and confirm the app can see it.
- Check for firmware updates and apply them before critical listening.
- Restart the streamer after major updates if the app or device requests it.
- Rename the streamer clearly, especially if you use multiroom audio or several network devices.
Set up streaming services and choose the right playback method
Modern streamers may support direct service integration, Connect-style playback, AirPlay 2, Roon Ready operation, internet radio, and UPnP/DLNA.
These are not all the same.
A Connect feature, such as Spotify Connect, TIDAL Connect, or Qobuz Connect, typically lets the service send playback directly to the streamer while your phone acts mainly as a controller. AirPlay 2 is convenient for Apple devices and multiroom playback, but it is an ecosystem route rather than the same as every native hi-res service path.
Roon Ready means the streamer can work as an endpoint in a Roon system.
Roon is software that manages music libraries, streaming services, metadata, and multiroom playback.
If you already use Roon, choose the streamer as an audio zone inside Roon and check that device settings match your DAC path.
UPnP and DLNA are local network playback protocols.
In simple terms, they let a control app find music stored on a server, NAS, computer, or compatible streamer/server and send it to a playback device.
Atoll, Denon, Leak, Kalista, and FiiO examples all show how common DLNA/UPnP remains in hi-fi streaming. Apps such as Mconnect or BubbleUPnP may be useful with compatible streamers and services.
Format support is important but should not be treated as a trophy list.
FLAC, WAV, AIFF, ALAC, AAC, MP3, and DSD are common file types across different streamers.
FLAC is especially practical because it is lossless, widely supported, and open. TIDAL has moved away from MQA toward FLAC for high-resolution audio, which makes FLAC support especially relevant for current streaming setups.
- Log in to only the services you actually use.
- For Spotify, TIDAL, or Qobuz, try the service’s Connect option if your streamer supports it.
- For Apple devices, use AirPlay 2 when convenience and multiroom control are priorities.
- For Roon systems, enable the streamer as a Roon Ready endpoint and configure output settings there.
- For local libraries, confirm your NAS or computer media server is visible through UPnP/DLNA.
Add local music from USB drives, SSDs, microSD, or NAS
Streaming does not have to mean online services only.
Many network streamers can play local files from USB storage, NAS servers, computers, microSD cards, or internal storage options.
Some models include USB-A ports for external drives; some support microSD; some provide an M.2 SSD slot; and some can create or participate in a DLNA-compatible music server environment.
For a local library, organize music folders clearly before connecting storage.
Use standard metadata where possible: artist, album, track number, and artwork.
The streamer’s display or app may show album art, file names, playback duration, and other information, but only if the library is indexed correctly and the files are tagged properly.
A NAS, or network-attached storage device, is often the most flexible option for large collections because it sits on the network and can serve files to multiple playback devices.
If you use USB storage directly attached to the streamer, make sure the drive is powered adequately and formatted in a file system the streamer supports according to its manual.
- Decide whether your library will live on NAS, computer, USB drive, microSD, or internal storage if supported.
- Use common lossless formats such as FLAC, WAV, AIFF, or ALAC when supported by your streamer.
- Keep folder structure simple: Music > Artist > Album > tracks.
- Allow the streamer or app time to scan large libraries before judging performance.
- Back up local music separately; a streamer should not be the only copy of your collection.
Configure output volume, sample rate, and sound processing
Many streamers offer settings that affect playback before the signal reaches your amplifier or DAC.
The most important is volume mode.
A fixed output sends a constant line-level signal and lets your amplifier control volume. A variable output lets the streamer act more like a preamplifier. Use fixed output when connecting to a normal integrated amplifier input unless you specifically need the streamer to control volume. Use variable output cautiously with power amplifiers or active speakers because unexpected high volume can damage speakers or hearing.
Sample rate describes how many times per second the audio waveform is digitally represented.
Bit depth describes the resolution of each sample.
PCM files may be described as 16-bit/44.1 kHz, 24-bit/192 kHz, or higher, depending on the source and device support. DSD is a different digital format and may require compatible DAC support. Do not force every track to the highest possible rate unless you understand the setting; native or automatic output is often the safest starting point.
Some streamers provide equalizers, display brightness controls, gain settings, or operating modes such as pure music mode, USB DAC mode, Bluetooth reception, HDMI ARC, or Roon Ready mode.
A parametric equalizer can shape tonal balance, but it is also easy to overdo.
Start with processing disabled or flat, confirm clean playback, then make careful adjustments if needed.
- Use fixed analog output into a standard integrated amplifier unless variable output is required.
- Set headphone gain low before changing to medium or high gain.
- Leave EQ flat during initial setup.
- Use automatic or native sample-rate output where available.
- If using an external DAC, confirm the streamer is not downsampling unexpectedly in app settings.
Maintain reliable hi-fi streaming over time
Once the streamer is working, maintenance is mainly about network stability, software updates, library hygiene, and cable checks.
Streaming platforms can change formats, apps, or service behavior.
Keeping firmware and control apps current reduces the chance of service login failures or missing playback options.
If you subscribe to a service that changes its catalog formats, refresh downloaded or offline content where relevant.
For example, TIDAL users affected by the move from MQA to FLAC needed updated apps and re-downloaded offline tracks in FLAC.
This kind of service change is not a hardware fault, but it can look like one if albums disappear, appear greyed out, or stop playing.
For local playback, rescan libraries after adding large numbers of files.
Keep NAS firmware and media-server software current, and avoid changing network names, router settings, or IP addressing repeatedly unless necessary.
- Update streamer firmware and control apps periodically.
- Restart router, NAS, and streamer after major network changes.
- Check that USB drives and NAS shares remain accessible after updates.
- Clean up duplicate libraries so apps do not show the same album multiple times.
- Keep a note of working settings before experimenting with advanced modes.
Concise network streamer setup checklist
- Decide whether the streamer will use its internal DAC or feed an external DAC.
- Use Ethernet for first setup if possible; choose stable dual-band Wi-Fi only when needed.
- Place the streamer on a ventilated shelf away from amplifier heat and wireless obstructions.
- Connect analog RCA/XLR to an amplifier, or digital optical/coaxial/USB/AES/I2S to a DAC as appropriate.
- Power on with amplifier volume low and select the correct input.
- Install the manufacturer’s app and update streamer firmware.
- Log in to streaming services and test Connect, AirPlay 2, Roon Ready, or UPnP/DLNA as needed.
- Add local storage or NAS libraries only after basic streaming works.
- Start with fixed output, flat EQ, and automatic/native sample-rate settings.
- Test with ordinary PCM music before troubleshooting DSD, hi-res files, or advanced digital outputs.
Common mistakes and how to avoid them
Using Wi-Fi in a weak-signal location and blaming the streamer for dropouts.
Test with Ethernet first.
If Ethernet fixes the issue, improve router placement, switch Wi-Fi band, reduce distance, or keep the streamer wired.
Connecting both analog and digital outputs without knowing which device is doing conversion.
Choose one signal path.
Use analog outputs when relying on the streamer’s DAC; use digital outputs when feeding an external DAC.
Assuming every digital output supports every hi-res format.
Check supported formats for the exact output.
Optical, coaxial, USB, AES/EBU, and I2S can have different PCM and DSD limits.
Treating I2S over an HDMI-style connector like normal HDMI.
Use I2S only when the streamer and DAC are explicitly compatible.
For TV audio, use HDMI ARC only if the streamer provides that function.
Starting headphone playback on high gain or high volume.
Begin with low gain and low volume, then increase gradually.
This protects hearing and avoids overdriving sensitive headphones.
Troubleshooting advanced formats before confirming basic playback.
First play a standard PCM stream or FLAC file.
Once that works, test DSD, high-rate PCM, local NAS playback, and special modes one at a time.
Frequently asked questions
Is Ethernet always better than Wi-Fi for a hi-fi streamer?
Ethernet is usually the most reliable choice because it avoids wireless interference and signal-strength problems.
Wi-Fi can work very well, especially with dual-band support and good router placement, but Ethernet is the best first test if you hear dropouts or buffering.
Should I use RCA, XLR, or a digital output from my streamer?
Use RCA or XLR if you want the streamer’s built-in DAC to create the analog signal.
Use a digital output such as optical, coaxial, USB, AES/EBU, or I2S if you want an external DAC to handle conversion.
XLR requires compatible balanced inputs on the receiving component.
What is UPnP/DLNA, and do I need it?
UPnP/DLNA lets devices on your home network find and play music from servers, NAS drives, computers, or compatible streamers.
You need it if you want local network playback without relying only on a streaming service app or Roon.
What does Roon Ready mean on a streamer?
Roon Ready means the streamer can act as an audio endpoint inside a Roon system.
Roon manages the library, metadata, streaming integration, and playback zones, while the streamer receives the audio stream over the network.
Is FLAC a good format for hi-fi streaming and local libraries?
Yes.
FLAC is a lossless, open, widely supported format.
It is practical for local libraries and increasingly important for services that use FLAC for high-resolution audio.
Why does my streamer show music but produce no sound?
Check the selected amplifier or DAC input, volume level, mute status, and whether you chose the correct output path in the streamer settings.
If using an external DAC, test a standard PCM file and confirm the DAC is set to the matching digital input.
Conclusion: build a stable signal path before chasing features
A network music streamer performs best when it is treated as a serious hi-fi source, not just another wireless gadget.
Start by defining its role: internal DAC to analog inputs, or digital transport to an external DAC.
Use Ethernet where possible, place the unit sensibly, install the correct control app, update firmware, and verify basic playback before adding NAS libraries, DSD files, EQ, Roon, AirPlay 2, or Connect services. Match outputs carefully, keep volume and gain conservative at first, and remember that format support depends on the exact connection being used. The most reliable setup is usually the simplest one: a stable network, one clean signal path, current software, correctly tagged music, and settings that preserve the original stream unless you have a clear reason to change them.

Join the discussion
Share your thoughts, listening impressions or product experience.