

Adding streaming to an existing hi-fi system is usually simpler than replacing it.
In most cases, you only need one new source component: a network streamer, streaming adapter, streaming transport, or streamer/DAC/preamp.
The correct choice depends on what your current amplifier, DAC, active speakers or receiver can accept. This guide explains how to choose the right streaming route, connect it safely, configure the network and apps, and troubleshoot the most common problems without turning your system into a complicated stack of boxes.
Match the streamer to the system you already own
Start by identifying the role your existing hi-fi system needs filled.
A streamer is the component that receives music over Wi-Fi, Ethernet, Bluetooth, AirPlay, Google Cast, Roon, DLNA/UPnP or service-specific “Connect” protocols, then sends audio onward to the rest of the system.
Some streamers include a digital-to-analog converter, often shortened to DAC. A DAC converts digital music data into the analog signal that a traditional amplifier can amplify. Other streamers are pure transports, meaning they output digital audio only and require a separate DAC.
If your integrated amplifier or receiver has only analog inputs, choose a streamer with analog outputs.
A compact adapter such as the Yamaha WXAD-10 is a useful example of this approach because it provides analog stereo RCA and 3.5 mm mini-jack outputs, while adding Wi-Fi, Ethernet, Bluetooth and AirPlay-style convenience to older systems.
If you already own a good external DAC, or your amplifier has digital inputs, consider a streaming transport.
A transport such as the iFi ZEN Stream 3 is designed to focus on network playback and feed an external DAC rather than duplicating conversion and amplification stages.
This keeps the upgrade flexible and preserves the character of the DAC you already use.
If you want fewer boxes, look for a streamer that also works as a DAC and preamplifier.
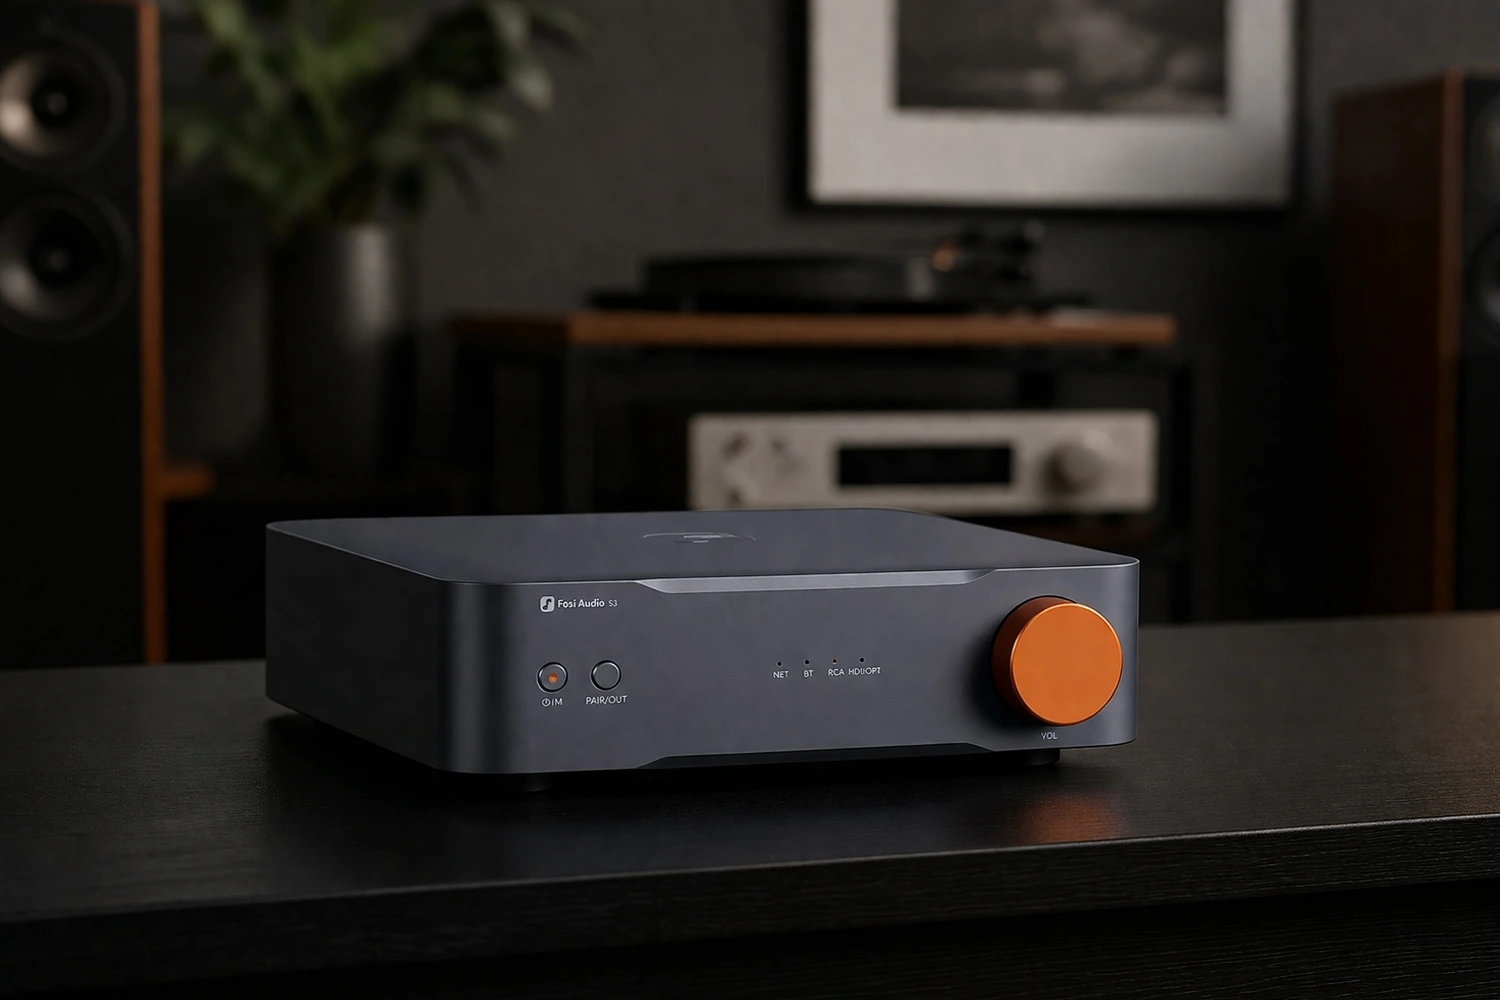
A unit such as the Fosi Audio S3 illustrates this category: it combines streamer, DAC and preamp functions, and can feed a power amplifier or active speakers.
Some all-in-one streaming hubs may also add features such as HDMI eARC for TV sound, balanced outputs, subwoofer output or trigger control.
- List the available inputs on your amplifier, receiver, DAC or active speakers: RCA analog, optical, coaxial, USB, XLR, HDMI eARC or another input.
- Decide whether you need analog output, digital output, or preamp volume control from the streamer.
- Check that your preferred streaming method is supported: Spotify Connect, TIDAL Connect, Qobuz Connect, AirPlay 2, Google Cast, Roon Ready, DLNA/UPnP, Bluetooth or a manufacturer app.
- Avoid buying features you cannot use. For example, a pure digital transport is not enough for an amplifier with only analog inputs unless you also have a DAC.

Choose the right connection: analog, digital, USB, HDMI eARC or Bluetooth
The connection between streamer and system matters because it determines which component performs conversion, volume control and input switching.
Analog RCA is the most universal route for older hi-fi amplifiers.
Connect the streamer’s left and right RCA outputs to any line-level input on the amplifier, such as AUX, CD, Tuner or Line. Do not connect a streamer to a phono input unless the device specifically outputs a phono-level signal, because phono inputs are designed for turntables and apply extra gain and equalization.
Digital connections are preferred when you want an external DAC or digital amplifier to handle conversion.
Optical and coaxial digital outputs carry digital audio to a DAC.
USB audio can also be used by some streamers to feed compatible DACs. The HiFi Rose RW800 Rose Air Lite, for example, is specified with USB audio support and can be used as a standalone network streamer feeding an amplifier, active speakers or external DAC, depending on the installation.
HDMI eARC is useful if you want a two-channel hi-fi system to handle TV sound as well as music streaming.
A streamer/DAC/preamp with HDMI eARC, such as the Fosi Audio S3, can receive PCM audio from a compatible TV and send it to a stereo amplifier or active speaker setup.
In this arrangement, check the TV audio menu and set the output format to PCM if required by the streamer.
Bluetooth is convenient for guests and quick playback, but it is not the same as full network streaming.
Network playback over Ethernet or Wi-Fi normally lets the streamer pull music directly from the service or local library, while Bluetooth sends audio from the phone or tablet to the streamer.
Use Bluetooth as a fallback, not as the main method if your goal is stable, high-quality streaming.
- For a traditional integrated amplifier, connect streamer analog RCA out to an AUX/CD/Line input.
- For an external DAC, connect streamer digital out to DAC digital in, then DAC analog out to the amplifier.
- For active speakers, confirm whether they need analog, digital or balanced input, and whether the streamer has volume control.
- For TV integration, connect the TV’s HDMI eARC port to a streamer or preamp that explicitly supports HDMI eARC, then select PCM audio output in the TV menu if needed.

Set up the network for reliable streaming
A music streamer depends on the home network.
Wi-Fi can work well, especially with modern dual-band streamers, but Ethernet is usually the simplest way to improve stability.
Several current streamers support both Wi-Fi and Ethernet, including compact adapters and more advanced streaming components. Ethernet is especially useful for high-resolution files, Roon systems, NAS libraries, and rooms where Wi-Fi signal is inconsistent.
If you use Wi-Fi, place the streamer where it receives a strong signal and avoid burying it behind metal racks, thick furniture or other electronics.
Dual-band Wi-Fi gives the option of 2.4 GHz or 5 GHz operation where supported.
In general, 2.4 GHz reaches farther, while 5 GHz can be cleaner and faster at shorter distances. The best choice depends on your room and router placement.
DLNA and UPnP allow compatible streamers to access music stored on computers or NAS drives over the network.
The Yamaha WXAD-10 supports DLNA, and streamers such as the iFi ZEN Stream 3 also support DLNA/UPnP-style streaming.
If your music library is on a NAS, make sure the NAS, streamer and control device are on the same network and that media sharing is enabled.
Some systems may benefit from network cleanup accessories, but they are optional.
The Matrix Audio SI-1, for example, is an optical network isolator designed to provide galvanic isolation between a home network and a streamer through RJ45 Ethernet connections.
Such devices are intended for systems where wired network noise or electrical interference is a concern, but they are not required for basic streaming setup.
- Use Ethernet if the streamer is near the router or a network switch.
- If using Wi-Fi, complete setup near the router first, then move the streamer to its final position and confirm stable playback.
- Keep the phone or tablet controller on the same home network as the streamer.
- For NAS playback, enable media sharing and verify that the streamer’s app can see the library.

Install apps and configure streaming services
Modern streaming can be controlled in two main ways: through the streamer manufacturer’s app or directly from a music service app.
Manufacturer apps are often needed for first-time setup, firmware updates, input selection and local library browsing.
For example, Yamaha’s MusicCast Controller is used to select albums and songs, create playlists, adjust volume and configure MusicCast-compatible devices. Aurender’s Conductor app is central to setup and operation on Aurender components, while some devices also support Roon Ready operation.
Service-specific Connect features let you start playback from the native app you already use.
Spotify Connect, TIDAL Connect and Qobuz Connect allow the service app to control the streamer directly where supported.
This is often more convenient than browsing inside a separate hi-fi app. AirPlay 2 is useful in Apple households, while Google Cast is useful in Android and mixed-platform homes. Roon Ready support is useful if you run a Roon server and want unified library, metadata and multiroom control.
Before serious listening, check volume behavior.
Some streamers can output fixed line level, variable preamp level, or both.
Fixed output is usually appropriate when feeding an integrated amplifier that has its own volume knob. Variable output is needed when the streamer is driving a power amplifier or active speakers directly. Make this setting deliberately; a streamer accidentally set to maximum variable output can play far louder than expected.
- Install the manufacturer app and complete first-time setup.
- Log in to your streaming services only through the official app or supported service login flow.
- Enable the streamer as a playback device in Spotify, TIDAL, Qobuz, AirPlay, Google Cast or Roon as applicable.
- Set output level mode: fixed for integrated amplifiers, variable for power amplifiers or active speakers.
- Start with the amplifier volume low, then raise gradually after confirming audio is playing correctly.

Place the streamer for quiet operation and easy use
Streamers are usually compact and can sit almost anywhere, but placement still matters.
Give the unit ventilation space, especially if it has internal power supplies, display electronics or preamp circuitry.
Avoid stacking it directly on hot amplifiers or receivers. Heat is not only a reliability concern; it can also make cables harder to manage and can shorten the life of nearby accessories.
Keep analog signal cables away from power adapters, routers and dense cable bundles when possible.
If the streamer uses Wi-Fi or Bluetooth, do not hide it in a fully enclosed metal cabinet.
If it uses Ethernet, make sure the cable is not under tension and does not pull the lightweight streamer out of place.
For living-room systems, think about daily control.
If you will use a phone app only, the streamer can be discreet.
If the unit has front-panel controls or a display, place it where you can read and reach it. Some more advanced streamers include displays, physical controls, input selection and menu access; others are designed to disappear into the system after setup.
- Place the streamer on a stable shelf with ventilation.
- Avoid placing it directly on top of hot amplification equipment.
- Route power, network and audio cables neatly, with no strain on small connectors.
- Keep Wi-Fi/Bluetooth streamers out of fully enclosed metal spaces.
Optimize sound without making the system unstable
Once the system works reliably, optimize one setting at a time.
If your streamer offers digital filters, EQ, exclusive playback modes or preamp activation, make changes slowly and keep notes.
Aurender’s A1000, for example, includes deeper settings such as DAC digital filters, display brightness options, native DSD behavior and preamplifier activation. Fosi’s app for the S3 includes playback management and a 5-band EQ. These features can be useful, but they should not become a substitute for correct speaker placement, proper gain structure and reliable network setup.
High-resolution support is useful only when the whole chain supports it.
A streamer may support PCM at high bit depth and sample rate, or DSD playback, but the DAC, connection type and app settings must also support the chosen format.
If you hear dropouts when playing very high-resolution files, test the same track over Ethernet, try a lower-resolution version, and confirm the DAC’s limits.
Disable processing you do not need if the device offers that option.
Some purist transports provide modes that reduce unnecessary background tasks during playback.
However, do not assume that every switch improves every system. The most important goals are stable playback, correct levels, clean connections and a control method everyone in the household can understand.
- Confirm reliable playback before changing sound settings.
- Use fixed output into an integrated amplifier unless you specifically need streamer volume control.
- Apply EQ sparingly and avoid large boosts that may cause distortion or overload downstream components.
- For high-resolution files, verify streamer, DAC and connection compatibility together.
Maintain the streaming setup over time
A streaming system is partly hi-fi hardware and partly networked software, so maintenance is different from a CD player or turntable.
Keep firmware updated, but do it when you have time to confirm the system still works afterward.
Do not interrupt power during firmware updates. If an update changes app behavior, check the output level and input settings before playing loudly.
Keep account logins, Wi-Fi credentials and app names documented for the household.
If you change routers, network names or passwords, the streamer may need to be set up again.
If you rely on NAS playback, make sure the NAS remains on the same network and that its sharing settings are not disabled by updates.
Clean the unit like other electronics: dry cloth, no liquid sprayed into vents or connectors, and power disconnected before moving cables.
If a streamer uses an external power supply, keep the cable strain-free and avoid bending the plug sharply at the device.
- Check firmware periodically through the official app.
- Restart the streamer, router and control device after major network changes.
- Back up NAS libraries separately from the streamer.
- Power down equipment before changing analog or digital audio connections.
Troubleshooting common streaming problems
If the app cannot find the streamer, first confirm that the phone and streamer are on the same network.
Guest Wi-Fi networks, mesh isolation settings or separate router bands can prevent discovery.
Rebooting the router, streamer and phone often resolves temporary discovery issues.
If music plays but there is no sound, check the whole signal path: streamer output, cable, amplifier input, volume level and mute settings.
On systems with both fixed and variable output, confirm the output mode.
On digital systems, confirm that the DAC is set to the correct input and supports the incoming format.
If playback drops out, try Ethernet before assuming the streamer is faulty.
If Ethernet is stable but Wi-Fi is not, improve router placement, reduce distance, or use a stronger network access point.
If only very high-resolution files fail, the bottleneck may be Wi-Fi stability, NAS speed, format compatibility or DAC support.
If TV sound via HDMI eARC does not work, verify that both the TV and streamer/preamp support eARC or ARC as required.
Use the TV audio menu to select external audio system and PCM output where appropriate.
Also confirm that the HDMI cable is connected to the TV port labeled ARC or eARC.
If Roon does not see the streamer, confirm that the unit is actually Roon Ready or otherwise supported, that Roon Core is running, and that both devices are on the same network.
Some control accessories, such as Roon-focused remotes, depend on the wider Roon system being configured correctly first.
- No device found: check same network, disable guest network isolation, reboot router and streamer.
- No sound: verify input selection, output mode, cable path, volume and mute.
- Dropouts: test Ethernet, then investigate Wi-Fi strength or file format demands.
- Distortion or excessive loudness: reduce streamer volume, check fixed/variable output and remove aggressive EQ boosts.
Concise streaming setup checklist
- Identify your amplifier or speaker inputs before buying a streamer.
- Choose analog output for older amplifiers without digital inputs.
- Choose a streaming transport if you already have a DAC you want to keep using.
- Use Ethernet where possible for the most stable network playback.
- Install the manufacturer app for setup, firmware and device settings.
- Enable your preferred control method: Connect, AirPlay, Google Cast, Roon, DLNA/UPnP or Bluetooth.
- Set fixed output into an integrated amplifier; use variable output only when driving active speakers or a power amplifier directly.
- Start with low volume after every wiring or output-setting change.
- Keep the streamer ventilated and avoid placing it on hot amplifiers.
- Document Wi-Fi, app and account details for future router or device changes.
Common mistakes and how to avoid them
Buying a digital-only streamer for an amplifier with only analog inputs.
Choose a streamer with a built-in DAC and analog outputs, or add an external DAC between the streamer and amplifier.
Connecting the streamer to a phono input.
Use AUX, CD, Tuner or Line inputs.
Phono inputs are for turntables and apply gain and equalization that are wrong for streamer output.
Leaving variable output at a high level when feeding a power amplifier or active speakers.
Begin with volume low, confirm whether the streamer is in fixed or variable mode, and raise level gradually.
Relying on weak Wi-Fi for high-resolution or whole-house streaming.
Use Ethernet where practical, or improve Wi-Fi coverage before troubleshooting the streamer itself.
Assuming every streaming protocol is the same.
Check support for the method you actually use: Spotify Connect, TIDAL Connect, Qobuz Connect, AirPlay 2, Google Cast, Roon Ready, DLNA/UPnP or Bluetooth.
Changing several sound settings at once.
Adjust one setting at a time, such as EQ, filter mode or exclusive mode, and confirm that playback remains stable.
Frequently asked questions
Do I need to replace my amplifier to add music streaming?
Usually no.
If your amplifier has a spare line-level input such as AUX, CD, Tuner or Line, you can add a streamer with analog outputs.
If the amplifier has digital inputs, you can also use a streaming transport or digital streamer and let the amplifier or DAC handle conversion.
Is Ethernet better than Wi-Fi for a music streamer?
Ethernet is generally the most stable option, especially for high-resolution files, NAS playback and Roon systems.
Wi-Fi can work well when signal strength is good, but dropouts are easier to diagnose if you can test the streamer with a wired connection.
What is the difference between AirPlay, Google Cast, Connect and Bluetooth?
AirPlay and Google Cast are platform-based streaming methods used from Apple, Android and compatible apps.
Spotify Connect, TIDAL Connect and Qobuz Connect let the native service app control playback on a supported streamer.
Bluetooth sends audio directly from the phone or tablet and is useful for convenience, but it is usually not the main choice for a permanent hi-fi streaming setup.
Should I use fixed or variable output from the streamer?
Use fixed output when connecting to an integrated amplifier or receiver that has its own volume control.
Use variable output when the streamer is acting as a preamplifier into a power amplifier or active speakers.
Always start with low volume after changing this setting.
Can I stream music from a NAS drive?
Yes, if your streamer supports local network playback such as DLNA/UPnP or has its own library features.
Keep the NAS and streamer on the same network, enable media sharing, and use the streamer’s control app to browse the library.
Why does my streamer appear in one app but not another?
Different apps use different discovery and playback systems.
A streamer may support AirPlay but not Google Cast, or Spotify Connect but not Qobuz Connect.
Confirm that the exact protocol is supported and that the phone, streamer and any server software are on the same network.
Conclusion: add streaming by preserving what already works
The best way to add music streaming to an existing hi-fi system is to treat the streamer as a source component and match it carefully to the equipment you already own.
Use analog outputs for traditional amplifiers, digital outputs for external DACs, and streamer/DAC/preamp designs when you want a compact hub for active speakers or a power amplifier.
Prioritize stable networking, correct output level, supported streaming services and safe wiring before chasing advanced settings. Once the system is reliable, refine app control, NAS access, EQ or filter options one step at a time. Done properly, streaming gives a classic hi-fi system modern access to services, local libraries and app control without discarding the amplifier and speakers that made the system worth keeping.

Join the discussion
Share your thoughts, listening impressions or product experience.